This article will discuss the dropdown box located in the Case screens.
Note: The Case manager will need to be enabled to create, view, and manage Cases. There is no additional cost for the Case Manager. If you do not see any of the Case options, please check with an Administrator on your account to see if the Case Manager can be enabled for your agency.
Case Screen
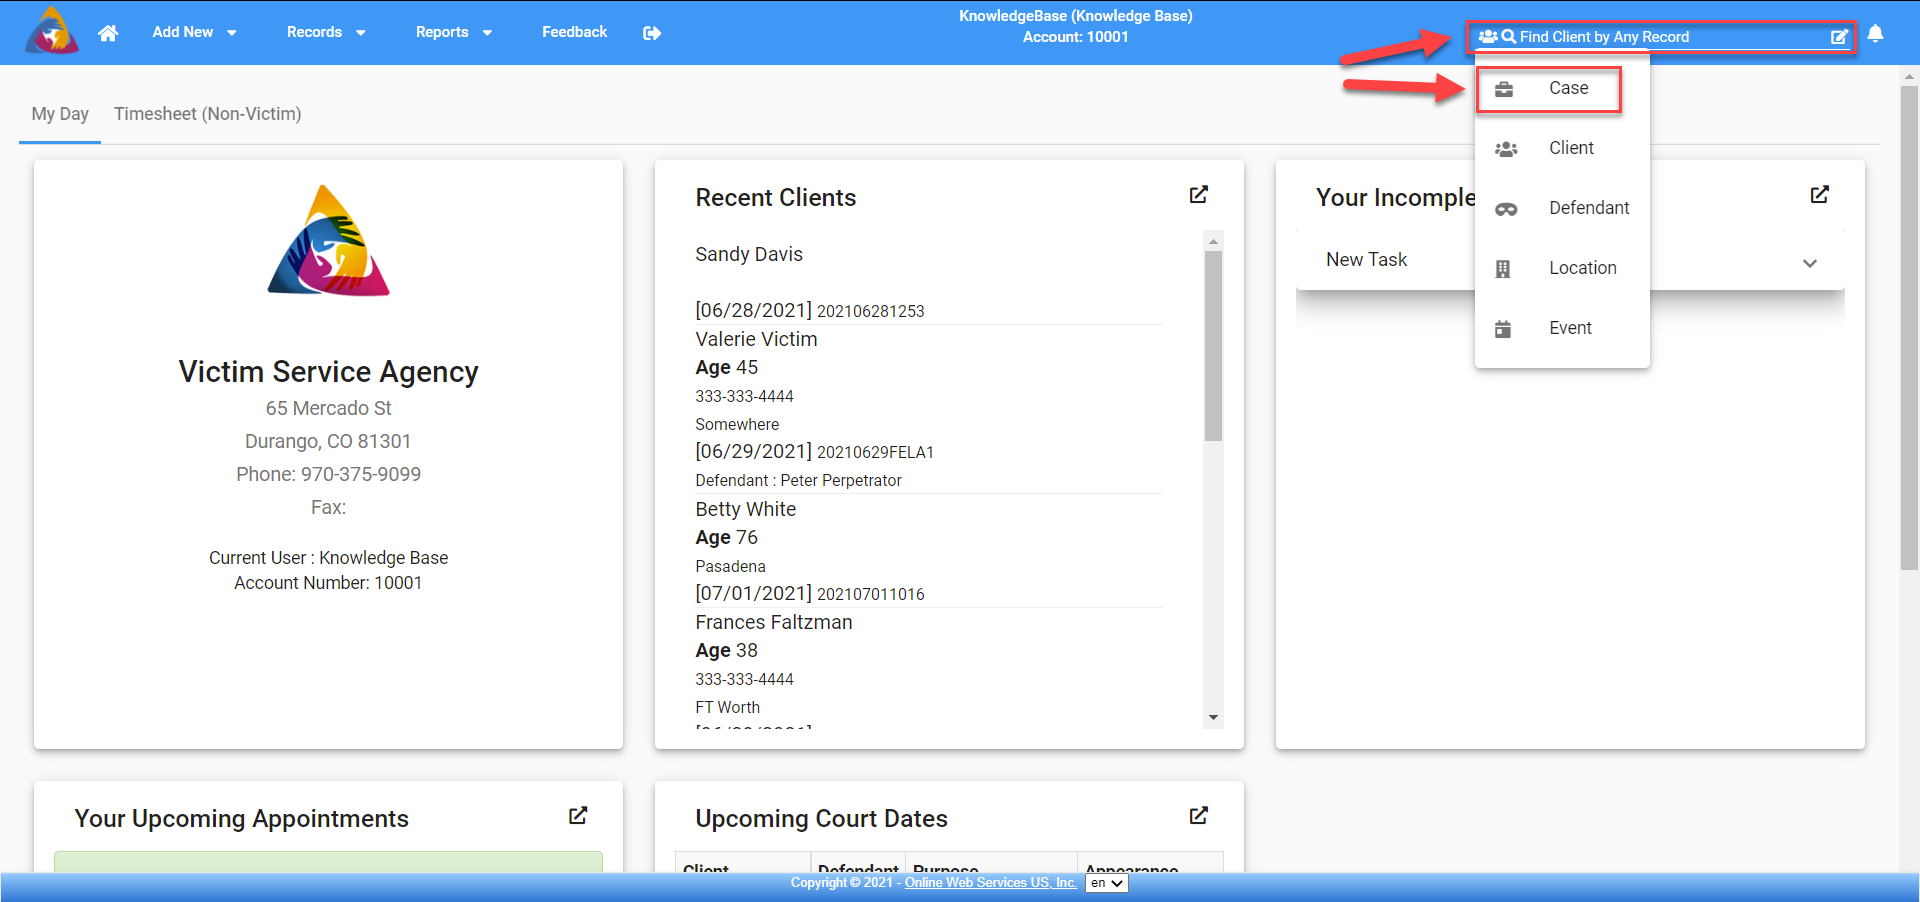
There are a couple of different ways to find the case screens. You can use the quick search tool in the top blue bar to search for the specific Case record you are wanting to view, for more information about that search tool see the video labeled Home Screen Quick Search. (see below - Figure 1)
Figure 1
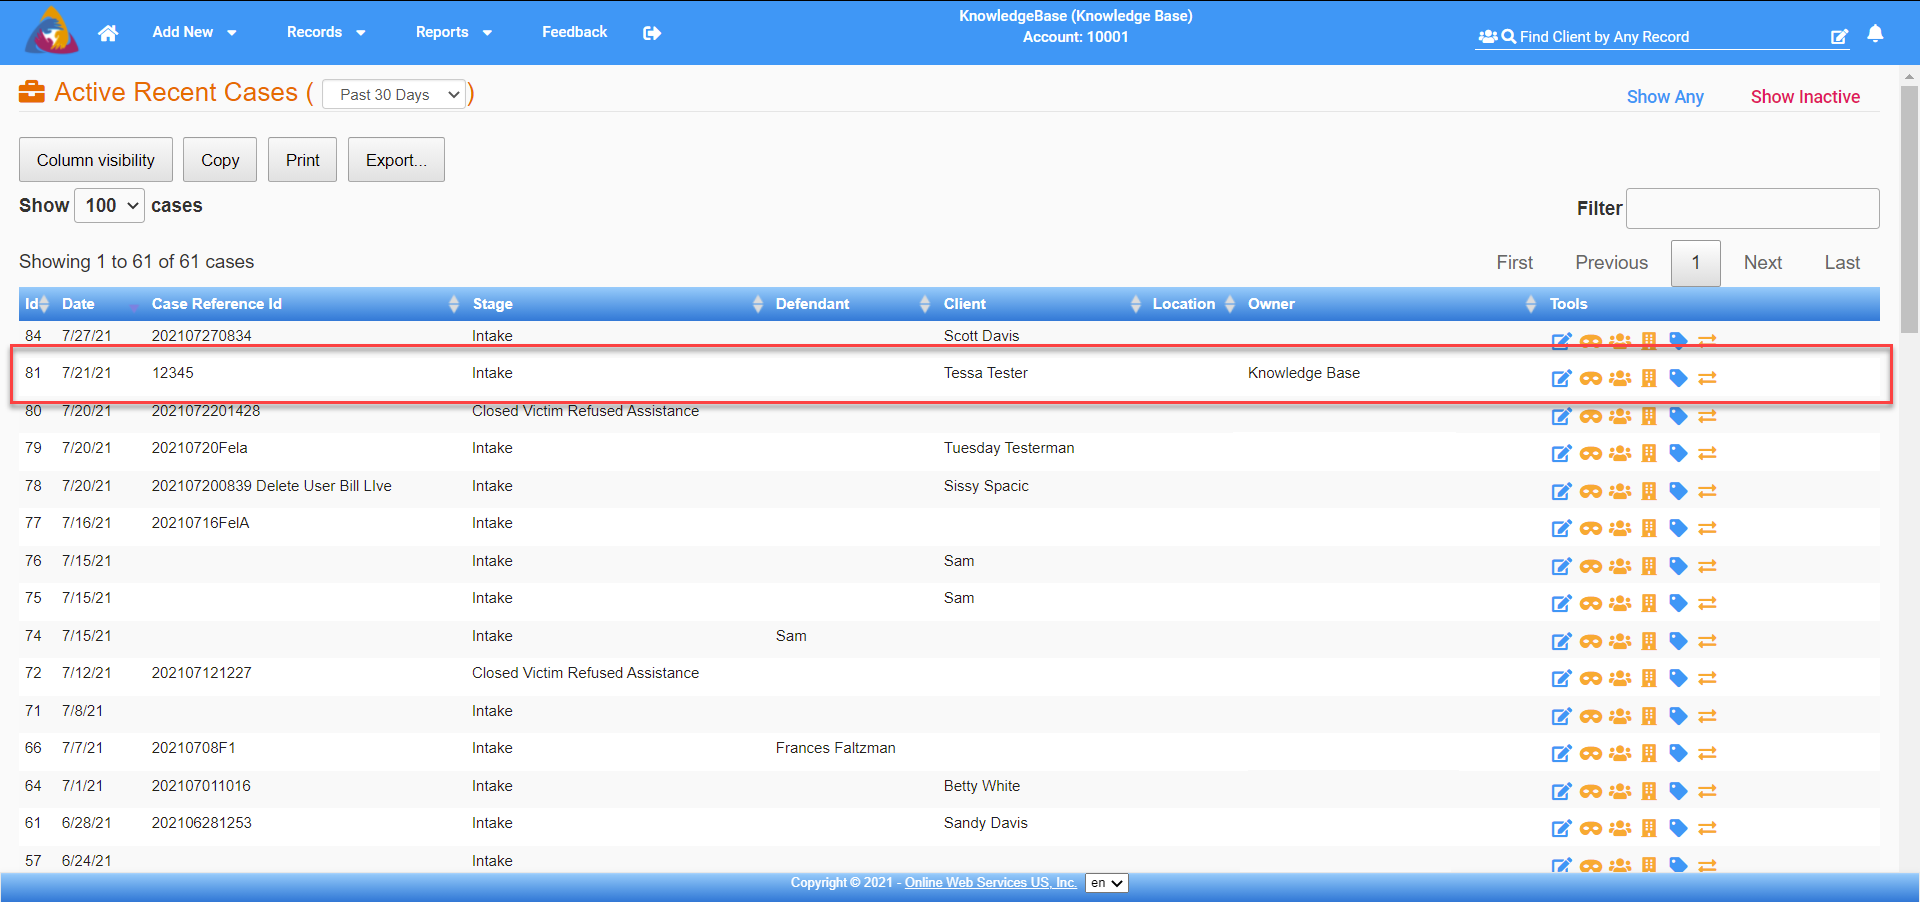
You can also click on Records and click on Cases (see below - Figure 2) to view a list of cases entered into the database and select the case you want to view from that screen. (see below - Figure 3)
Figure 2
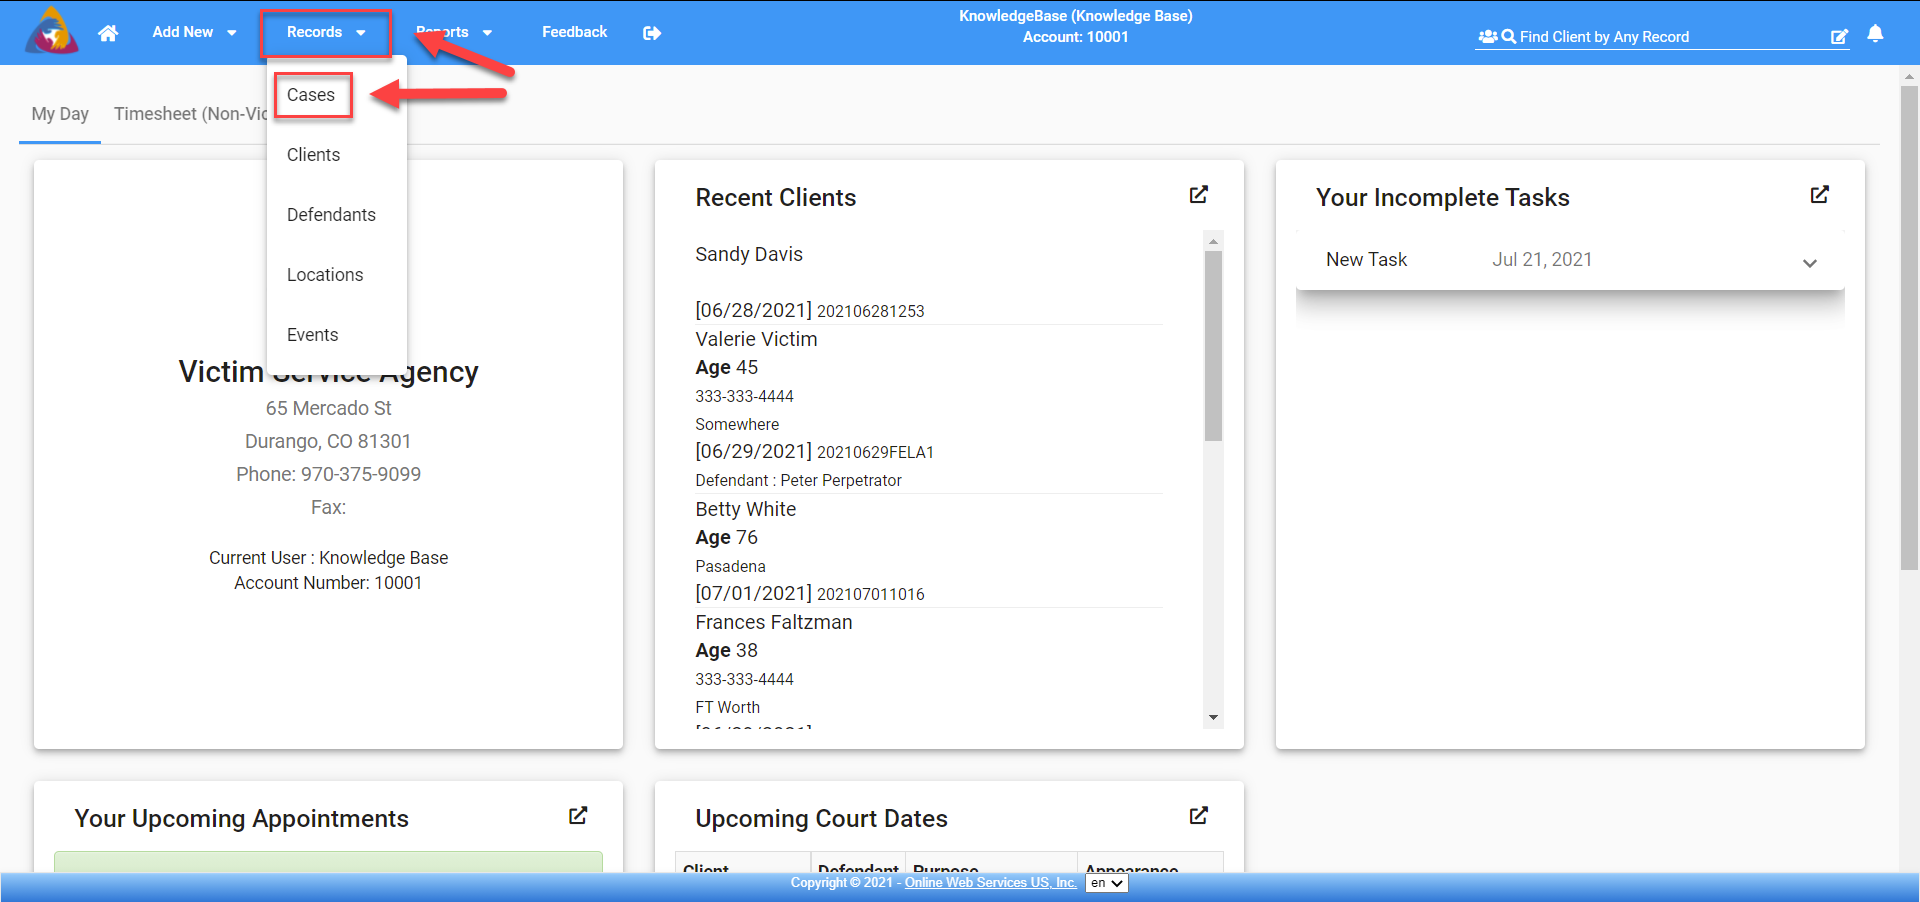
Figure 3
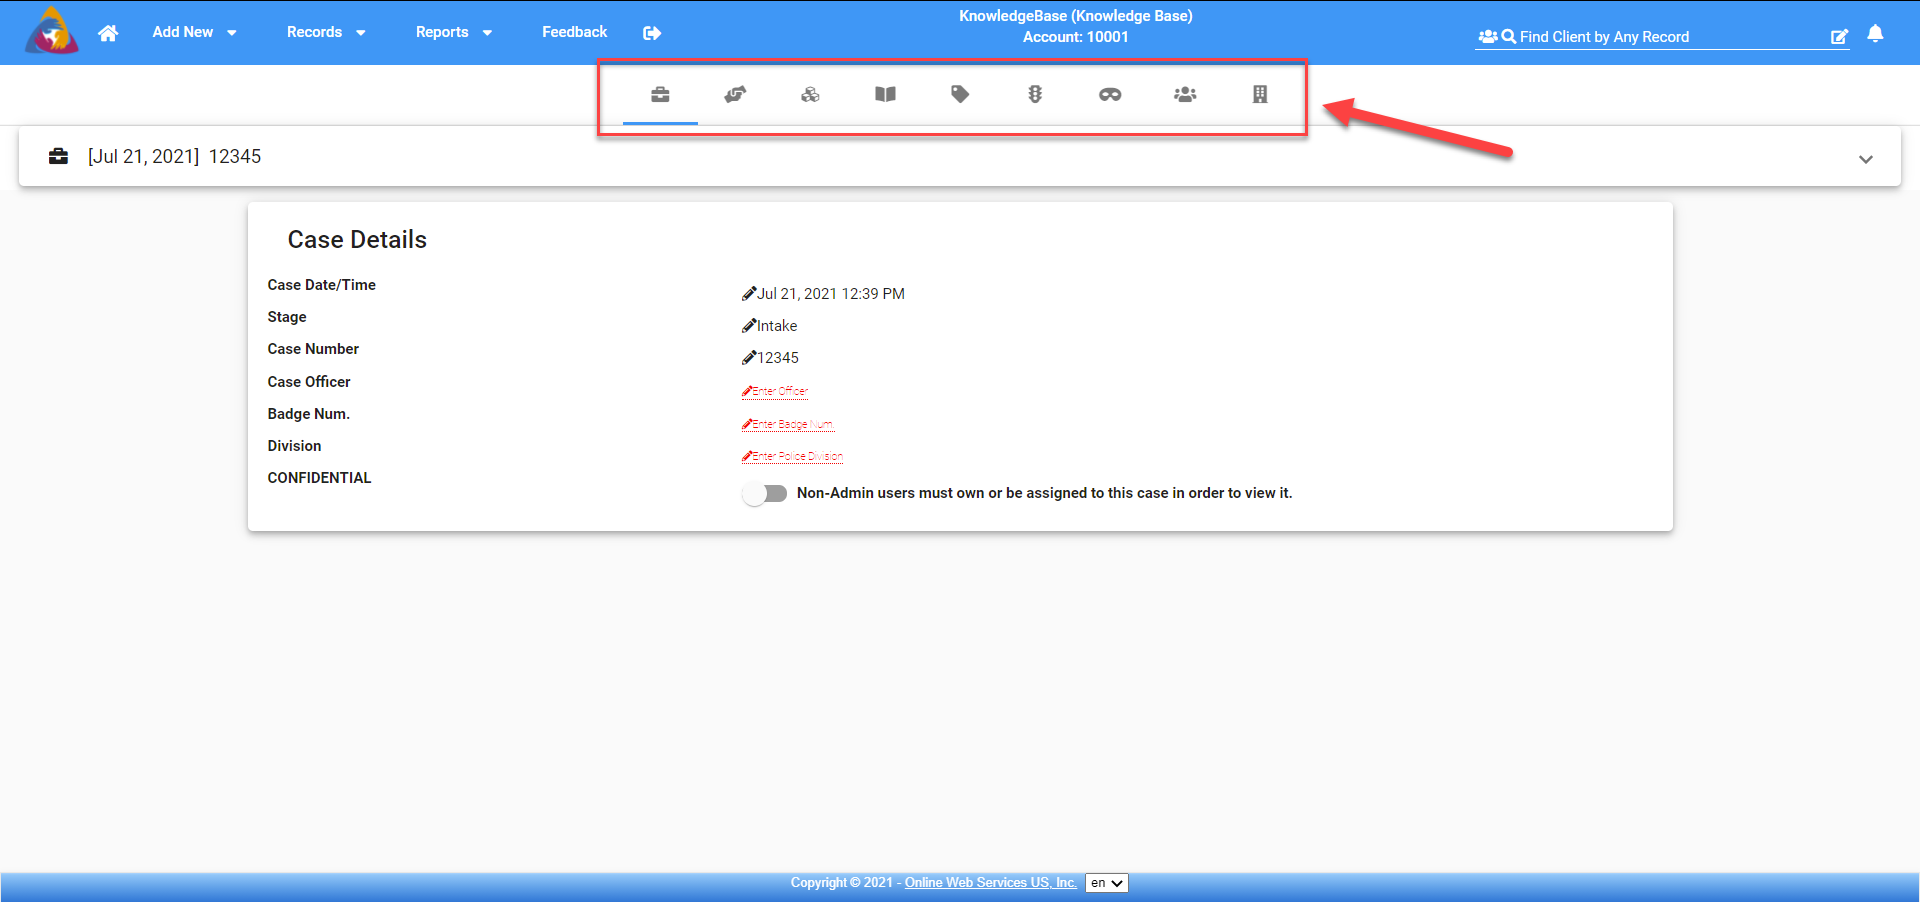
Once in the Case screen, you will see the tabs or tools across the top just below the blue bar (see below - Figure 4). For more information about each of those tools or tabs see the article How do I view Case Records.
Figure 4
Case Dropdown
Below the tools or tabs, you will see the dropdown box (see below - Figure 5). Click on the box to view the details.
Figure 5

Within that dropdown box you will see 4 boxes (depending on the components enabled). (see below - Figures 6-7)
Figure 6

Figure 7

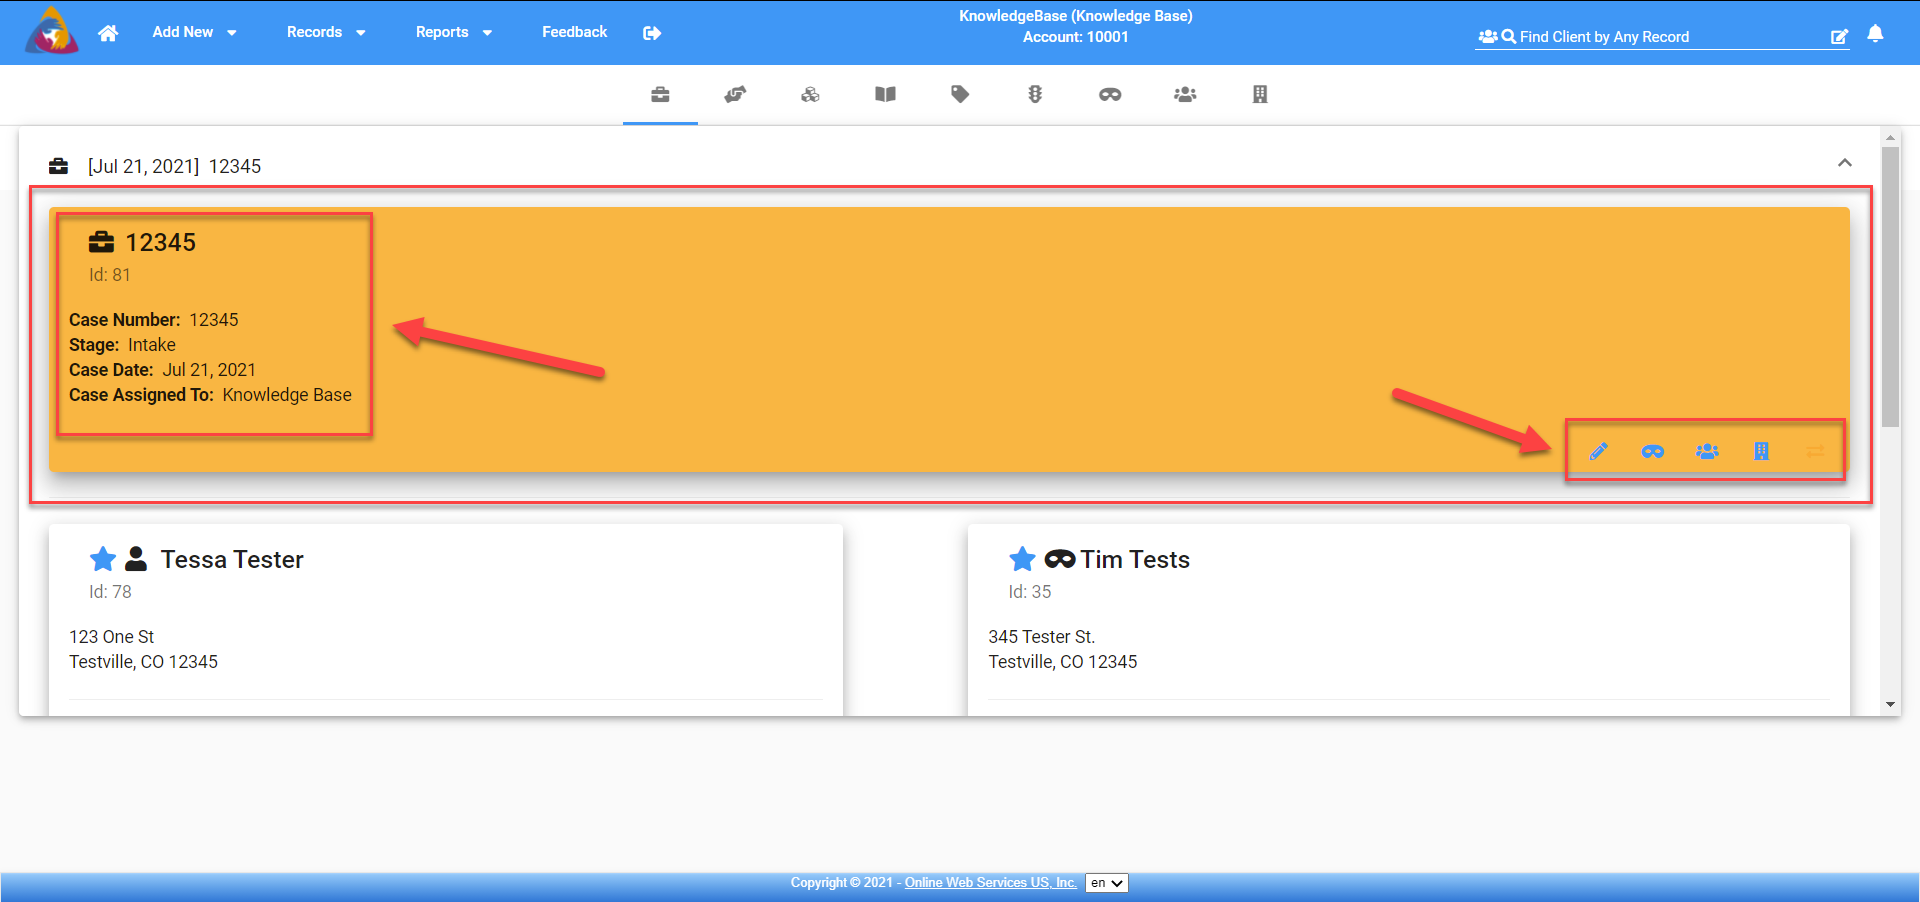
Case Info
The first box across the top will show the information about the case. The Case ID number is an automatically generated, unique, sequential number for each case that is entered. The Case Number is a number that is entered by the user on the account. The Case Stage, the Case Date, and the Advocate or User the Case is assigned to. You will also see 4 icons in the bottom of this box. The pencil will allow you to edit the case details, the mask icon will allow you to view the Case defendants, the 3 people icon will allow you to view the Case Victims, and the building icon will allow you to view the case locations. (see below - Figure 8)
Figure 8
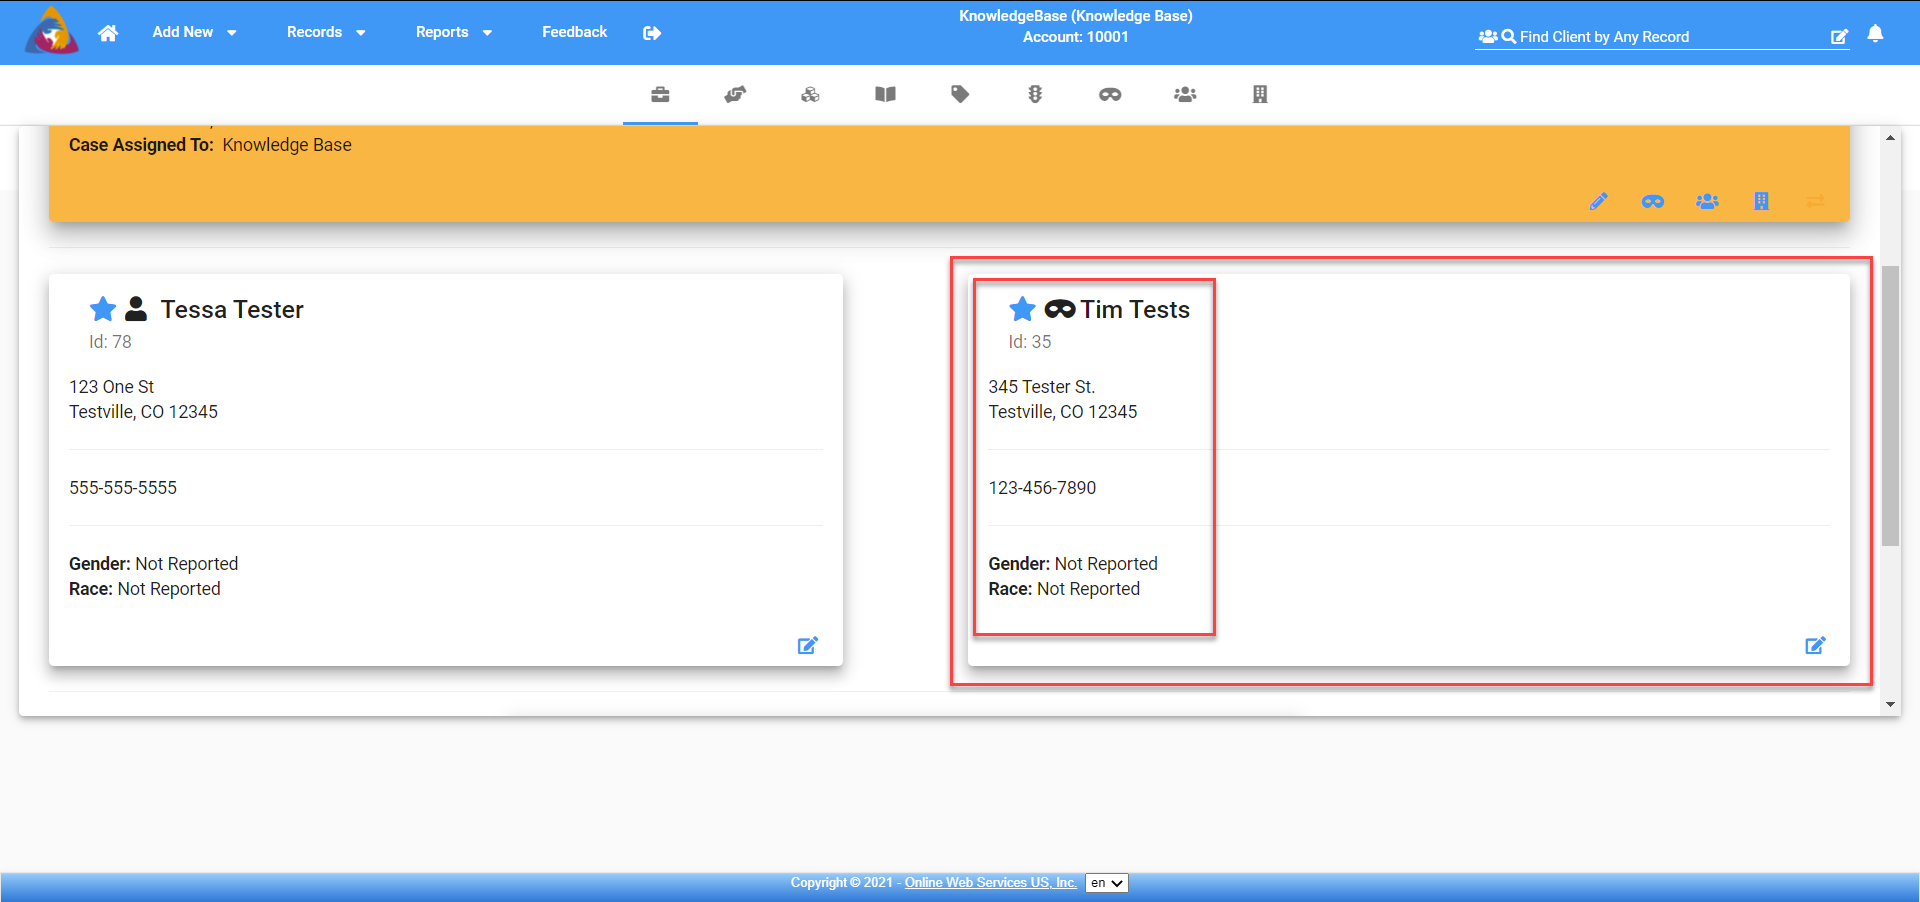
Client Info
The box below the top box on the left will display the information about the primary client or victim for the case. The ID is the automatically generated, unique, sequential ID number that is assigned to that client for that case. (see below - Figure 9)
Figure 9

You will also see the Primary Client address and contact information as well as the Gender, Race, and Primary Advocate assigned to the case. In the bottom right corner, you will see 2 icons. The blue icon will bring you into the Client’s Case information screens where you will have access to all the tools and tabs across the top.
Each additional victim or client will display below the primary client in its own separate box. In those boxes, you will see their client ID, Name, address, contact information, demographics, and the primary advocate for that client.
Defendant Info
The box to the right will display the information about the Primary Defendant. The ID is the automatically generated, unique, sequential number that is assigned to that defendant for that case. (see below - Figure 10)
Figure 10
You will also see the Primary Defendant's address, contact information, as well as the defendant’s demographics. In the bottom right corner, you will see 2 icons. The blue pencil icon will bring you into the defendant’s screens where you will have access to all the tools across the top. ****link to Defendant Case information, Defendant Information, Defendant Assignments****
Each additional defendant will display below the primary defendant in its own separate box. In those boxes, you will see their defendant ID, name, address, contact information, and demographics.
Locations
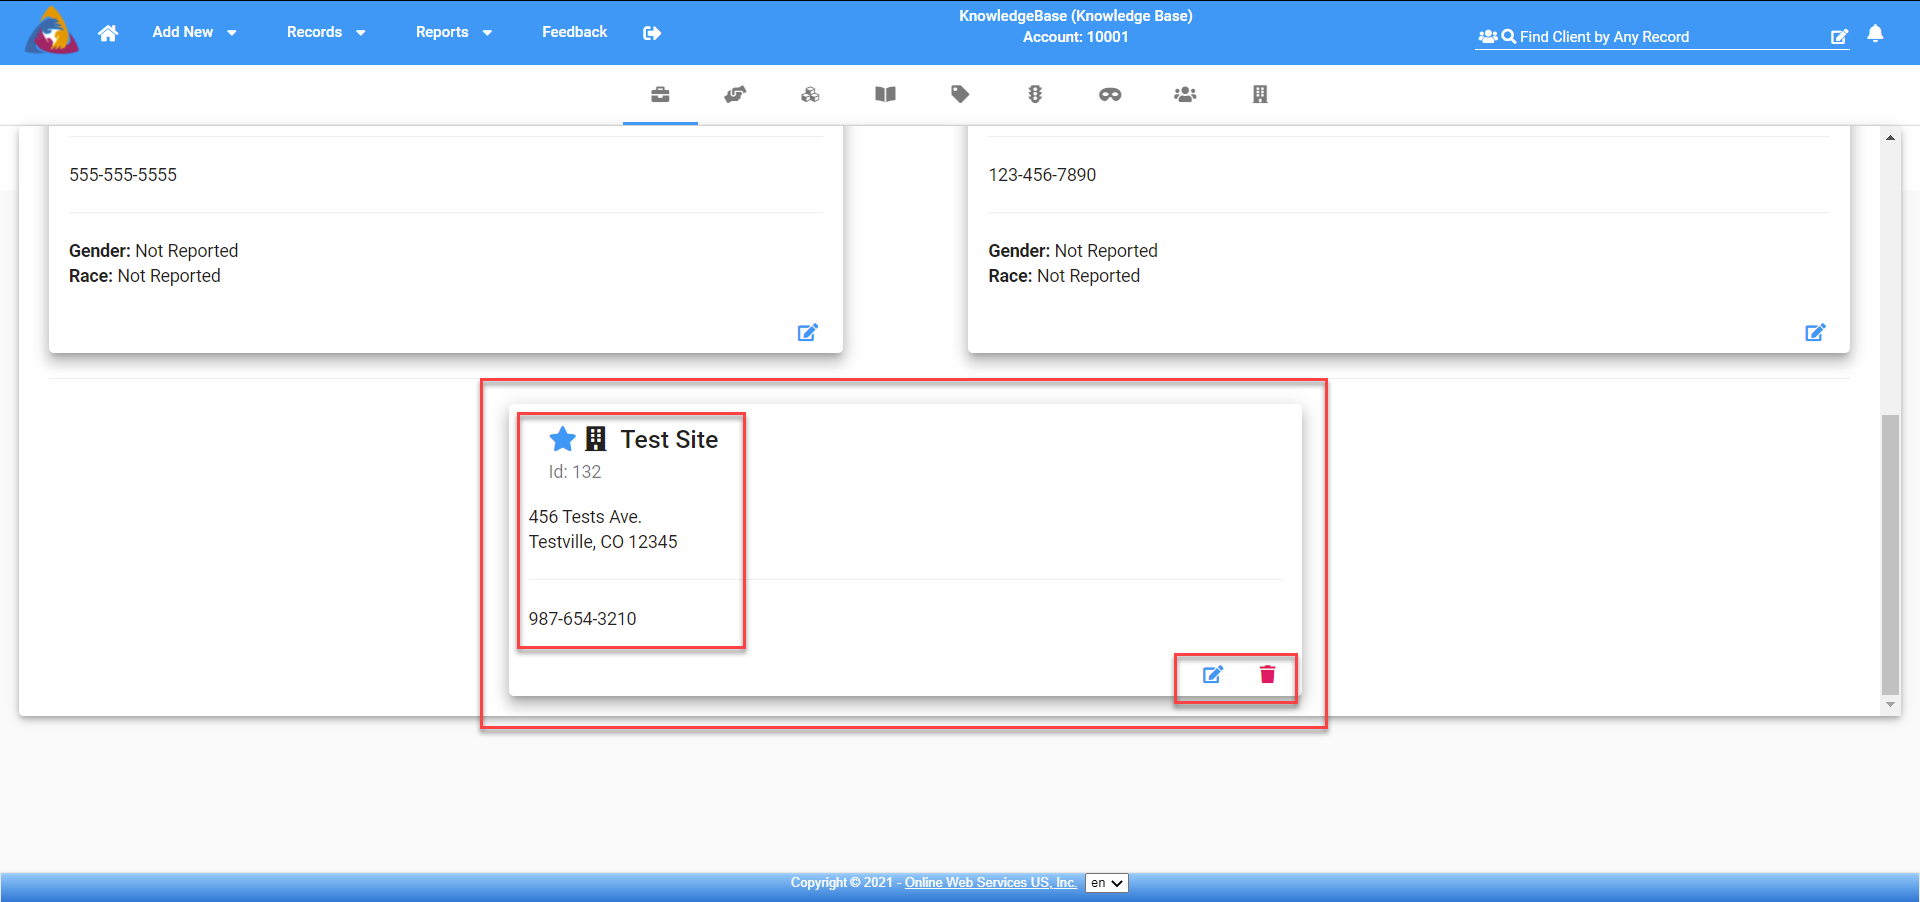
The last box or boxes at the bottom will display the Location or multiple locations information for the case. You will see the Name that was assigned to the location by the user or advocate, business name, address, phone number, and any other contact information for that location. If there are multiple locations listed, the location with the large blue star at the top is the Primary location for this case. Each location box will have 2 icons in the bottom right corner. Clicking on the blue icon will take you into the location’s edit screen to edit the location. For more information about this screen see the video labeled Location Edit. The red trash can icon will remove the location from the case. (see below - Figure 11)
Figure 11