
This article will discuss the Cases list screen.
NOTE:
In order to view cases, the Case Manager add on must be enabled by your account administrator.
To view the main case list
From any screen, click on Records and click on Cases. (Figure 1)
Figure 1

Cases List Screen
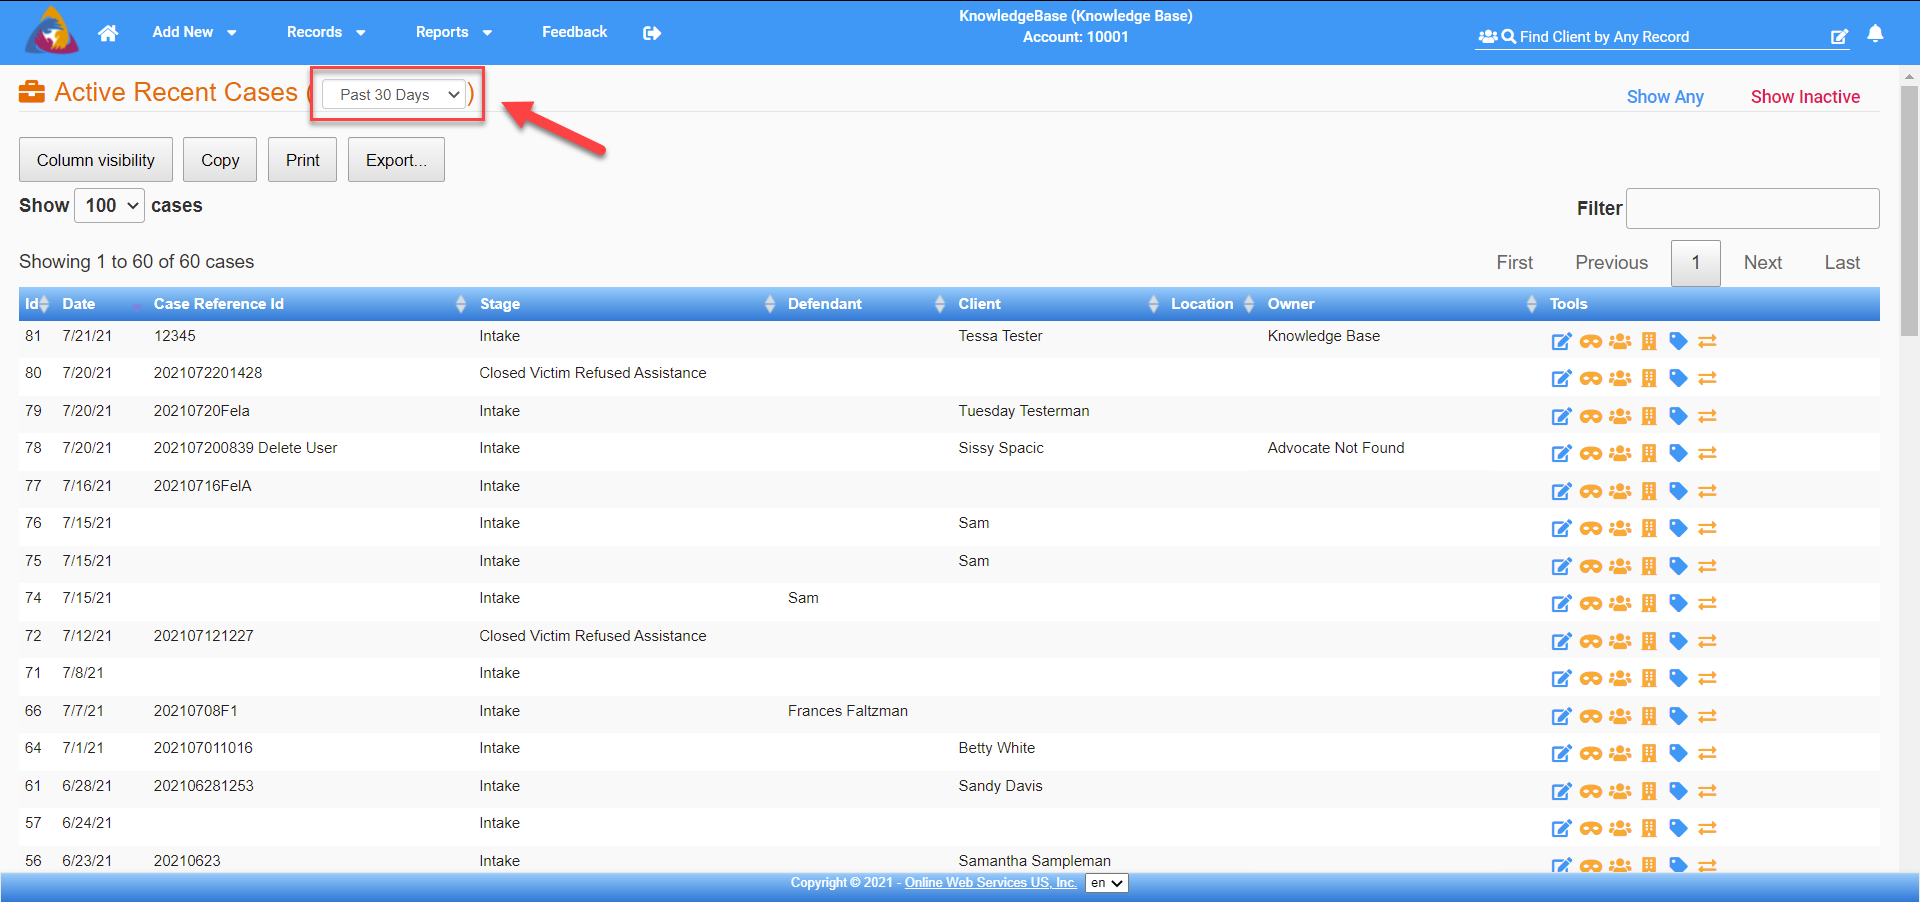
- Recent Cases for the past 30 days will display and can be changed by clicking the down arrow button and selecting the preferred time range from the list (Figure 2)
Cases are displayed based on your security level and confidentiality settings
Figure 2
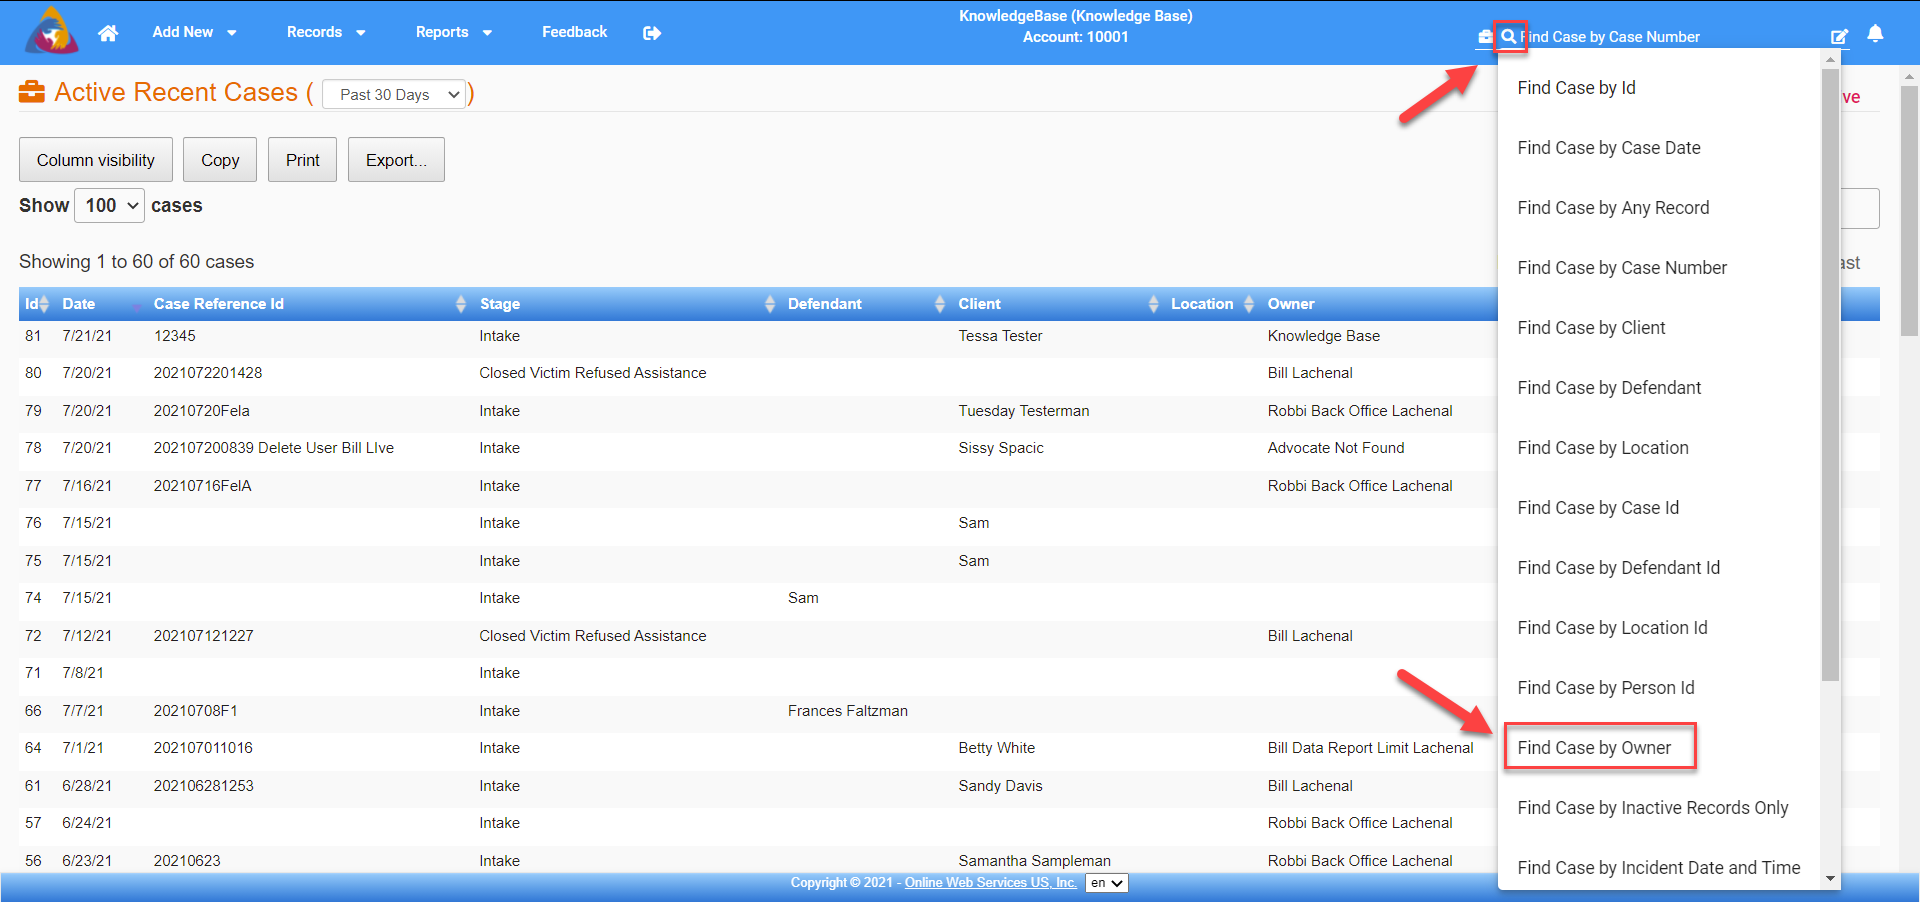
To find Cases by Case Owner
Use the quick search tool in the top blue bar and change the find by case to find by owner and click on the icon to the right that looks like a box with a pencil in it. For more information about Quick Search please see the article: How do I use Quick Search. (See Figures 3 and 4)
Figure 3


Figure 4

Show Active, Show Inactive, Show Any
In the upper right corner of the screen, you will see 2 of 3 buttons:
-
Show Active - Shows only Active Cases
- Show Inactive - Shows only Inactive Cases
- Show Any - Shows both Active and Inactive Cases
Figure 5
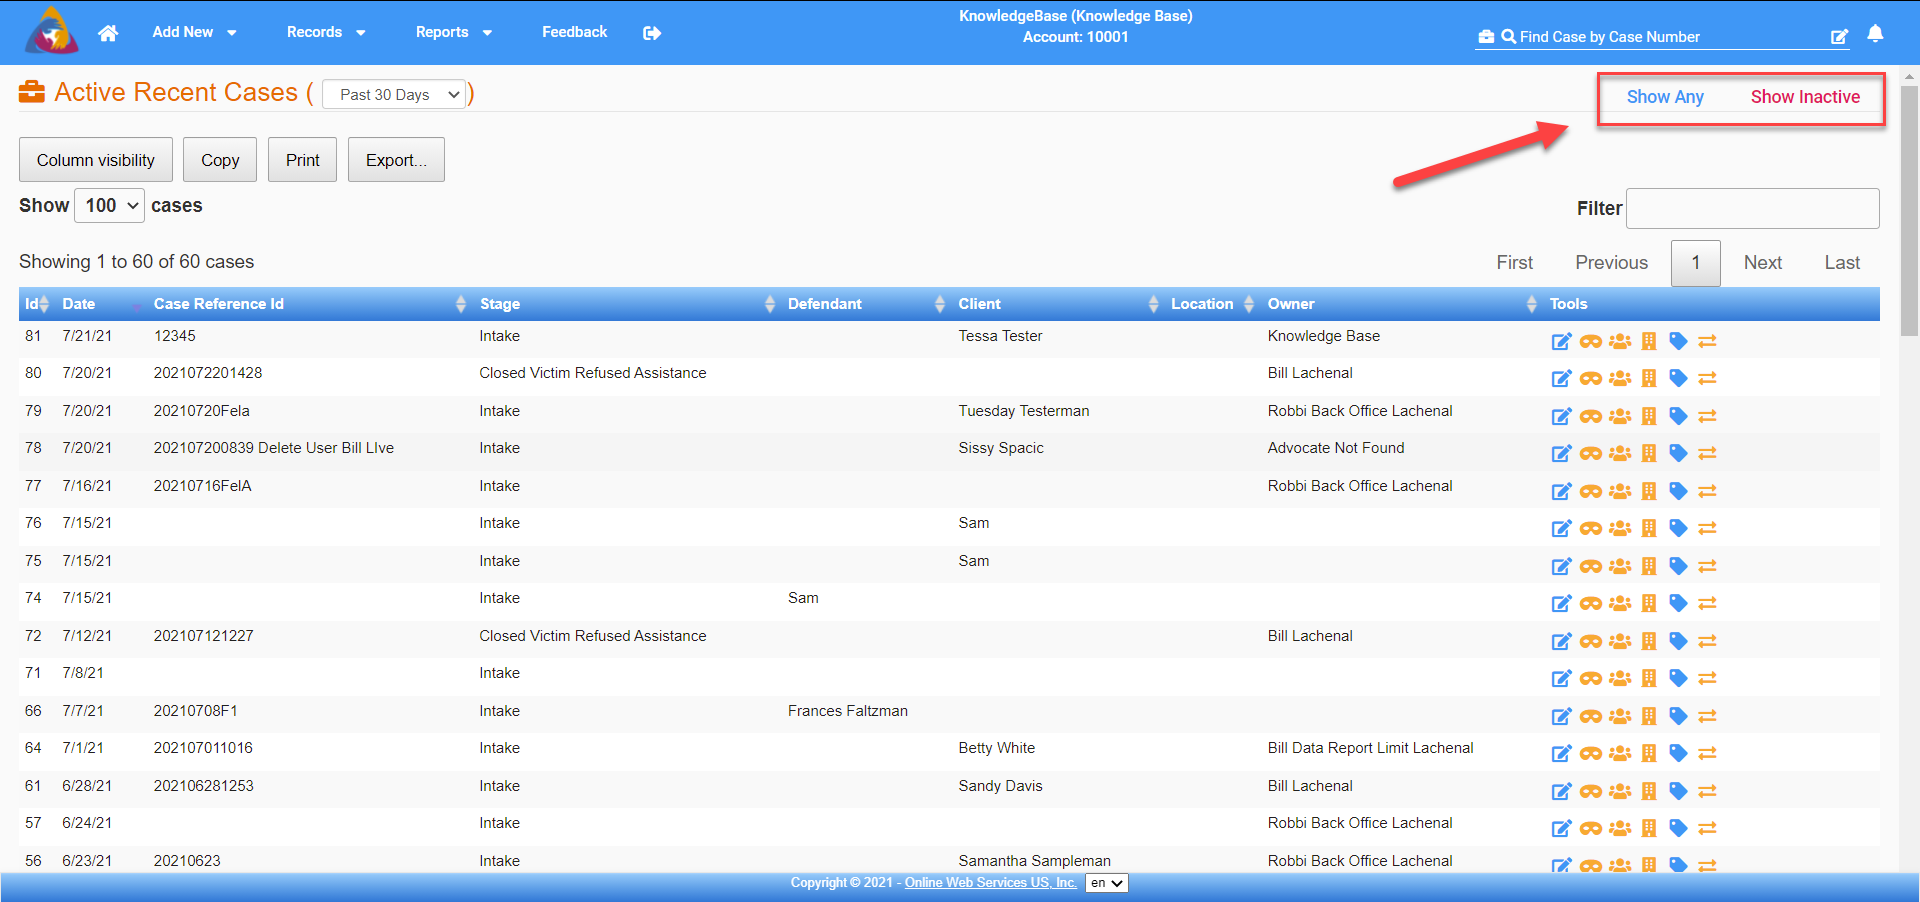
Option Buttons
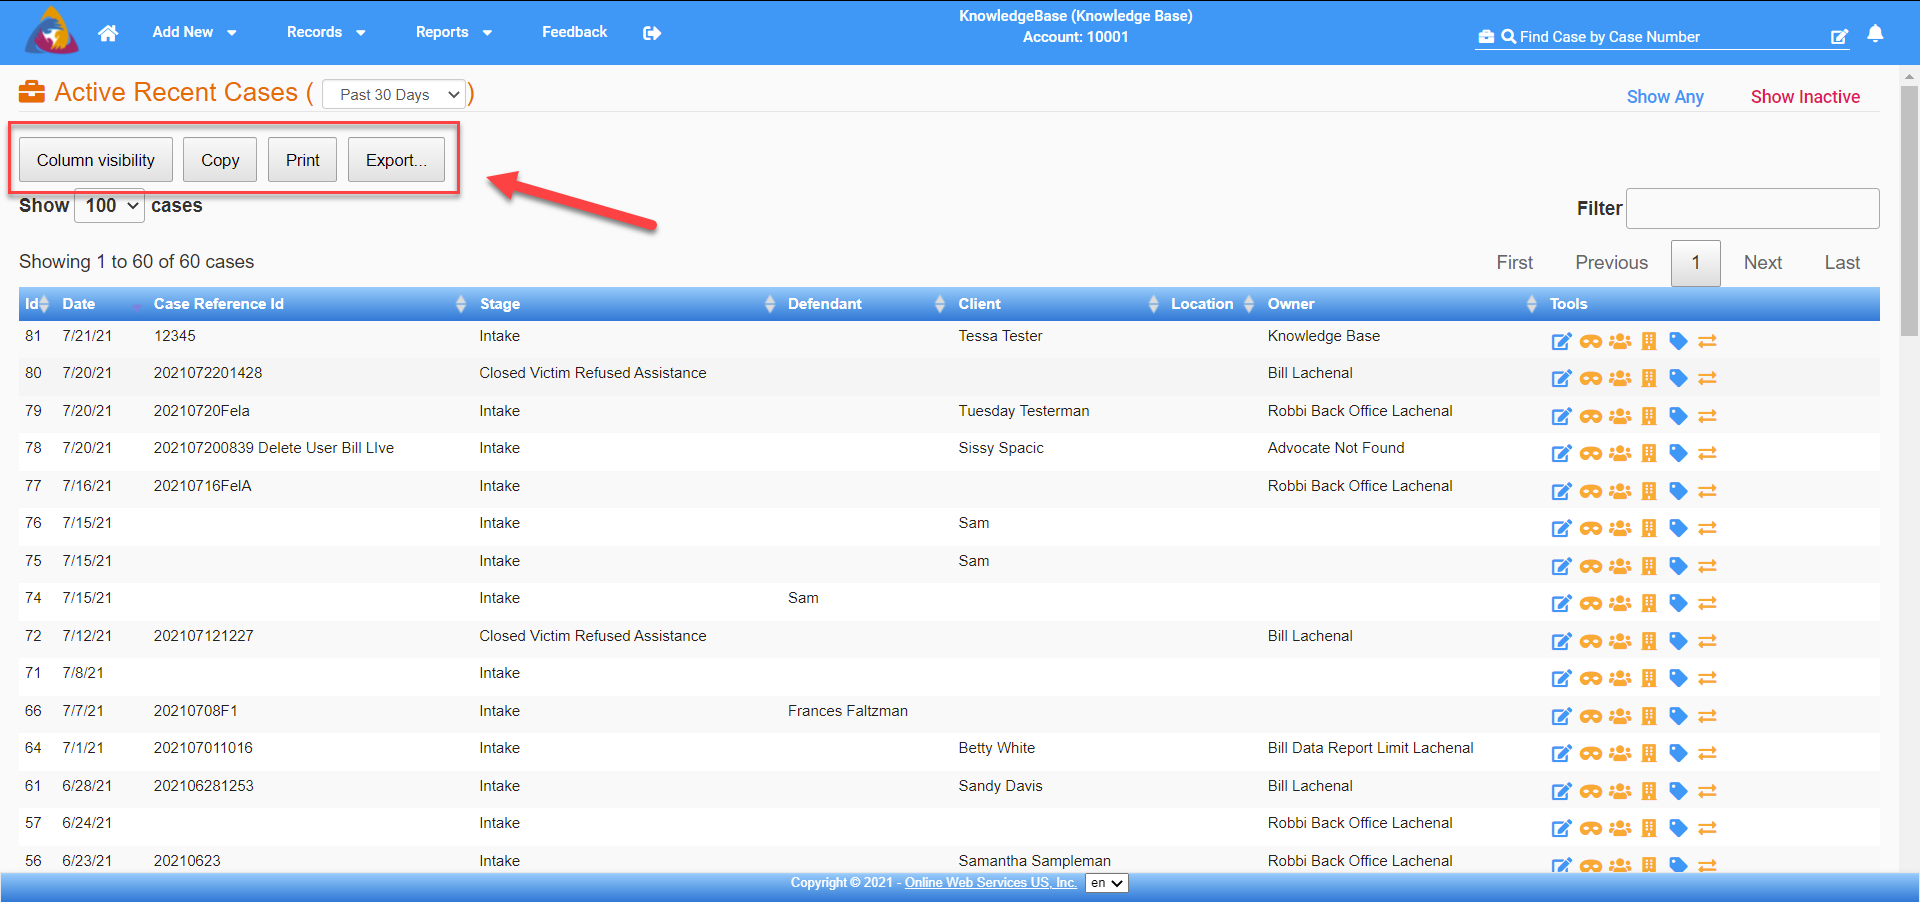
Option buttons are locate at the to left of the screen. (See Figure 6)
- Column Visibility
- Allows each user to choose which columns of information they see on this screen
- The default is to show all columns
- Copy
- Allow the user to copy what is displayed on the screen to paste into another document
- Print
- Allow the user to Print what is displayed on the screen
- Export
- Allows the user to export data displayed on the screen
- Export options are CSV, Excel and PDF
Figure 6
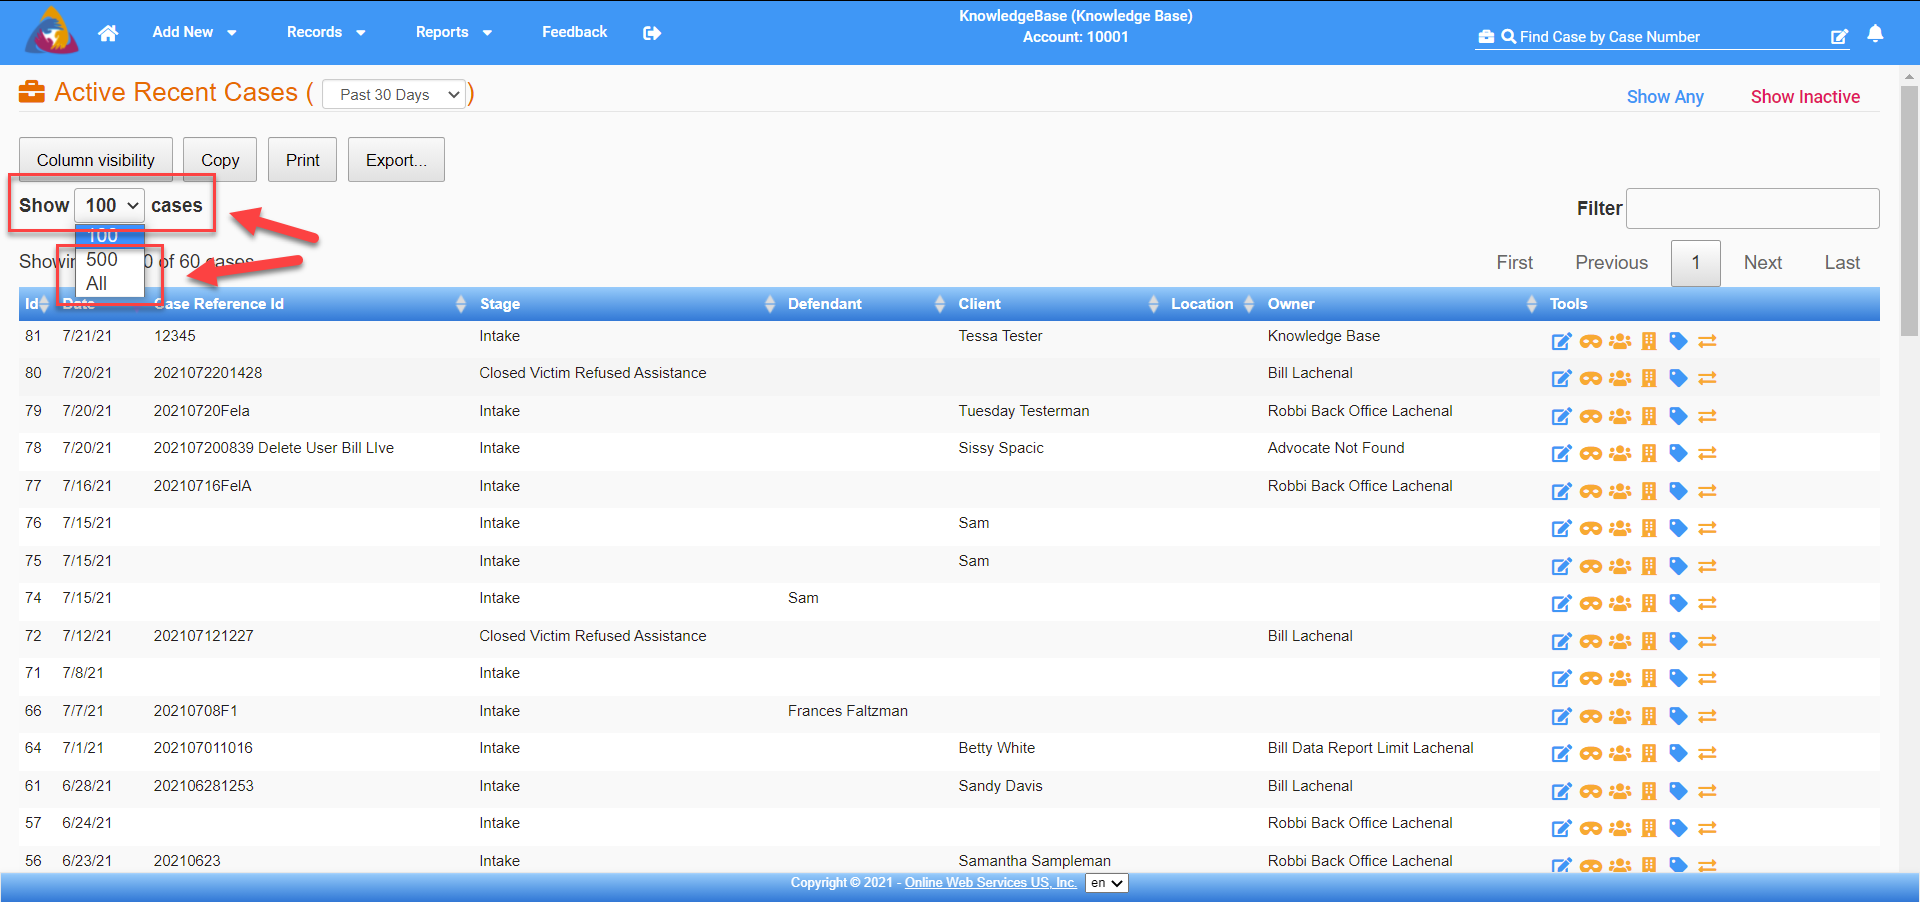
Number of Records to Display
Below the column visibility button, you will be able to choose from the dropdown box the number of cases that are displayed on the screen. You can choose 100 (the default), 500, or All. (See Figure 7)
Figure 7
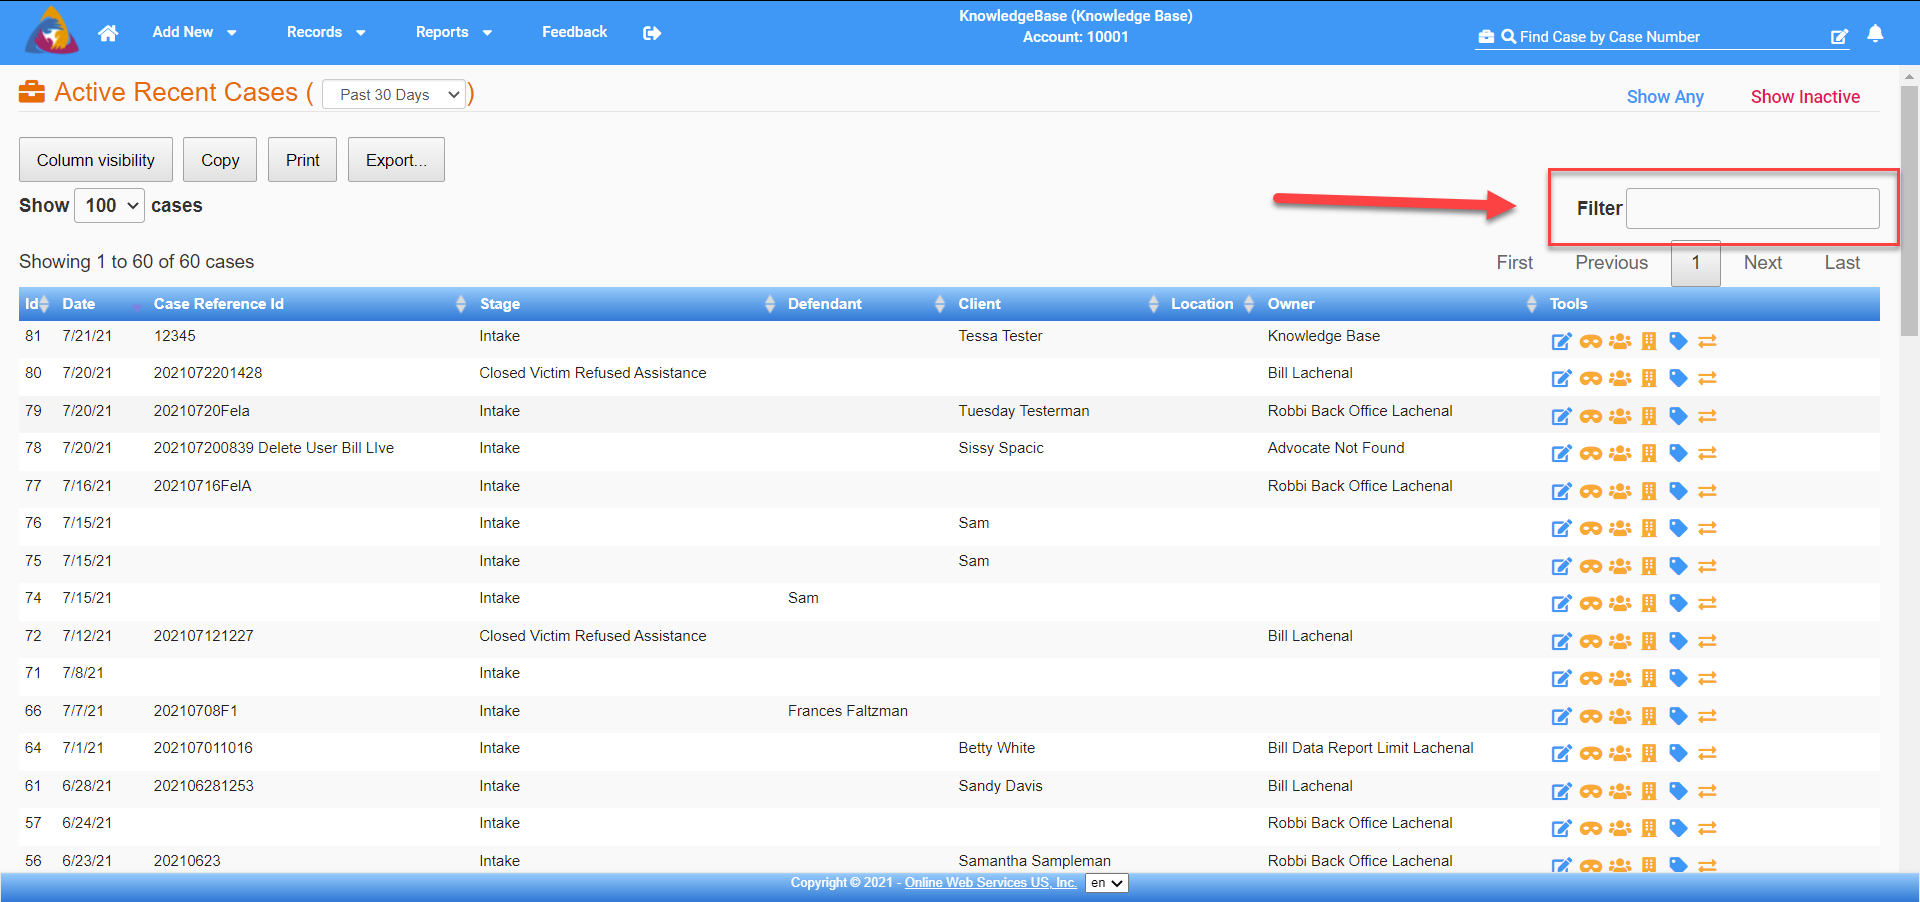
Filter what is on the screen
On the right side of the screen, you will see the Filter box. (See Figure 8)
- Allow the user to filter what is displayed on the screen
- Filters by numbers and letters
- Filters start with the first character entered
NOTE: This is not the same as the Search tool in the top blue bar that searches the entire database, the filter box will allow you to filter what is displayed on the screen.
Figure 8
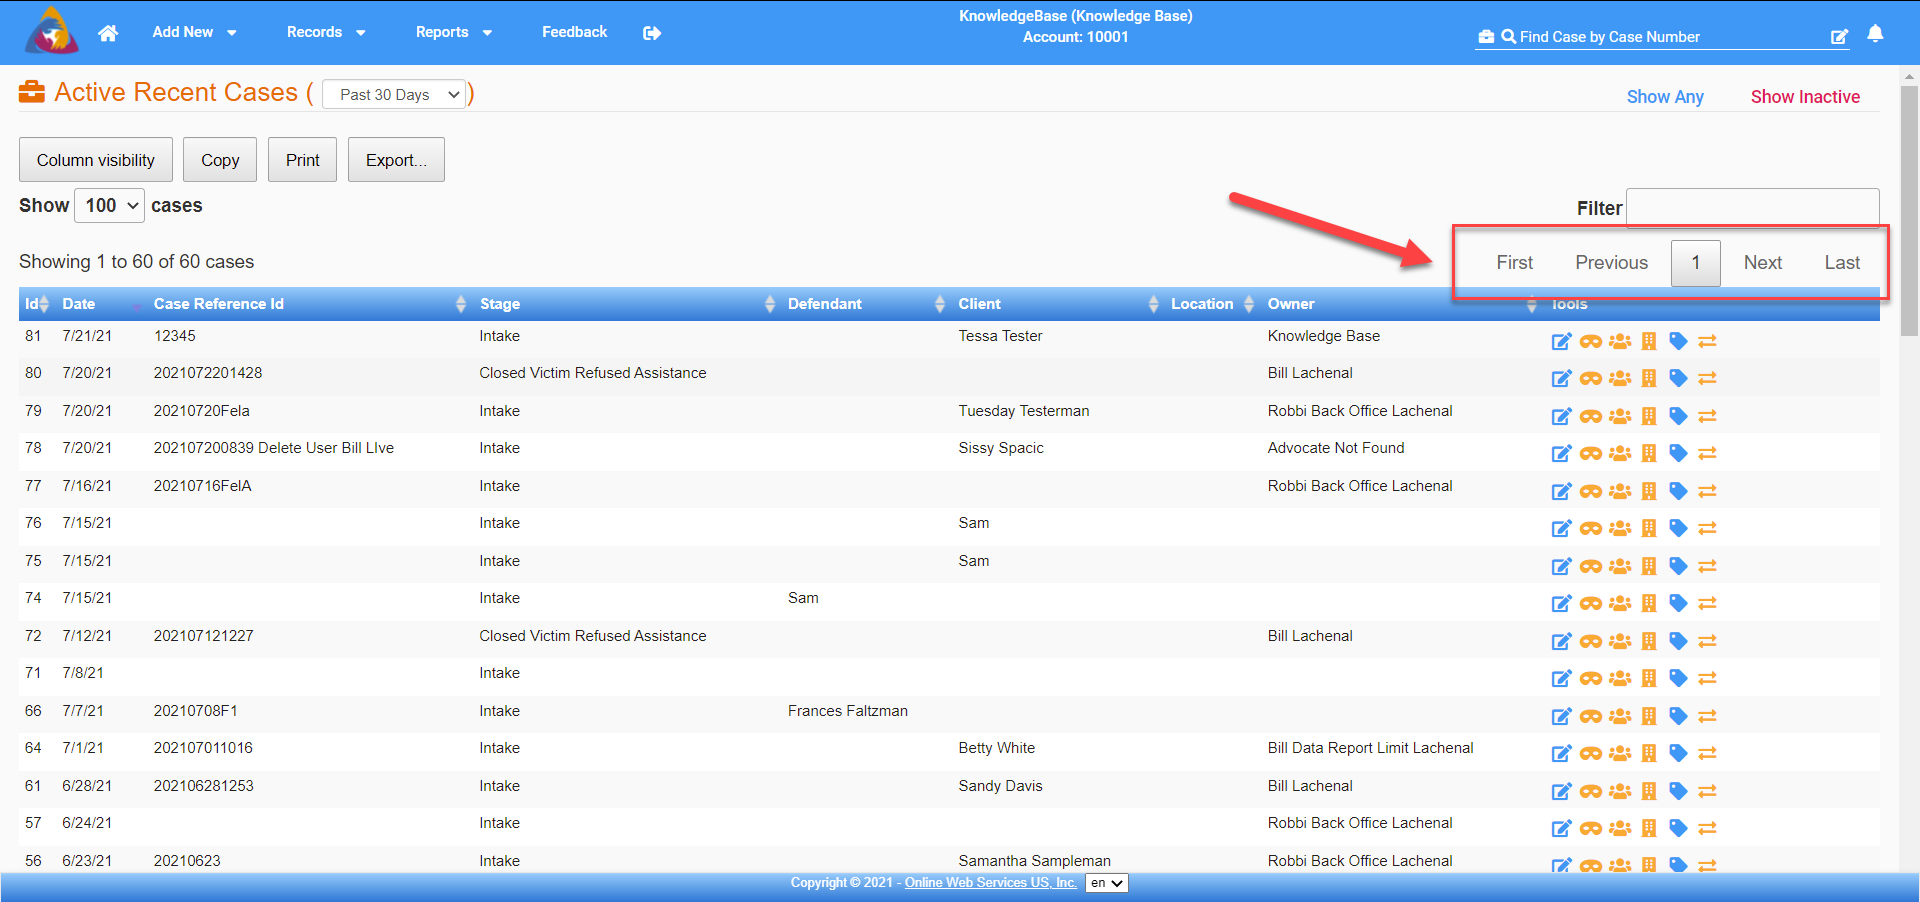
Switching between pages
Just below the Filter box are navigation options: (See Figure 9)
- First - will take the user back to the first page of the records
- Previous - will take the user to the previous set of records
- Next - will take the user to the next set of records
- Last - will take the user to the last set of records
Figure 9
Sorting the data
The list that is displayed on the screen can be sorted by clicking on the titles at the top of each column. Click 1 time for ascending order and a second time for descending order. (See Figure 10)
Figure 10

Digging into a case
Once the user has located the case they want to work with, several options are available. (See Figure 11)
- Clicking in the row will take the user to the Case Detail form **** CHANGE TO A LINK ***
- Clicking on one of the tool options (indicated by the arrow in figure 11) will:
- Icon 1: takes user to Edit Case Details
- Icon 2: takes user to Case Defendants
- Icon 3: takes user to Case Clients/Victims
- Icon 4: takes user to Case Locations
- Icon 5: takes user to Case Tags
- Icon 6: will Deactivate/Activate the case depending on current status
- Icon 7: (not displayed) will allow a case to be deleted
- Icon 8: (not displayed) will allow a case to be expunged
NOTE:
-
-
- hovering over the tool and it will tell you what it is
- Icons displayed depend on what options your administrator has turned on and the security level assigned to your user id
-
Figure 11
