
Tags for Clients, Cases, Defendants, Locations, Events, and Victimizations can be added and edited in the Admin settings on the "Add/Edit Tags" tab.
Note: to add and edit tags, you must be an admin user on your agency's account. If you are not, please contact an Admin user in your agency to add tags and direct them to this article if needed.

- To start, click the "Admin" button on the top blue bar. This will take you to the Admin settings page.
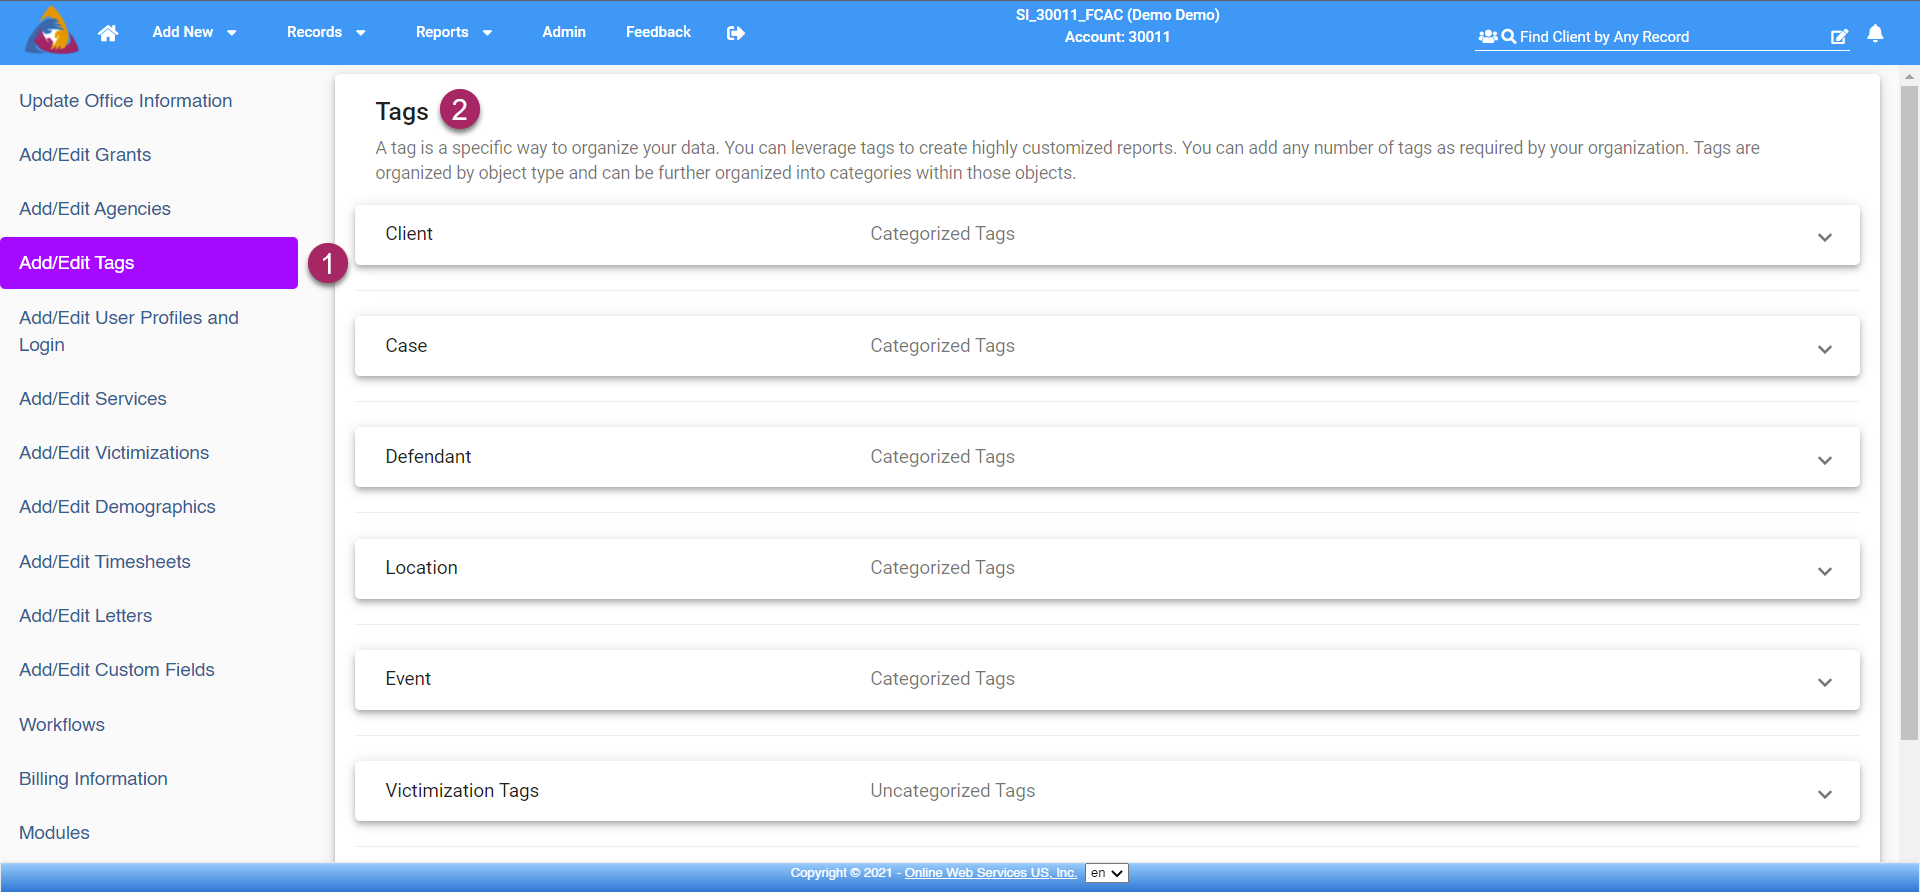
- Once you are in the Admin settings, Click the tab labeled "Add/Edit Tags" on the left side of the screen.
- After you have clicked the "Add/Edit Tags" tab, you will see a list of dropdown tabs for adding and editing tags for your agency.
Add Tags
For a full list of tag examples please see the article: What Are Some Examples of Tags That I Can Create?
- To add a new tag, start by selecting the type of tag you wish to add (Client, Case, Defendant, etc...). Each type of tag has its own dropdown tab; for this example, we will be adding a Client tag. Click the "Client" dropdown tab and options for client tags will be shown.
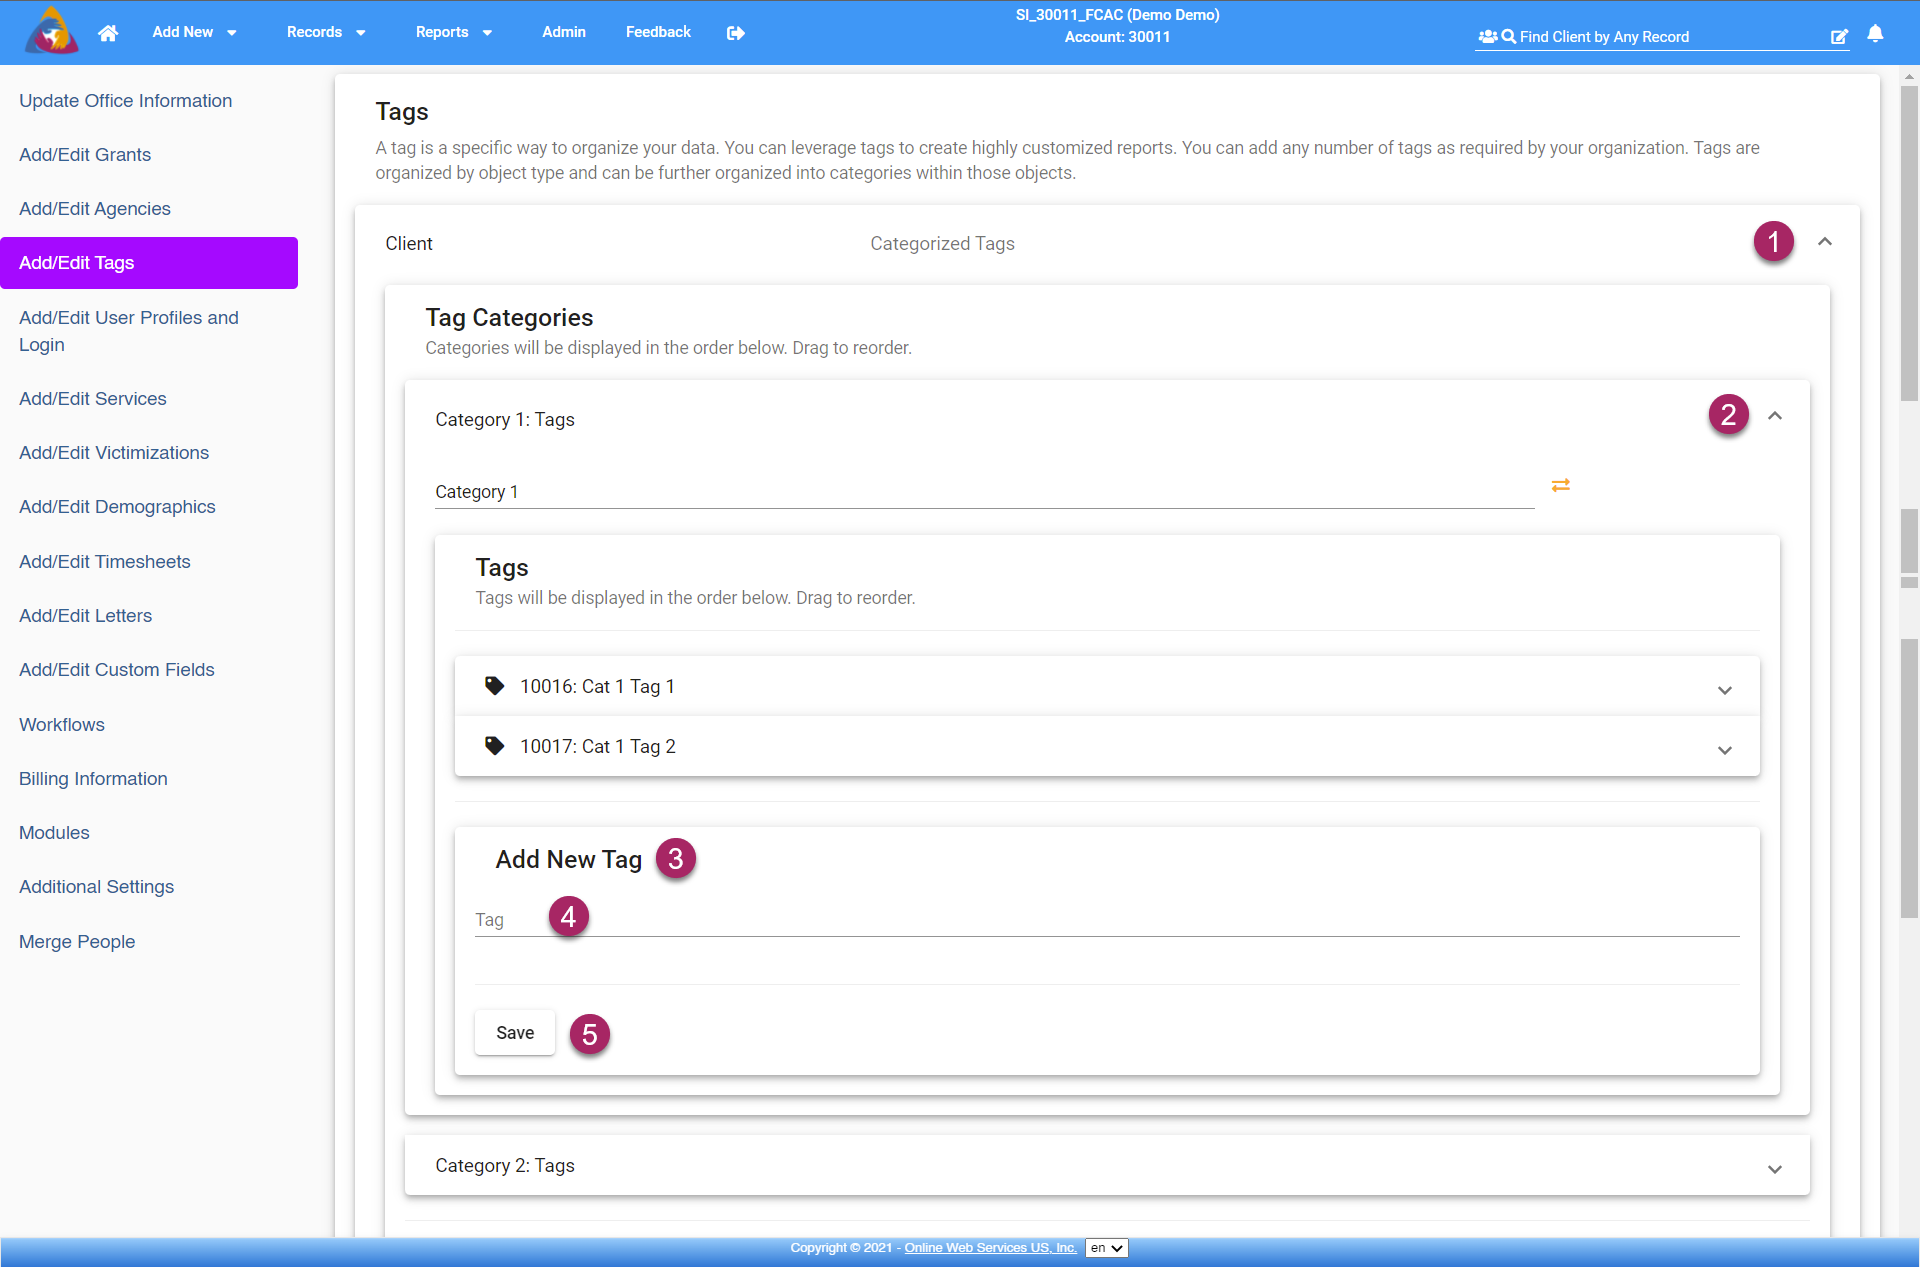
- Each dropdown for each type of tag (Client, Case, etc...) will contain category dropdowns. Categories can be added to each type of tag and will be further discussed later in this article. Choose the category that you want to add a new tag to and click on its tab to show a list of the tags in that category and add your new tag.
- At the bottom of your selected category dropdown, you will see a block labeled "Add New Tag". This is where you will add your new tag.
- Click the field labeled "Tag" and enter the name of your new tag.
- Once finished, click the button labeled "Save" and your tag will be added to the software.
Edit Tags

- To edit a tag, start by selecting the type of tag you wish to edit (Client, Case, Defendant, etc...). Each type of tag has its own dropdown tab; for this example, we will be editing a Client tag. Click the "Client" dropdown tab and options for client tags will be shown.
- Each dropdown for each type of tag (Client, Case, etc...) will contain category dropdowns. Categories can be added to each type of tag and will be further discussed later in this article. Choose the category of the tag you wish to edit and click on its tab to show a list of the tags in that category.
- You will see a block labeled "Tags". This block will show a list of all the tags that have been added to that category.
- Choose the tag you wish to edit from the list by clicking on it. The dropdown for that tag will expand to show editing options.
- Click the field labeled "Tag", to make edits to the name of the tag.
- If you wish to remove a tag from your software, click the yellow icon on the bottom right of the tag's dropdown that looks like two arrows pointing in opposite directions. This will deactivate the tag and it will not be available in the software. If you wish to use the tag in the future, it can be reactivated by following the same steps.
- If you wish to move a tag to a different category, you can do so by clicking the blue icon on the bottom right of the tag's dropdown that looks like two arrows moving clockwise. This will show a dropdown field on the screen that, when clicked, will display a list of other categories that the tag can be moved to. Choose the category you want to move the tag to by clicking on it.
Add Tag Category

- To add a new tag category, start by selecting the type of tag category you wish to add (Client, Case, Defendant, etc...). Each type of tag has its own dropdown tab; for this example, we will be adding a Client tag category. Click the "Client" dropdown tab and options for client tags will be shown.
- At the bottom of the dropdown you will see a field labeled "New Category". Click this field and you will be able to type a name for the category you are adding.
- Once you have entered the name of your new tag category, The button labeled "Add New Client Tag Category" will turn blue and you can click it to save your new category.
Edit Tag Category
- To edit a tag category, start by selecting the type of tag category you wish to edit (Client, Case, Defendant, etc...). Each type of tag has its own dropdown tab; for this example, we will be editing a Client tag category. Click the "Client" dropdown tab and options for client tags will be shown.
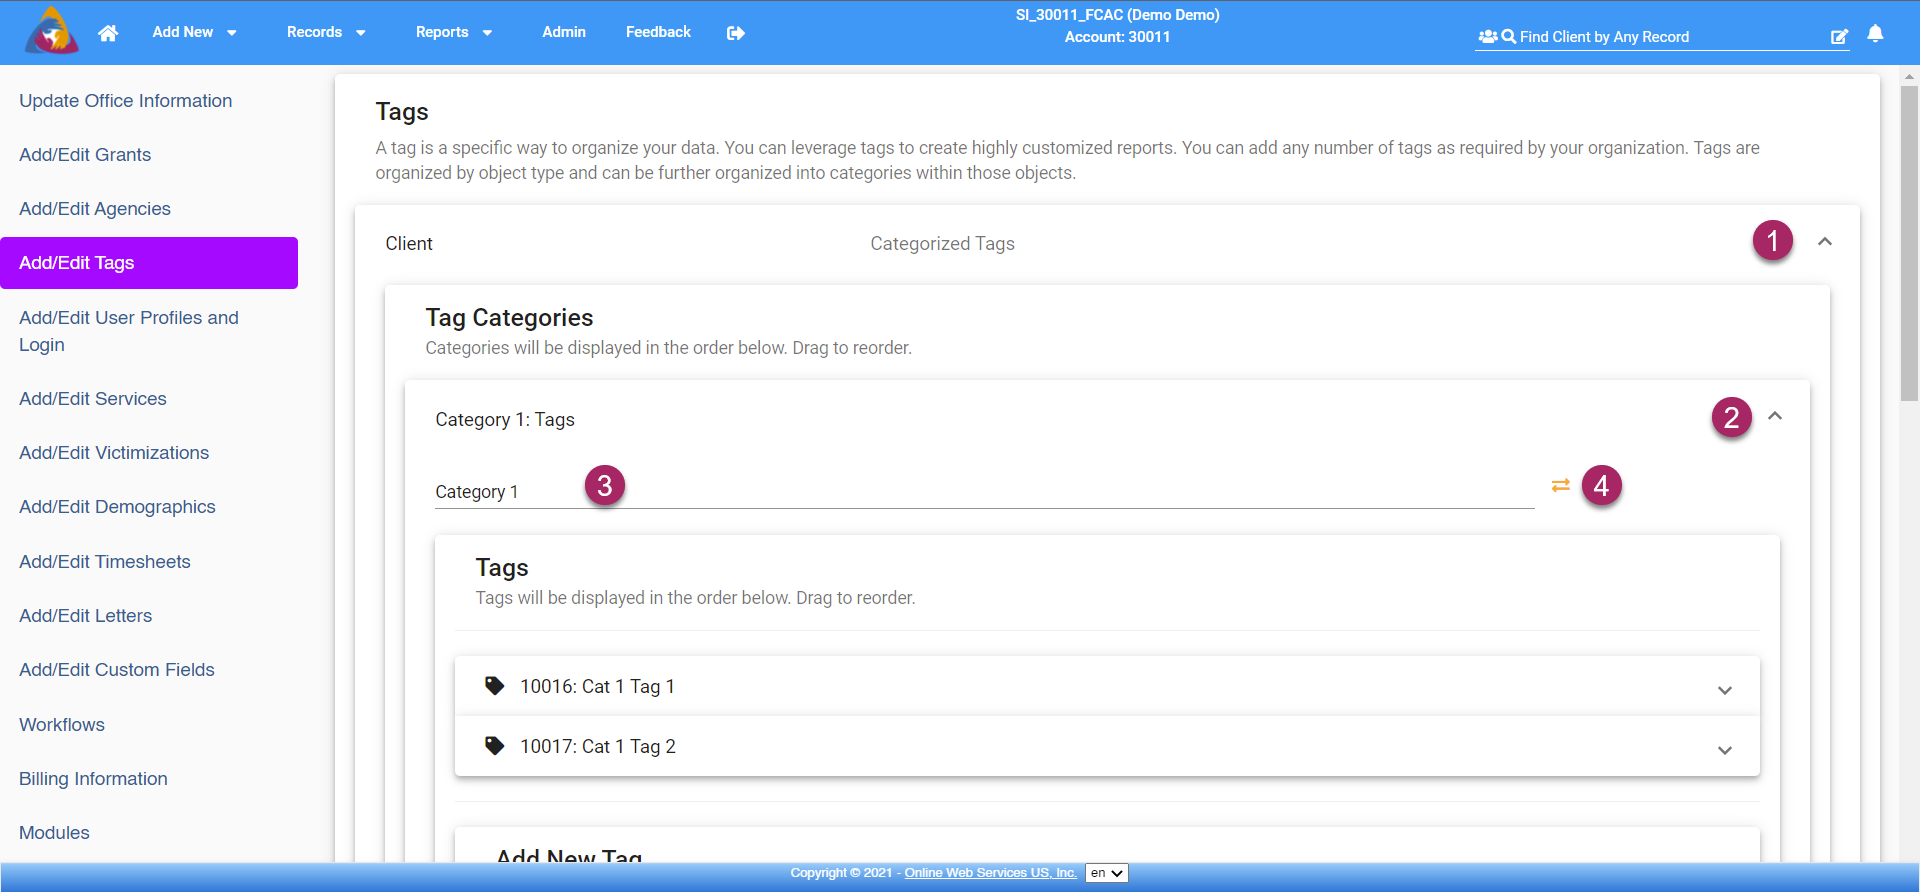
- Choose the category of the tag you wish to edit and click on its tab to expand its dropdown.
- The first field on the expanded tab will show the name of the selected category. Click this field and you can edit the name of the tag category. Changes will be saved autimatically.
- If you wish to remove a category, click the yellow icon that looks like two arrows facing in opposite directions. This will deactivate the category and hide it from users in your agency. It can be reactivated later by following the same process.