How do I add/edit Client Tasks?
Utilizing the Client Tasks tab, you are able to create tasks to stay up to date on what needs to be done for your clients.
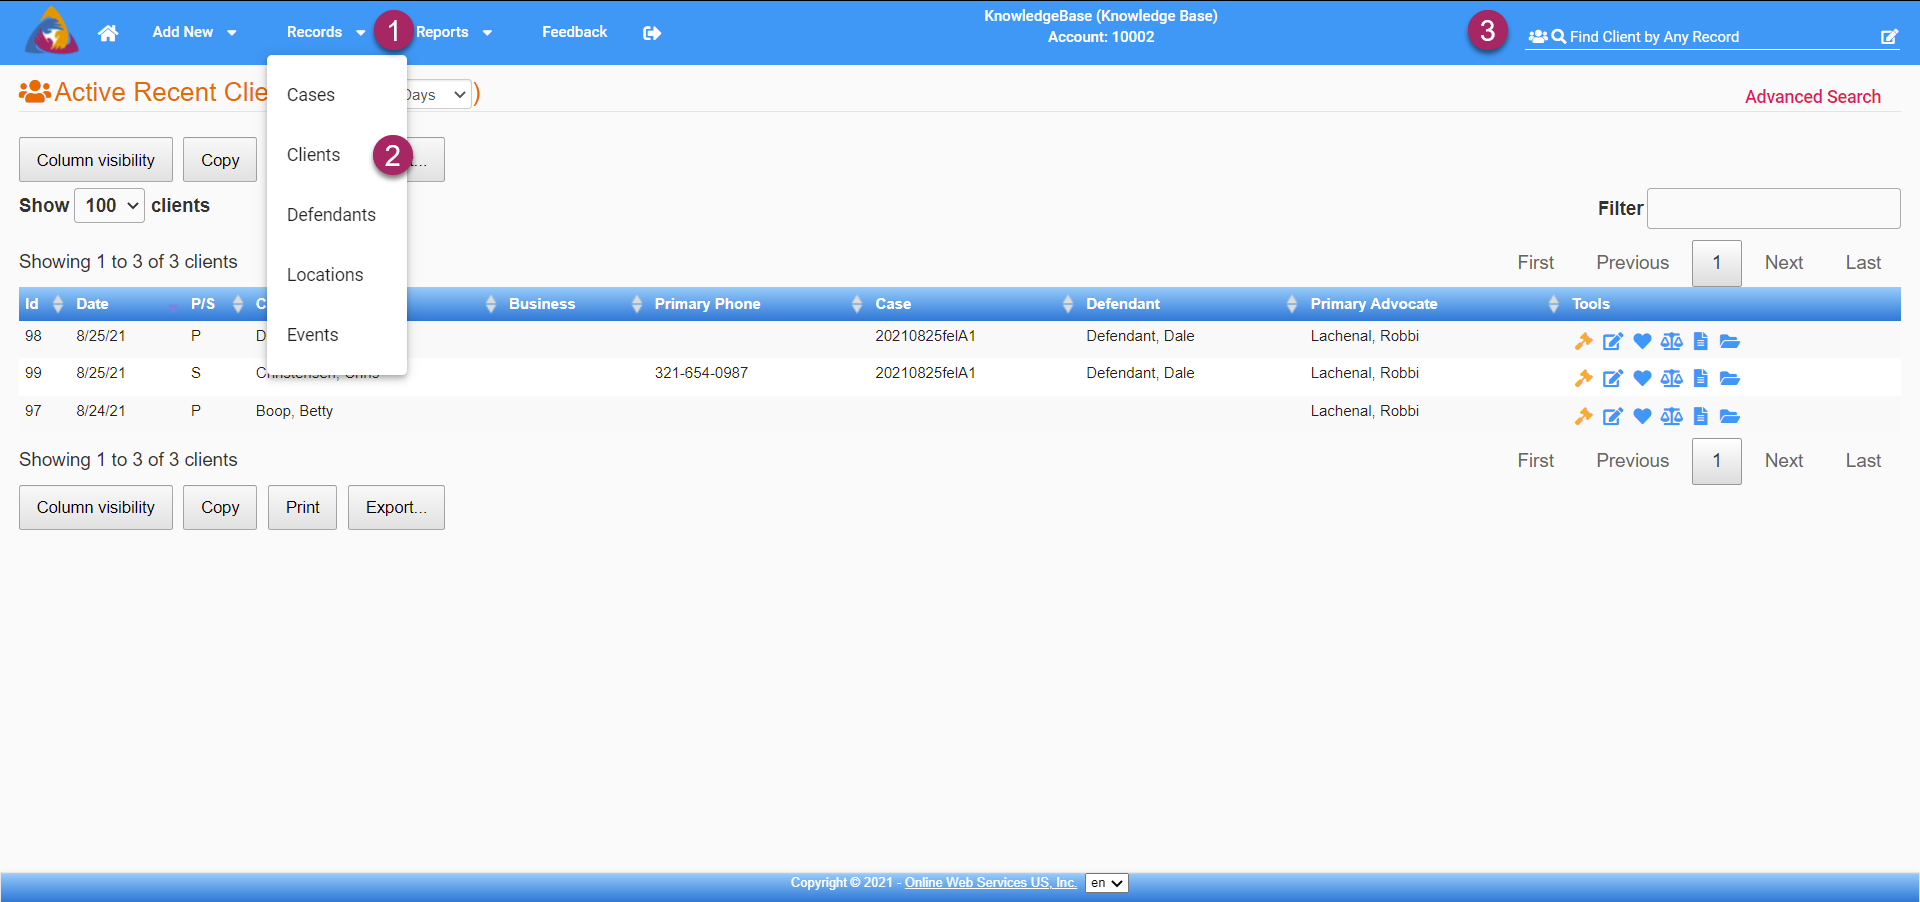
- To start, navigate to the Clients Screen by clicking on the Records dropdown on the top blue bar.
- Select "Clients" from the dropdown and you will be taken to the Clients Screen.
- You can also navigate to the Clients Screen by doing a search for clients by utilizing the search bar on the right side of the top blue bar.
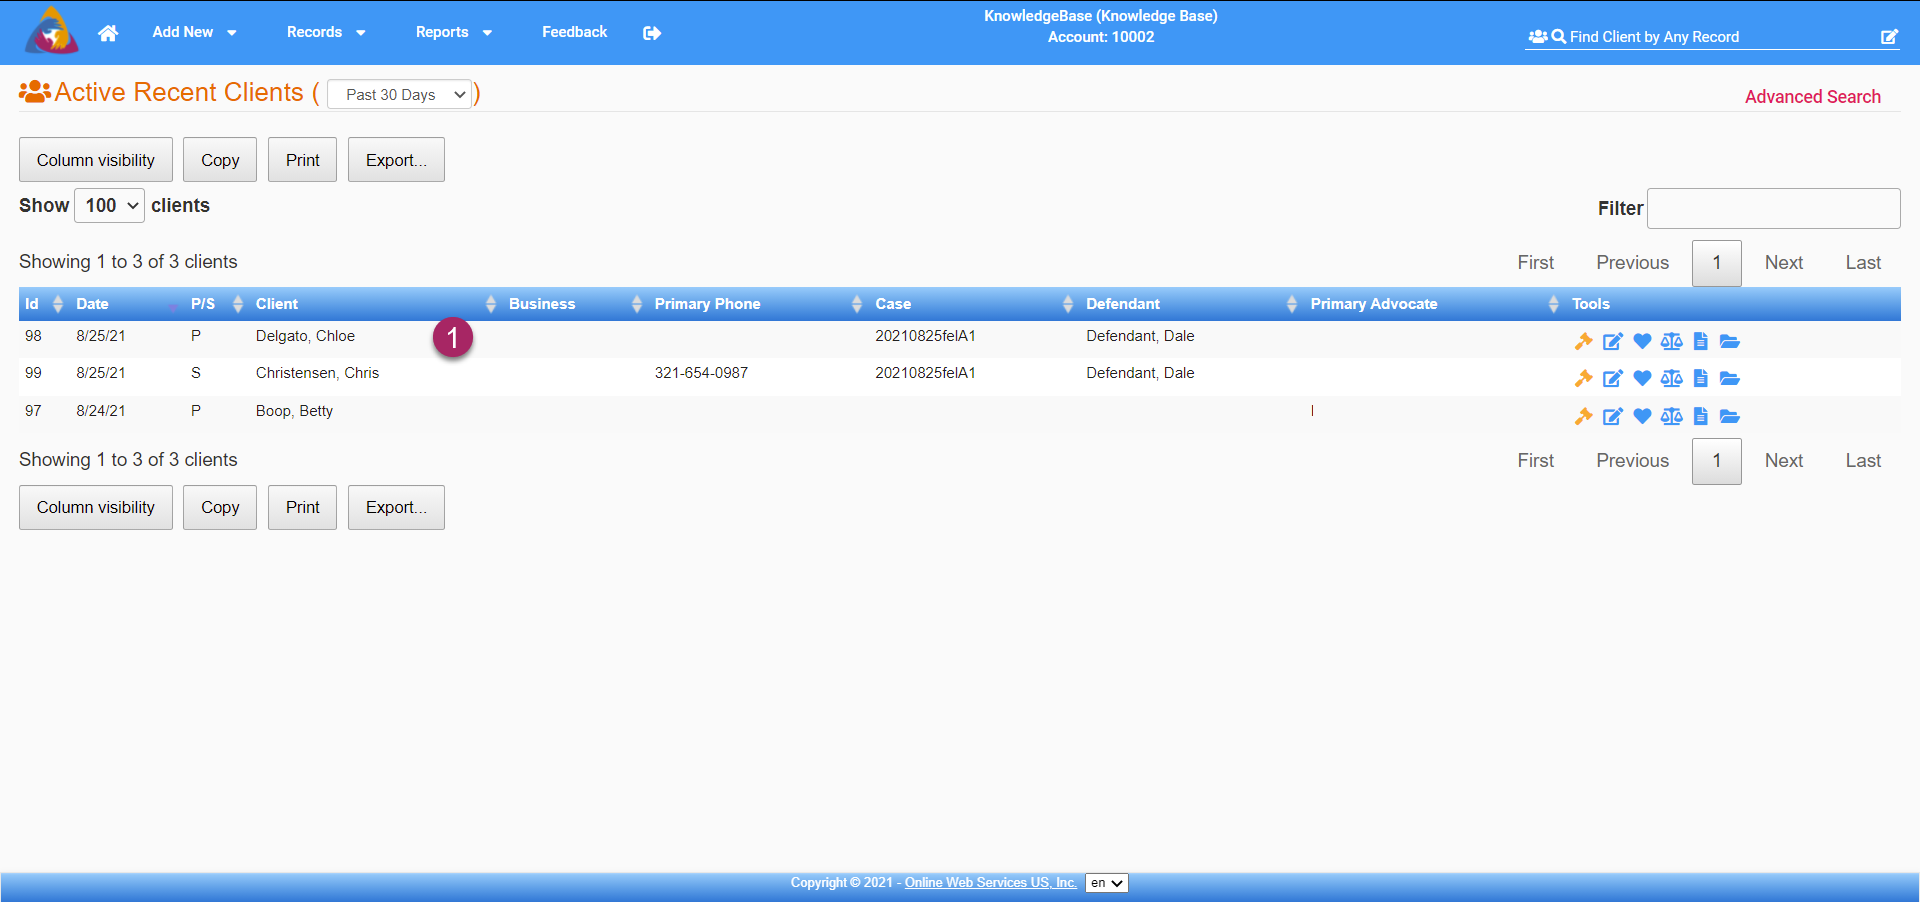
- Select a client from the list of clients to navigate to that client's info screen.
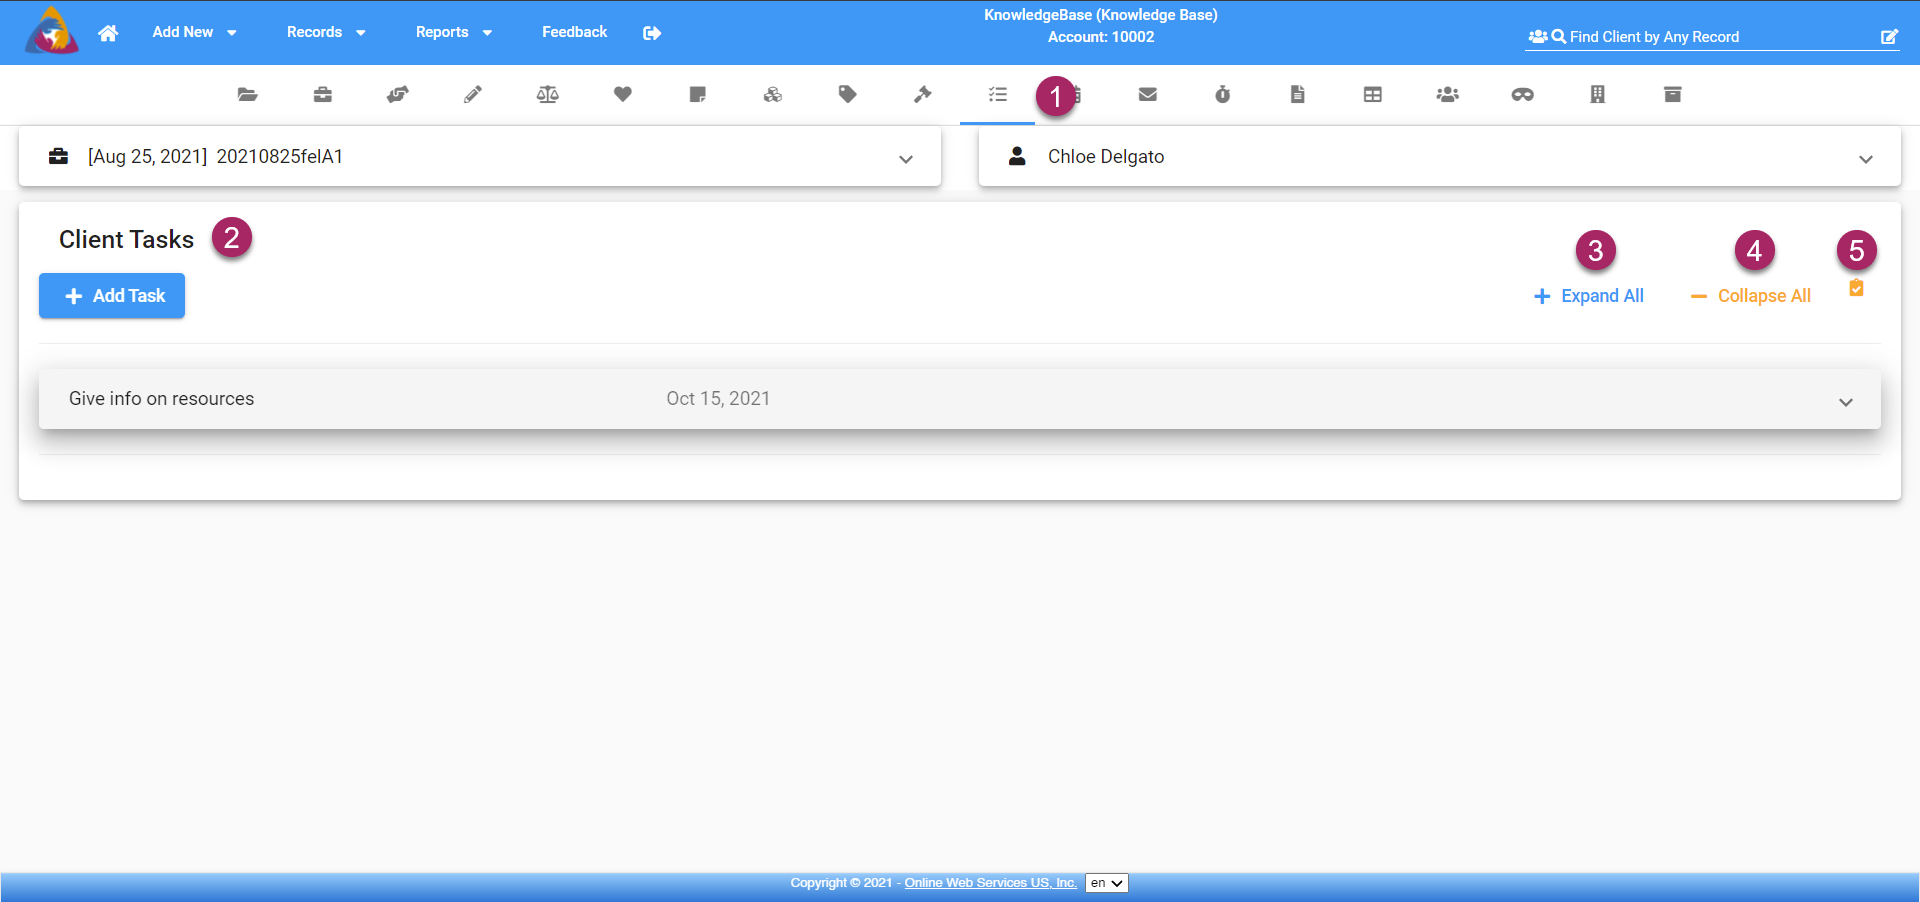
- Once you have selected a client, you will be taken to the client screen. Navigate to the Client Tasks tab by clicking the icon that looks like a checklist. This is located on the row of icons below the top blue bar.
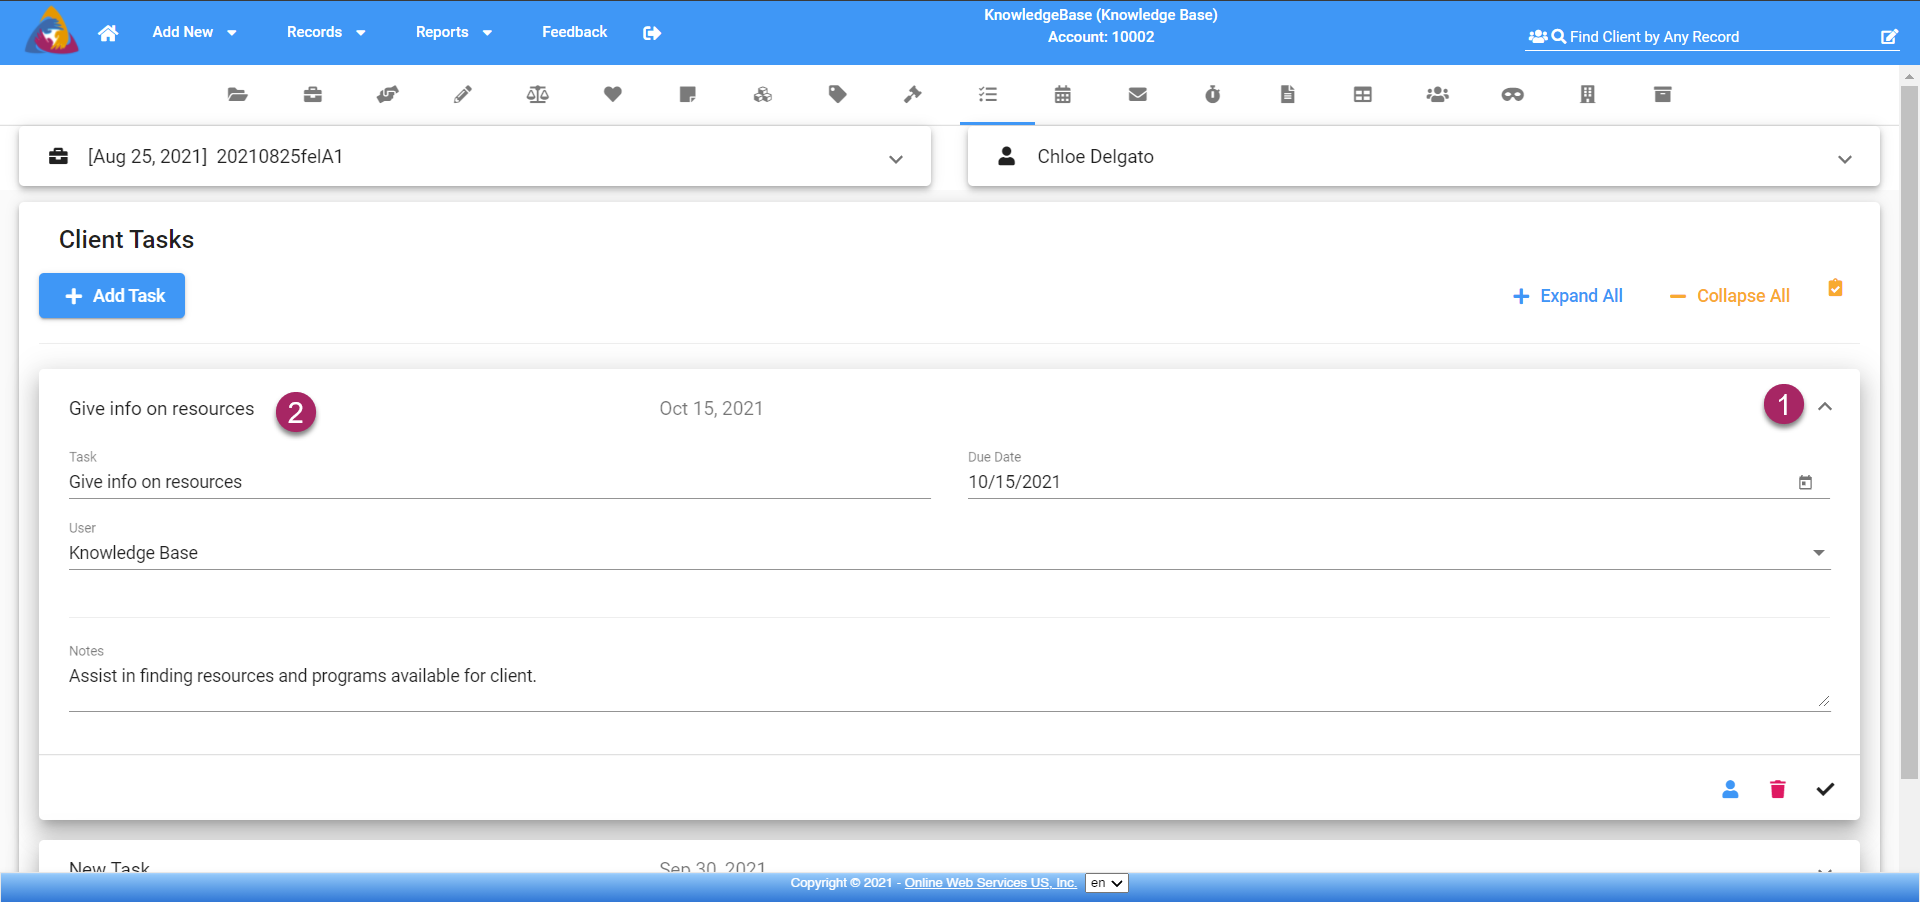
- clicking the Client Tasks icon will take you to the client's tasks tab. From here you can add new tasks as well as view and edit current tasks.
- At the top right of the screen, you will see three buttons. the first is "+ Expand All". This will expand all the tasks tabs to show more details.
- If all or multiple tabs have been expanded, you can click "- Collapse All" to collapse all the tabs.
- To view your completed tasks, click the yellow icon that looks like a clipboard with a checkmark. This will only show tasks that have been marked as completed in the list below.
Add New Task
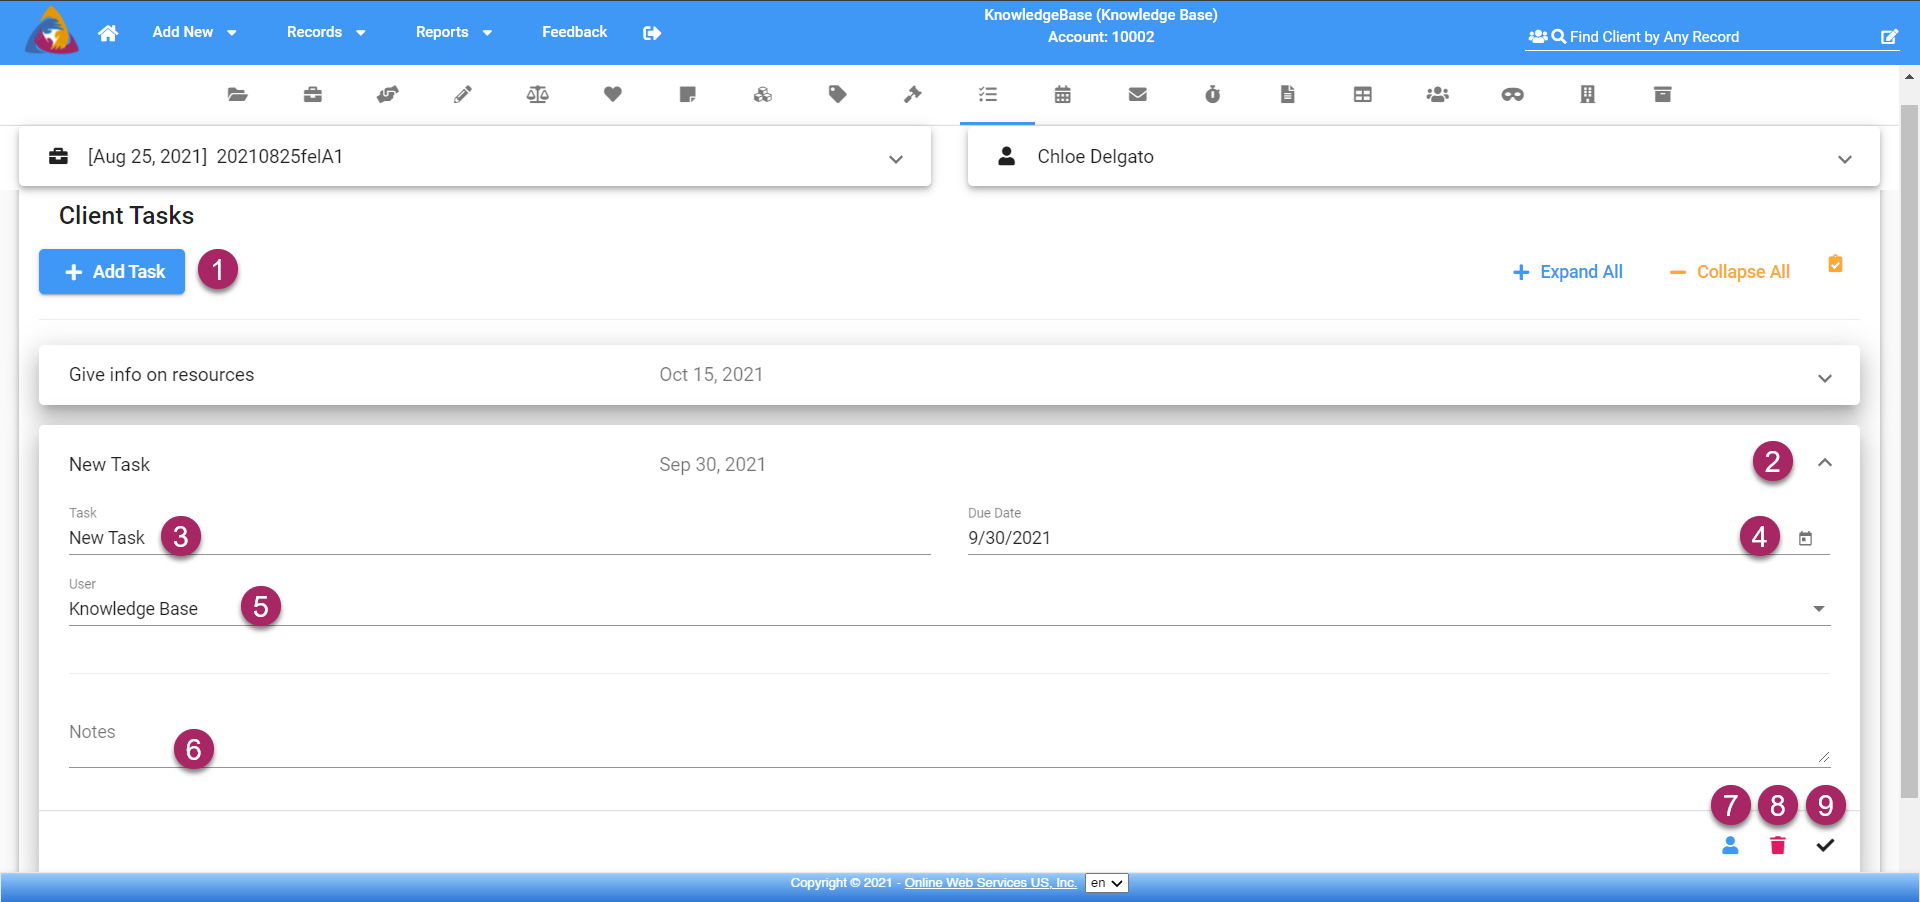
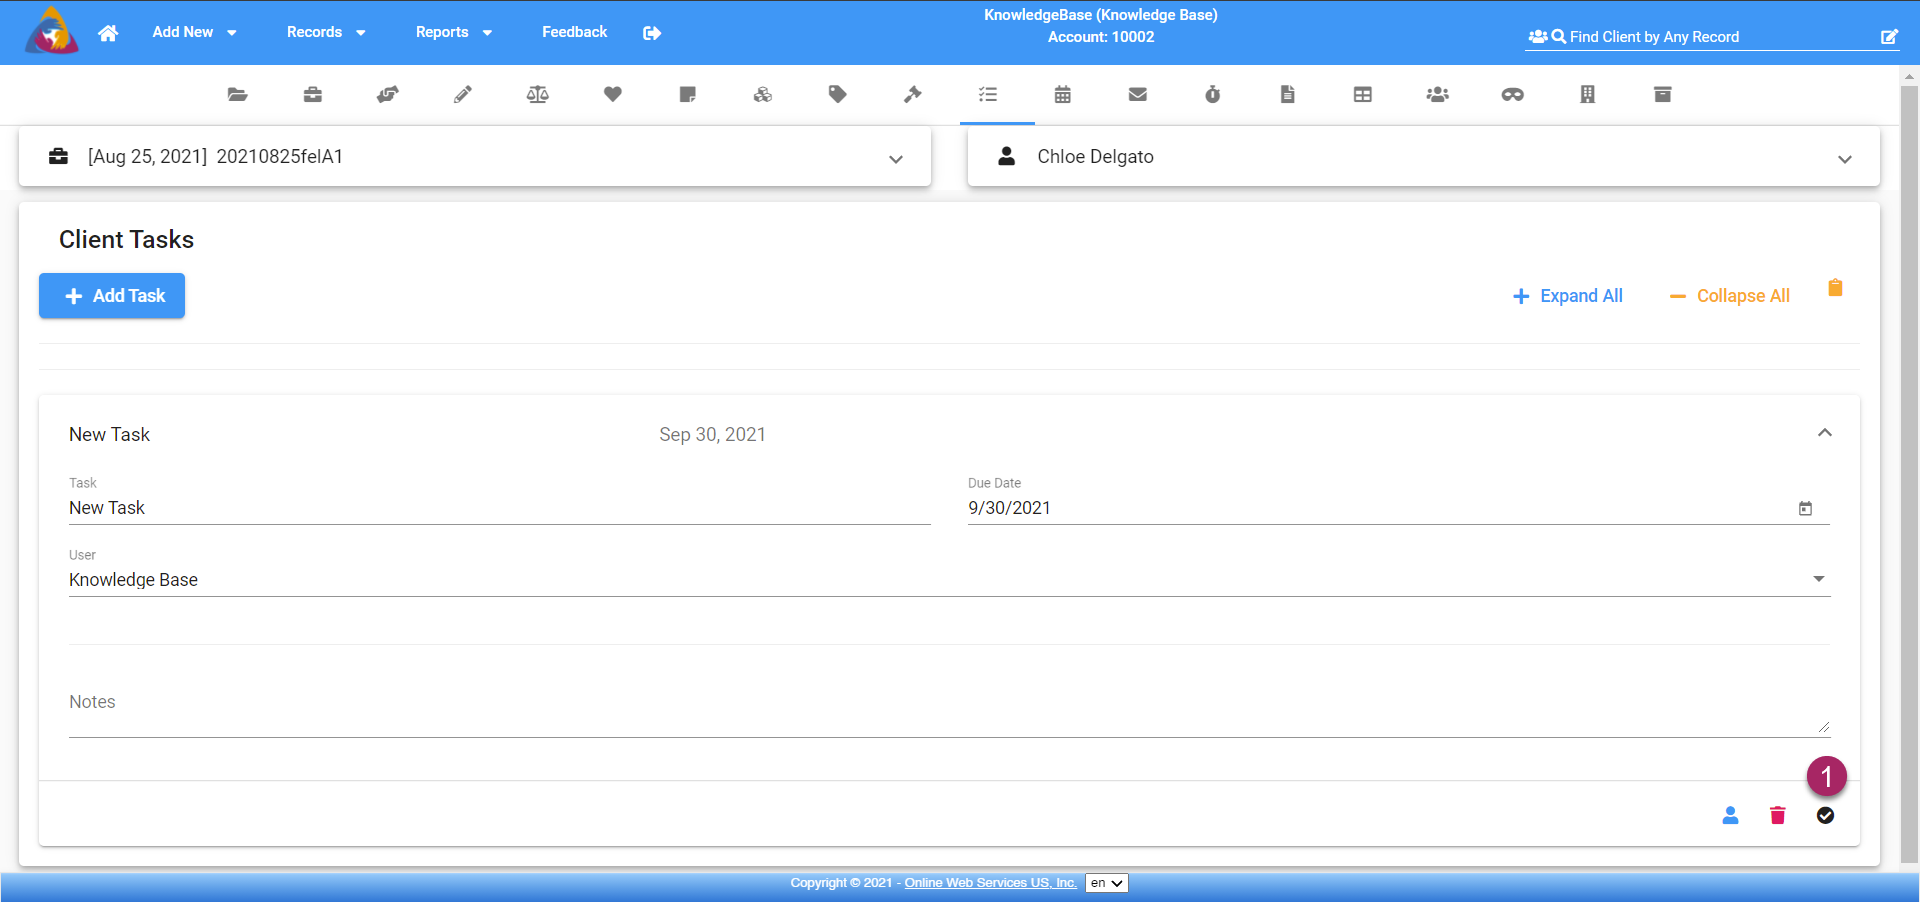
- To begin, click the blue "+ Add Task" button at the top right of the screen.
- This will create a new task in the list below. Note: the newly created task will not be expanded, to add details click the arrow icon on the right side of the newly created task's tab.
- Under "Task", enter a name or description of the task. This will show as the name of the task while viewing your list of tasks.
- In the field below "Due Date", click the calendar icon on the right side of the field and a calendar will open allowing you to pick a due date for your new task. This will default to the current date.
- In the field under "User", either click the default user (yourself) or click the dropdown arrow on the right side of the field. This will open a dropdown list of advocates to choose from. Assign the advocate that will be performing the task.
- In the field below "Notes", you can add any additional details to the task. Once complete, all of your changes will be saved automatically.
- The blue icon that looks like a person and is located at the bottom right of the screen will take you to the Client Details of the client that you are entering the task for.
- The Red trash can icon at the bottom right of the screen will delete your task
- Once a task has been completed, it can be marked as completed by clicking the checkmark icon at the bottom right of the screen.
View/Edit Task
- Start by expanding the tab of the client you wish to edit. Do so by clicking the arrow icon on the right side of its tab.
- Once the tab has been expanded, follow steps 3-9 above (Add New Task) for entering task details. All changes made will be saved automatically.
Completed Tasks
- When viewing completed tasks all functions remain the same except for the complete task button. When viewing a completed task, you are able to mark it as incomplete by clicking the icon that now appears as a checkmark in a circle.
