How do I add/edit Client Appointments?
Utilizing the Appointments tab, you can add and track appointments for clients.
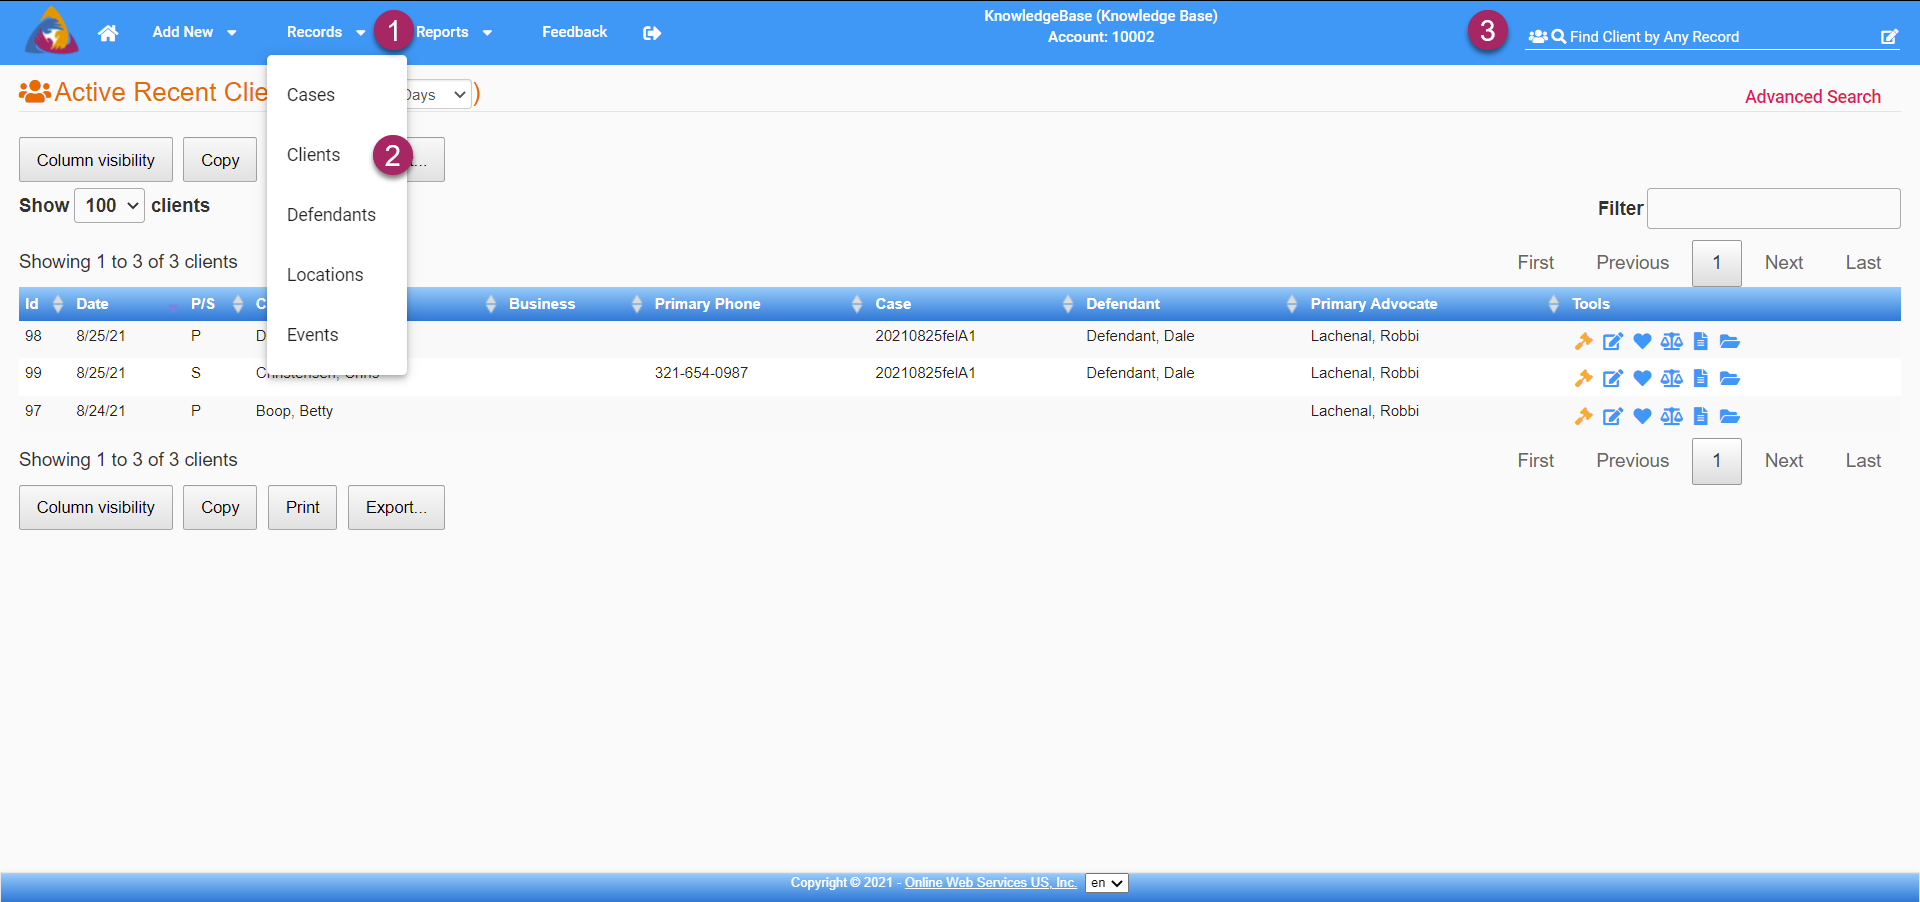
- To start, navigate to the Clients Screen by clicking on the Records dropdown on the top blue bar.
- Select "Clients" from the dropdown and you will be taken to the Clients Screen.
- You can also navigate to the Clients Screen by doing a search for clients by utilizing the search bar on the right side of the top blue bar.
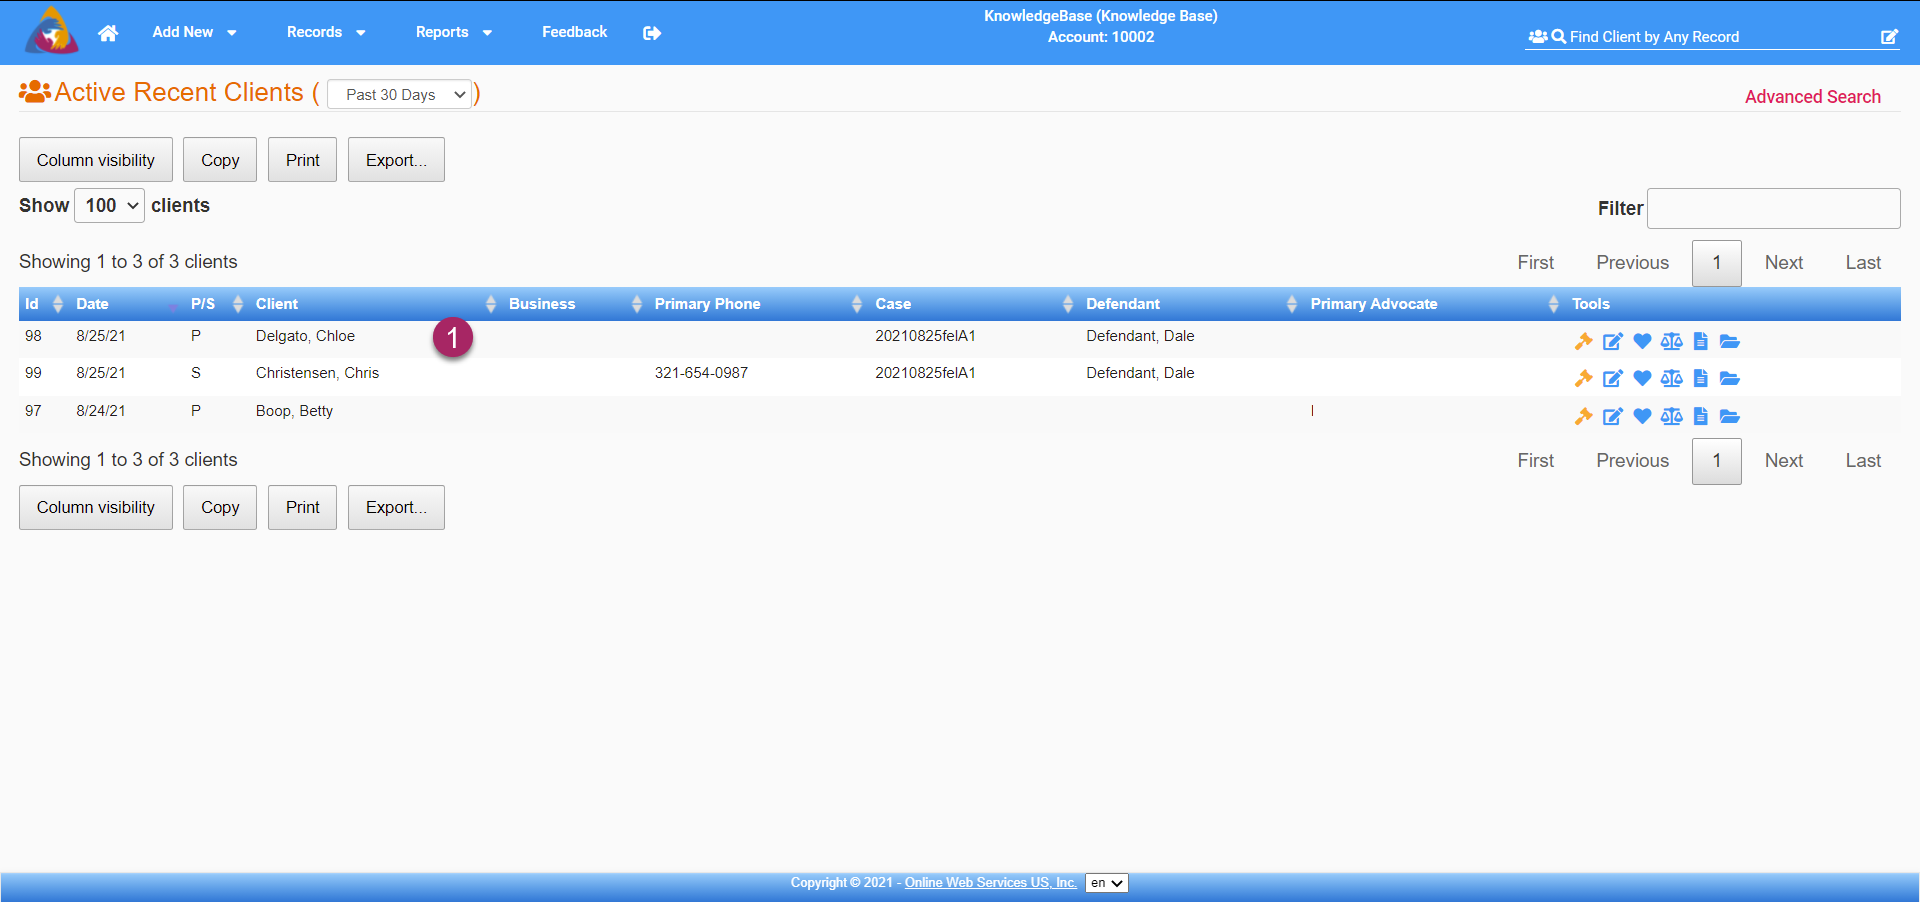
- Select a client from the list of clients to navigate to that client's info screen.
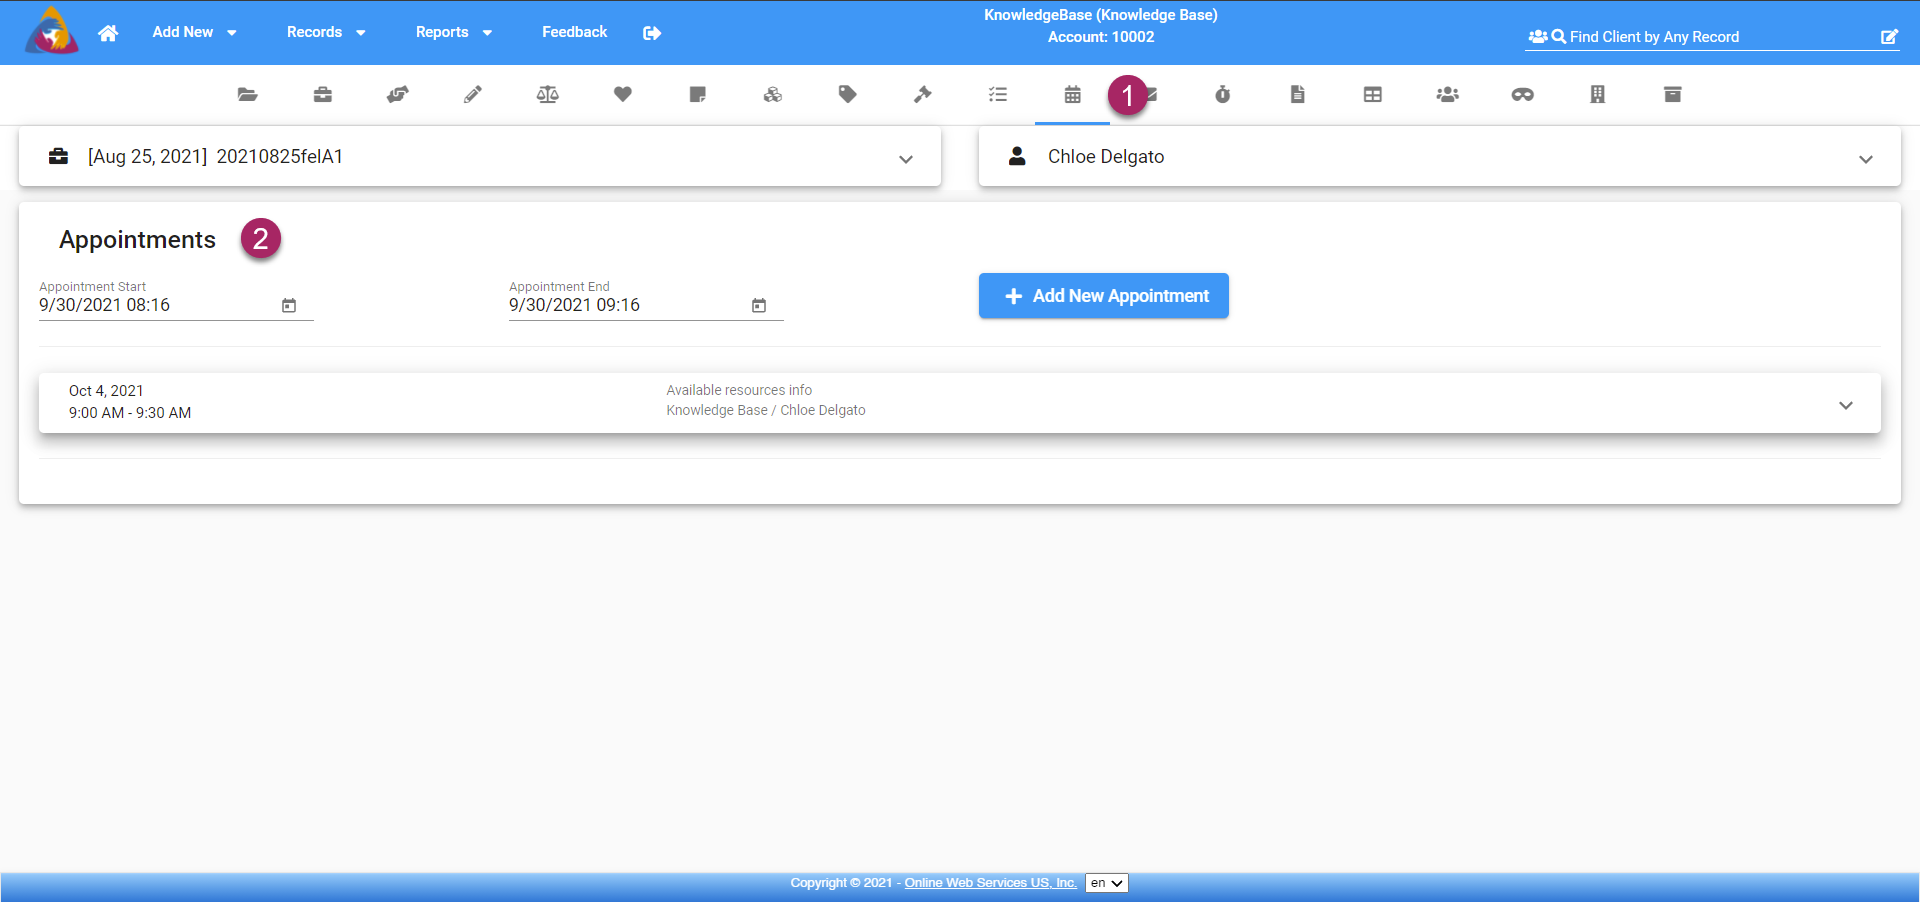
- Once on the desired client's client screen, navigate to the Appointments tab by clicking the icon that looks like a calendar. It is located on the row of icons below the top blue bar.
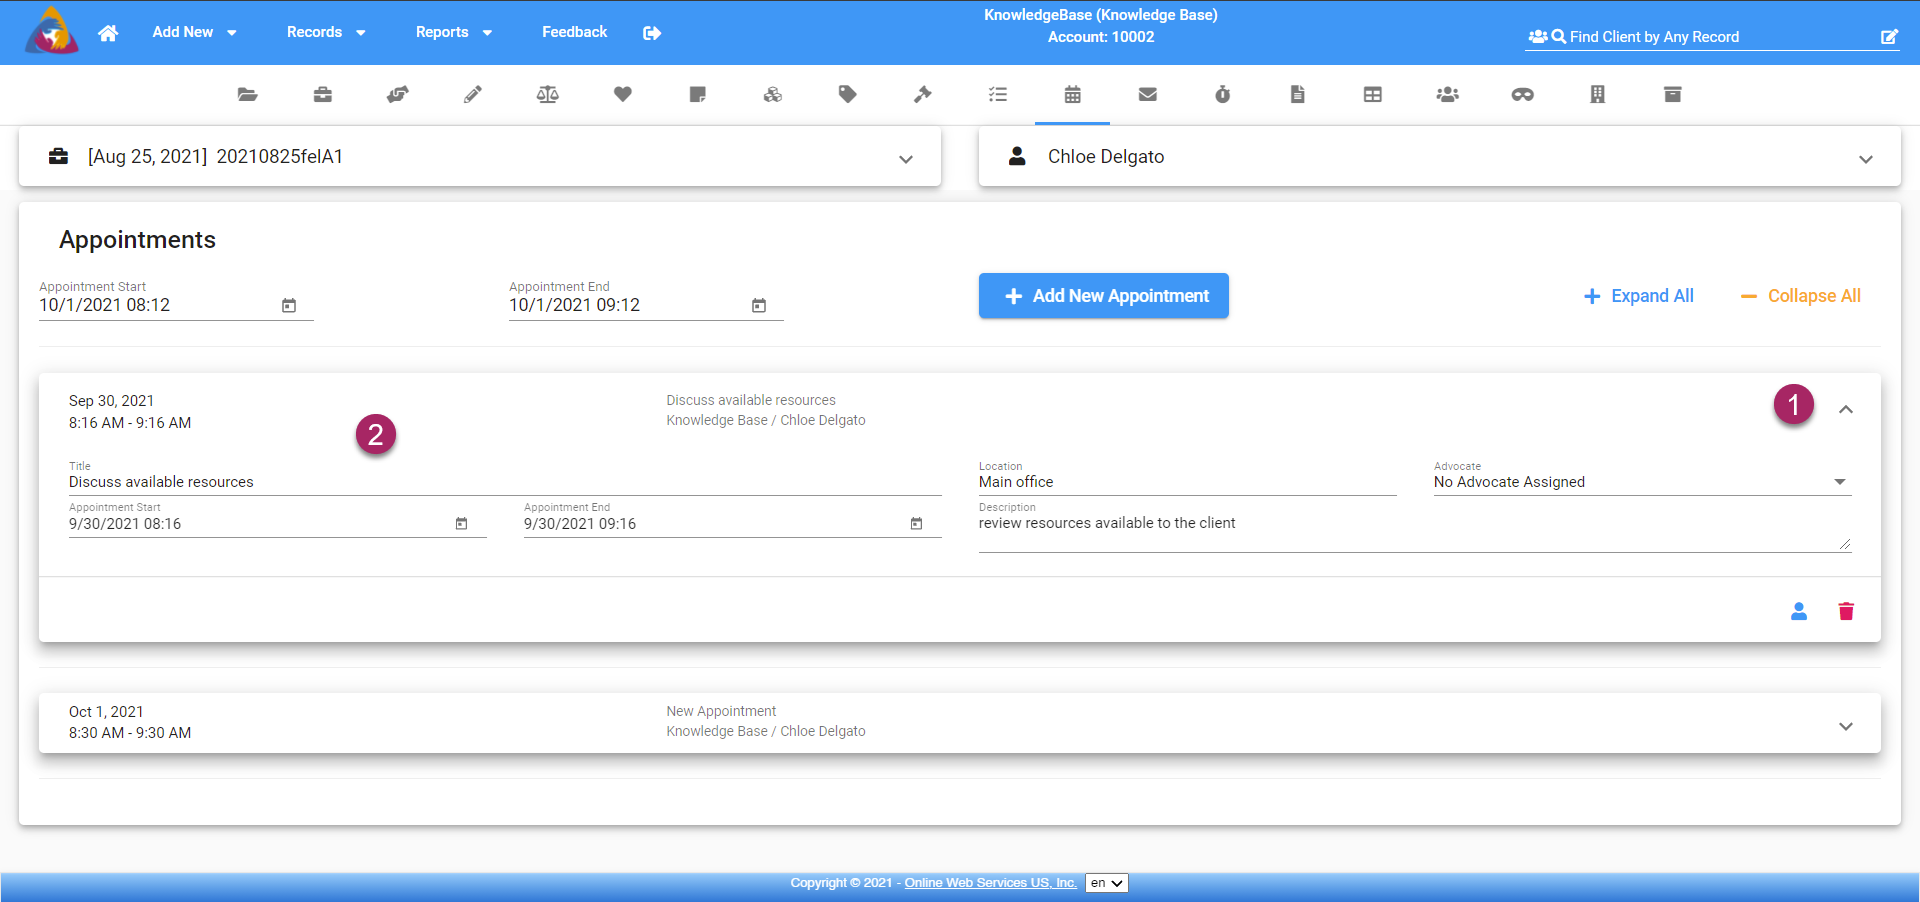
- This will bring you to the appointments screen.
Add New Appointment
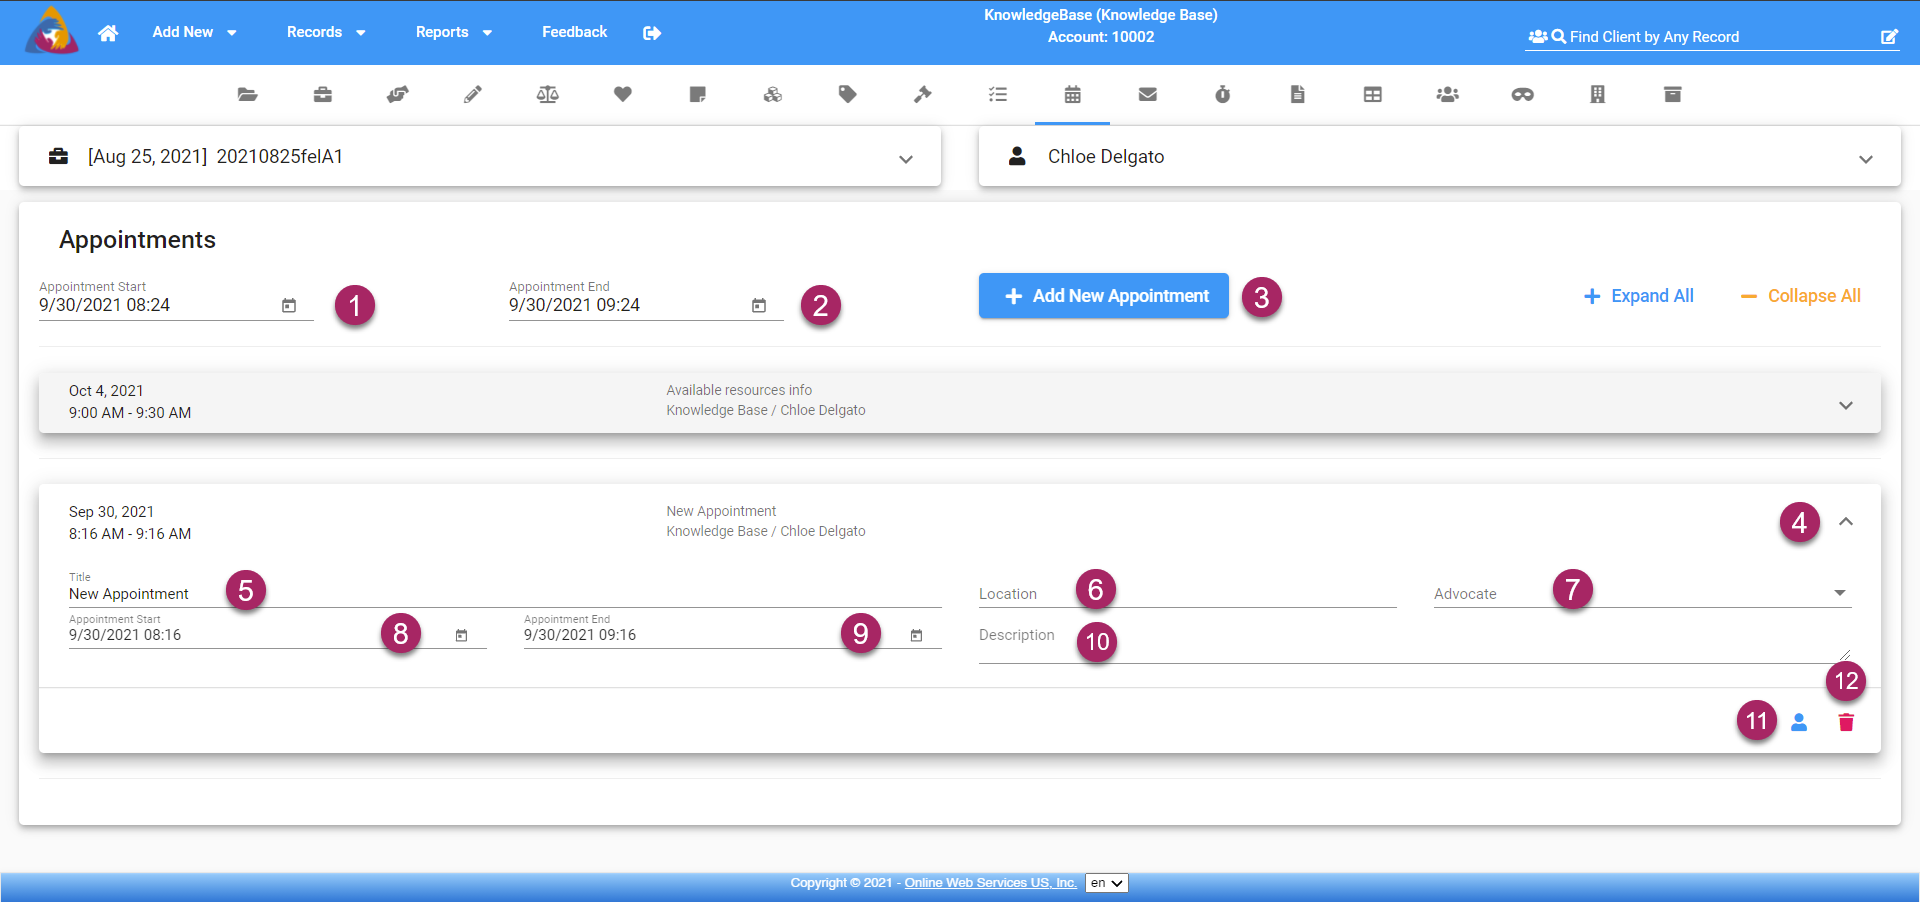
- Start by selecting a start date/time for the appointment by clicking the calendar icon in the field below "Appointment Start". Clicking the calendar icon will open a calendar where you are able to choose a start date and time.
- Next, select an end date/time for the appointment by clicking the calendar icon in the field below "Appointment End". Clicking the calendar icon will open a calendar where you are able to choose an end date and time.
- After entering start and end times, click the blue "+ Add New Appointment" button, and your new appointment will be created and added to the list below labeled as "New Appointment".
- Once added, the tab for your new appointment will be collapsed. To expand the tab and add details, click the arrow icon on the right side of the tab.
- In the field below "Title", you can enter a name for the appointment.
- The next field, "Location", allows you to type the name of the location where the appointment is taking place.
- Click the arrow icon on the right side of the field labeled "Advocate" to open a list of advocates. Select the advocate that will be at the appointment to add them.
- The appointment start date was entered at the beginning of the process, but if you have made a mistake it can be changed by clicking the calendar icon on the right side of the field labeled "Appointment Start".
- The appointment end date was entered at the beginning of the process, but if you have made a mistake it can be changed by clicking the calendar icon on the right side of the field labeled "Appointment End".
- Lastly, enter a description of the appointment, if needed, in the field labeled "Description". All data entered to this point will be saved automatically.
- Clicking the blue icon that looks like a person's head and torso will open the client details for the current client.
- Clicking the red trash can icon will delete the appointment.
Edit Appointment
- To begin, expand the tab of the appointment you wish to edit. Do so by clicking the arrow icon on the right side of the desired appointment's tab.
- The remaining steps follow the same process as adding details to a new appointment. Follow steps 5-12 above (Add New Appointment) to make changes to an existing appointment.
