
Watch the video and/or read the article below:
The system will identify your existing Version 5 Grants and allow you to configure them.
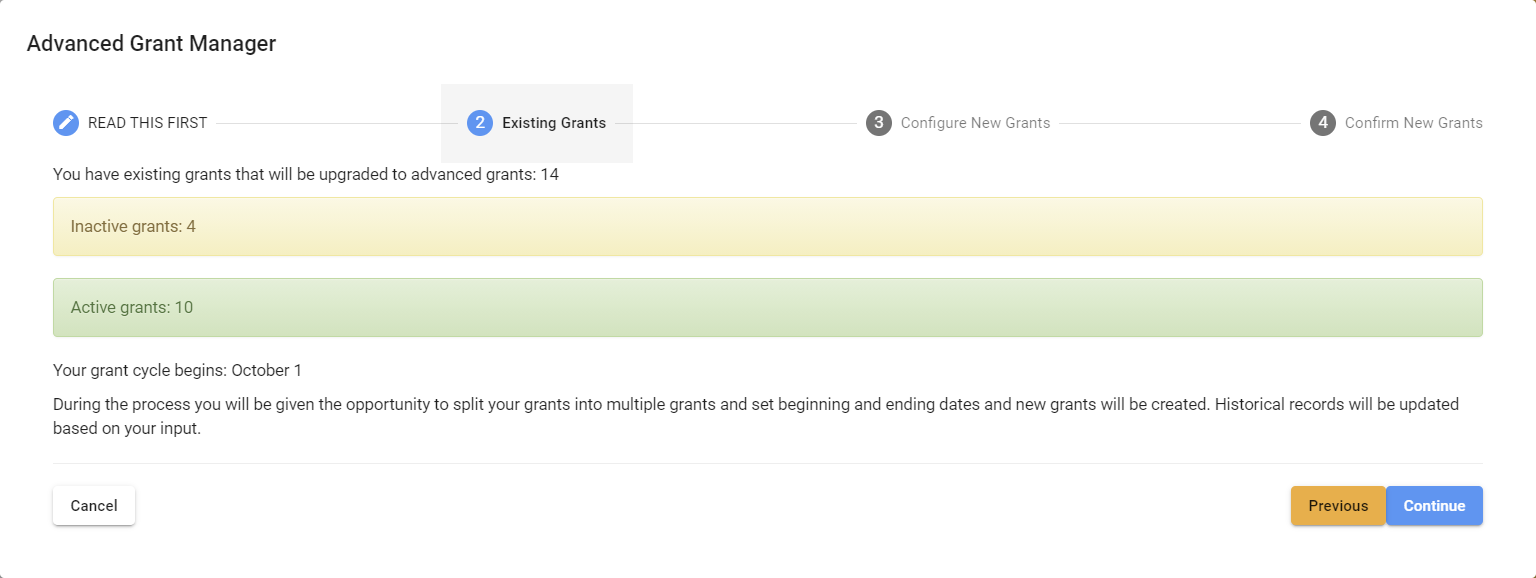
Click Continue to move to the next step and start configuring your first grant.
Configure New Grants
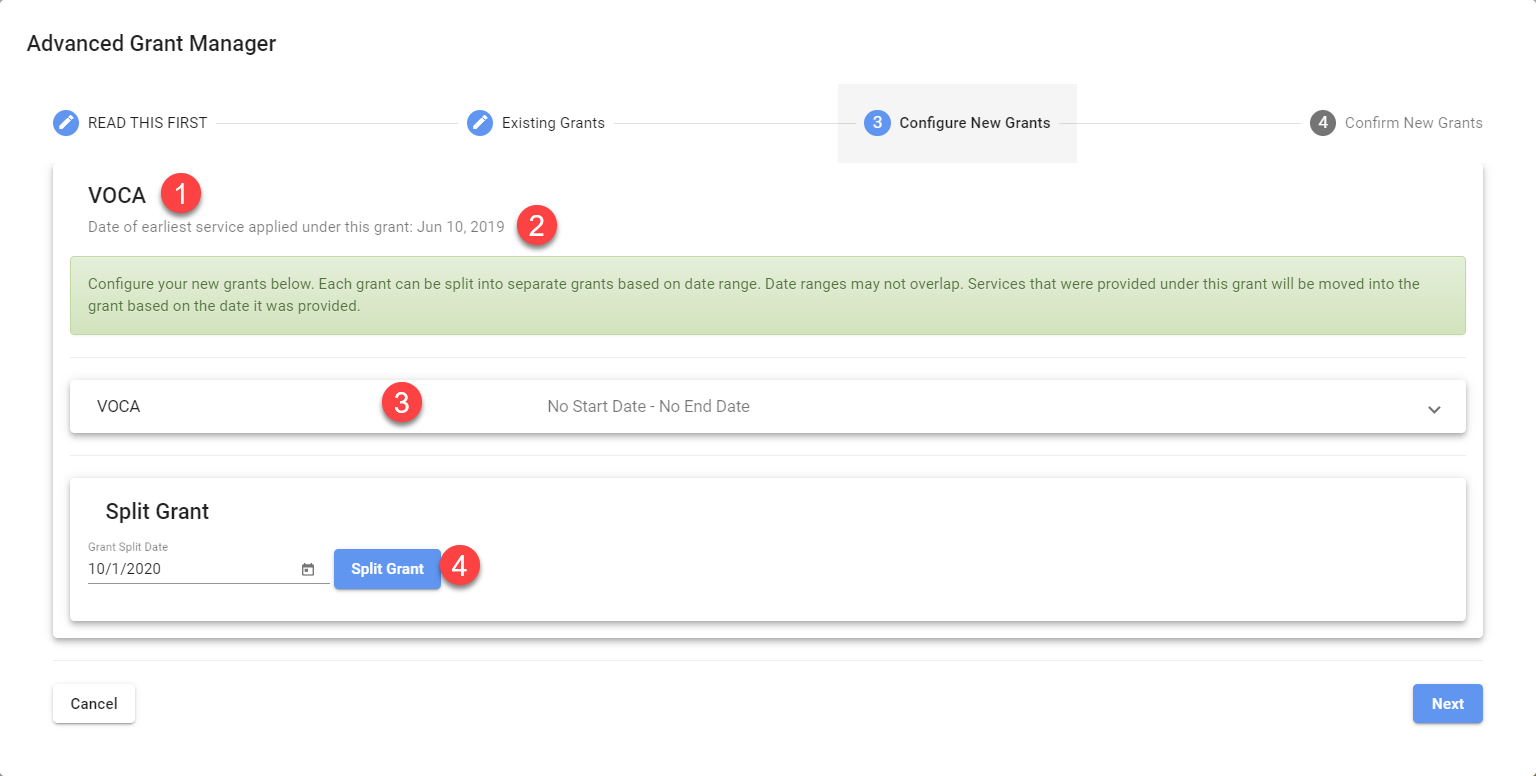
- This will tell you what grant you are currently working with
- This shows you the earliest date of any services applied to this grant
- Shows the current configuration
- Allows you to split the grant at a certain date.
- This date will be backwards from the current date to the beginning date of your current grant reporting year.
- If your grant is a 1 year cycle, and begins on the date shown, all you need to do is click the button to perform your first split.
- If your grant is on a 2 or 3 year cycle, just change the date appropriately
NOTE: The beginning and end dates of your grants determine how New versus Continuing client data is reported.
- If you are on a 3 year grant but they want you to consider each client New each fiscal year, you need to configure the grants as 1 year grants. If you configure a grant as a 2 or 3 year grant, a client will only be reported as New one time for that grant cycle.

- After you clicked split the first time, the screen will display the current grant with the begin date you entered on the previous screen to "No End Date"
- It will show you the "Split" grant from "No Start Date" through the day prior to the Begin Date of what is displayed beside number 1
- If the Split date is correct, press "Split Grant" again, or change the date then press it
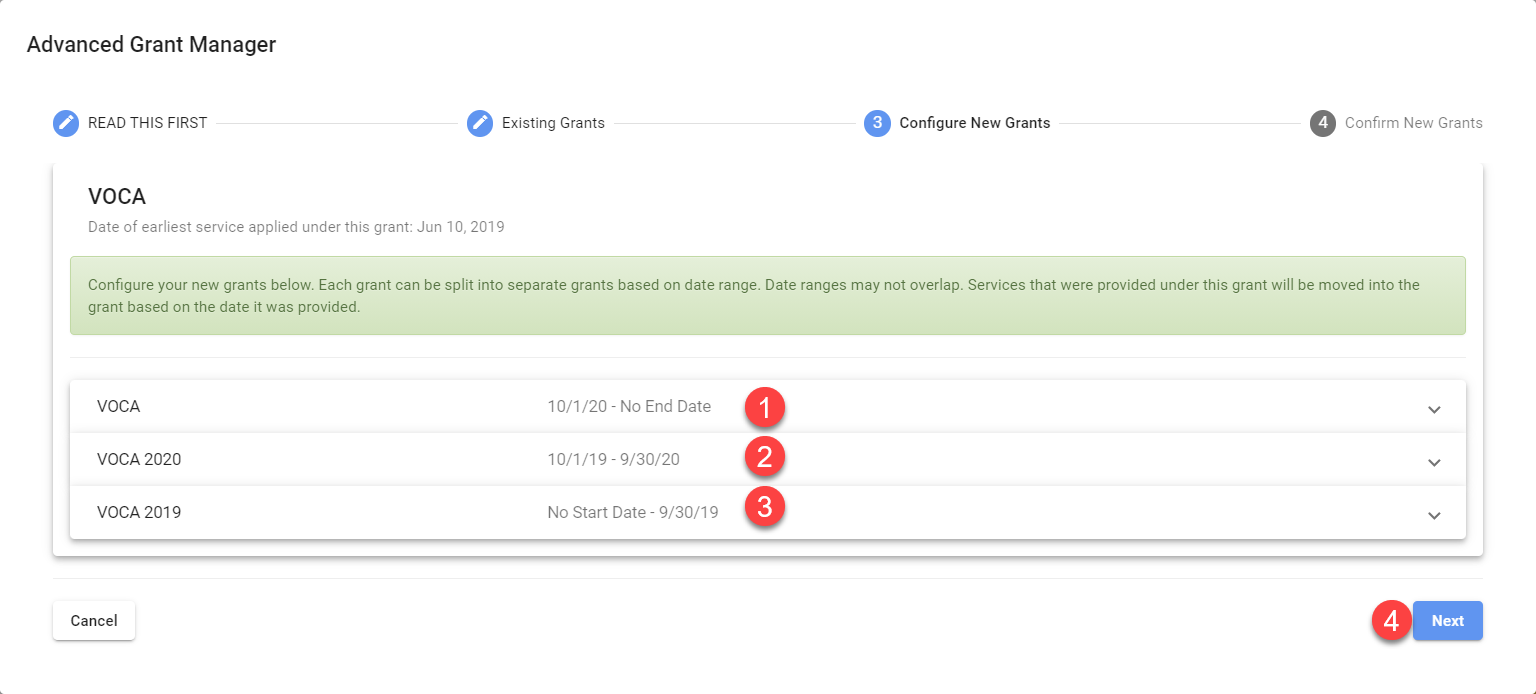
- After pressing the button, this one will remain the same
- This will now show a "Begin" and "End" date based on the split date you entered
- This is the earliest grant based on the earliest service date
- Once you have reached the earliest service date, you will no longer get the option to "Split" again and will display "Next" to allow you to go to the next grant
Modifying Grant Details

- Use the carrot icon to drop down to display the grant details for editing
- When not grayed out, you will be able to edit the Start Date
- When not grayed out, you will be able to edit the End Date
- Choose grant types VOCA, VAWA or Other
- If you know and want to put your grant id number, you can do it here
- This is the grant name that users will see throughout the system
- If can place the grant award dollars here if you would like
- If you wish to track the percentage of services to be applied to the grant, you set the percentage here
- Add any additional description you would like about the grant here
Next Grant
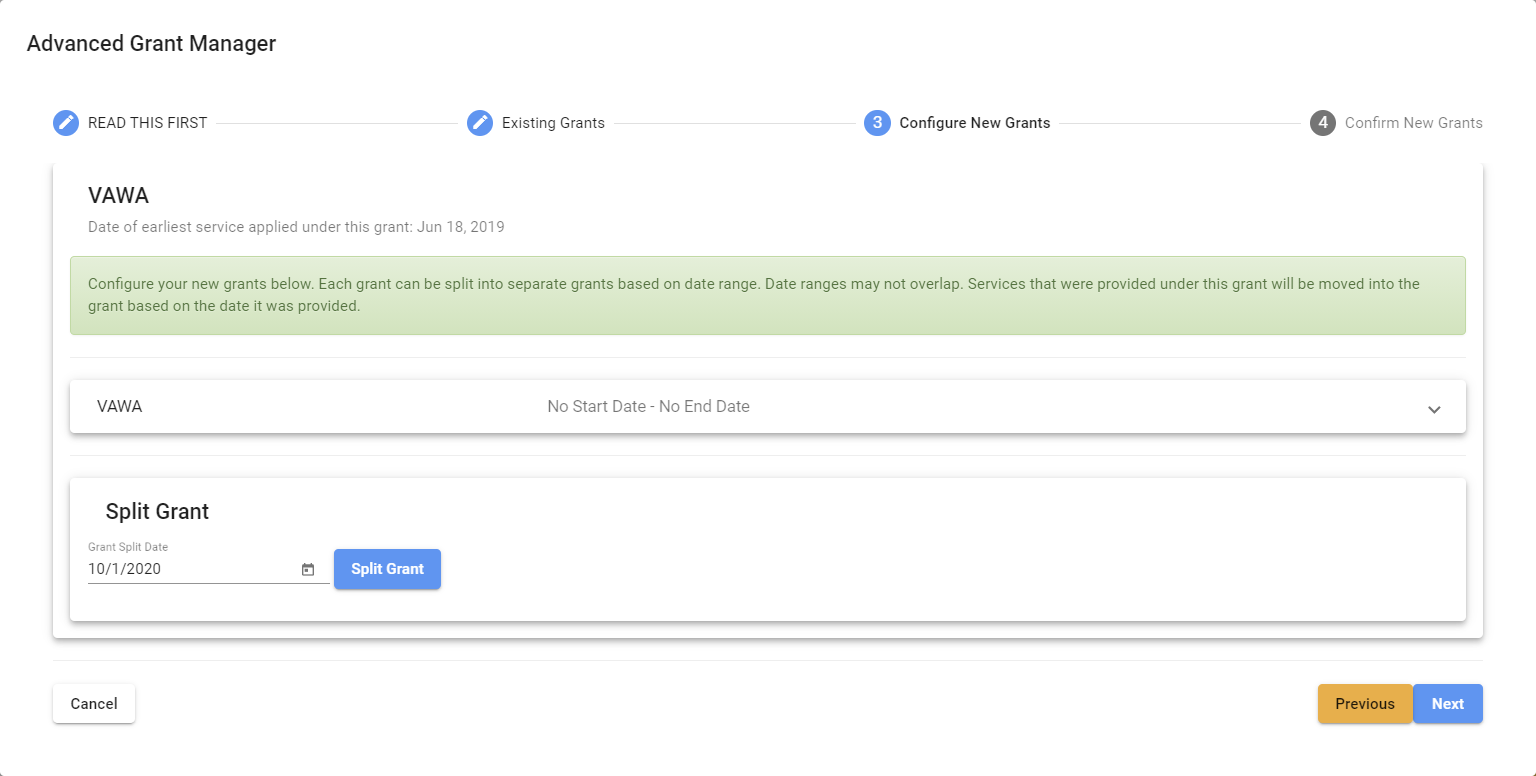
The process continues for EACH separate grant you had setup in Version 5.

- You can return to the previous screens to make changes
- Confirm and finish the upgrade