How do I add/edit Users?
As an admin user, you are able to add and edit your accounts users through the Add/Edit User Profiles and Login tab in the admin settings.
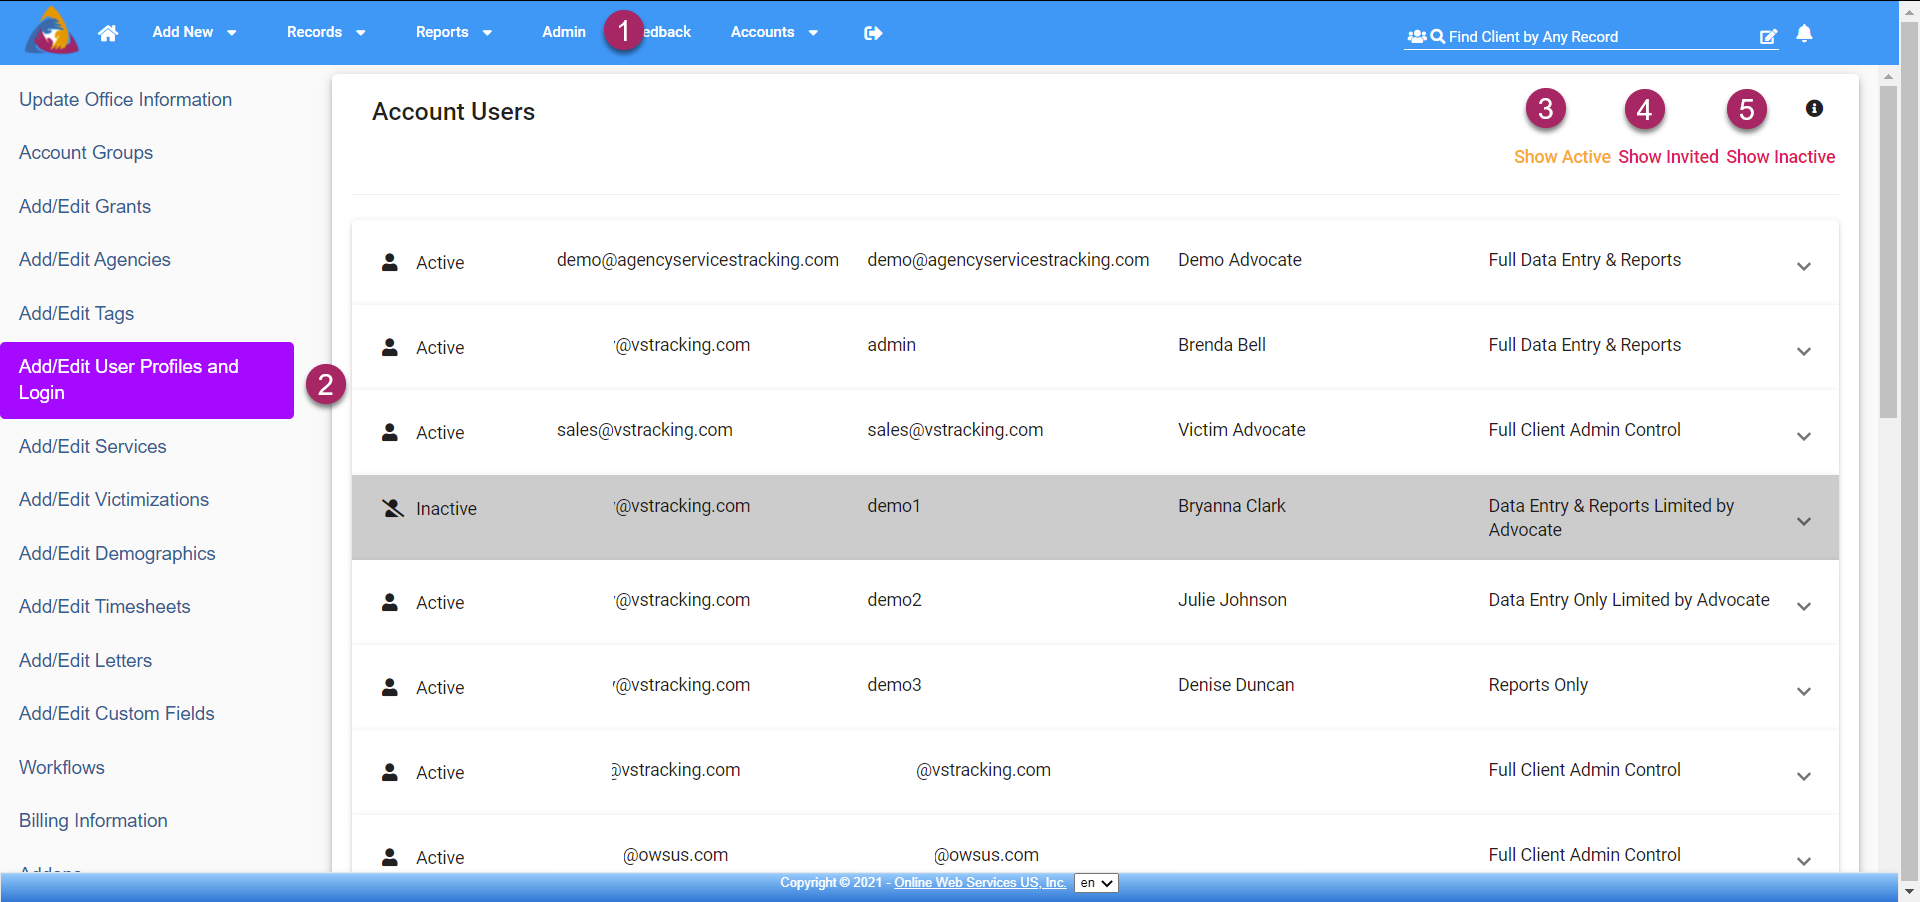
- To access Account Users, navigate to the admin settings by clicking "Admin" on the top blue bar.
- Next, click the "Add/Edit User Profiles and Login" tab and you will find the Account Users tab.
- The list of users on your account can be filtered by using the options in the top right corner. The first option, "Show Active", filters the list to only show active users.
- The second option, "Show Invited", will display only users who have been invited to the account but have not yet activated their profile.
- The last option, "Show Inactive", only shows users that have been deactivated from the software.
Edit Users
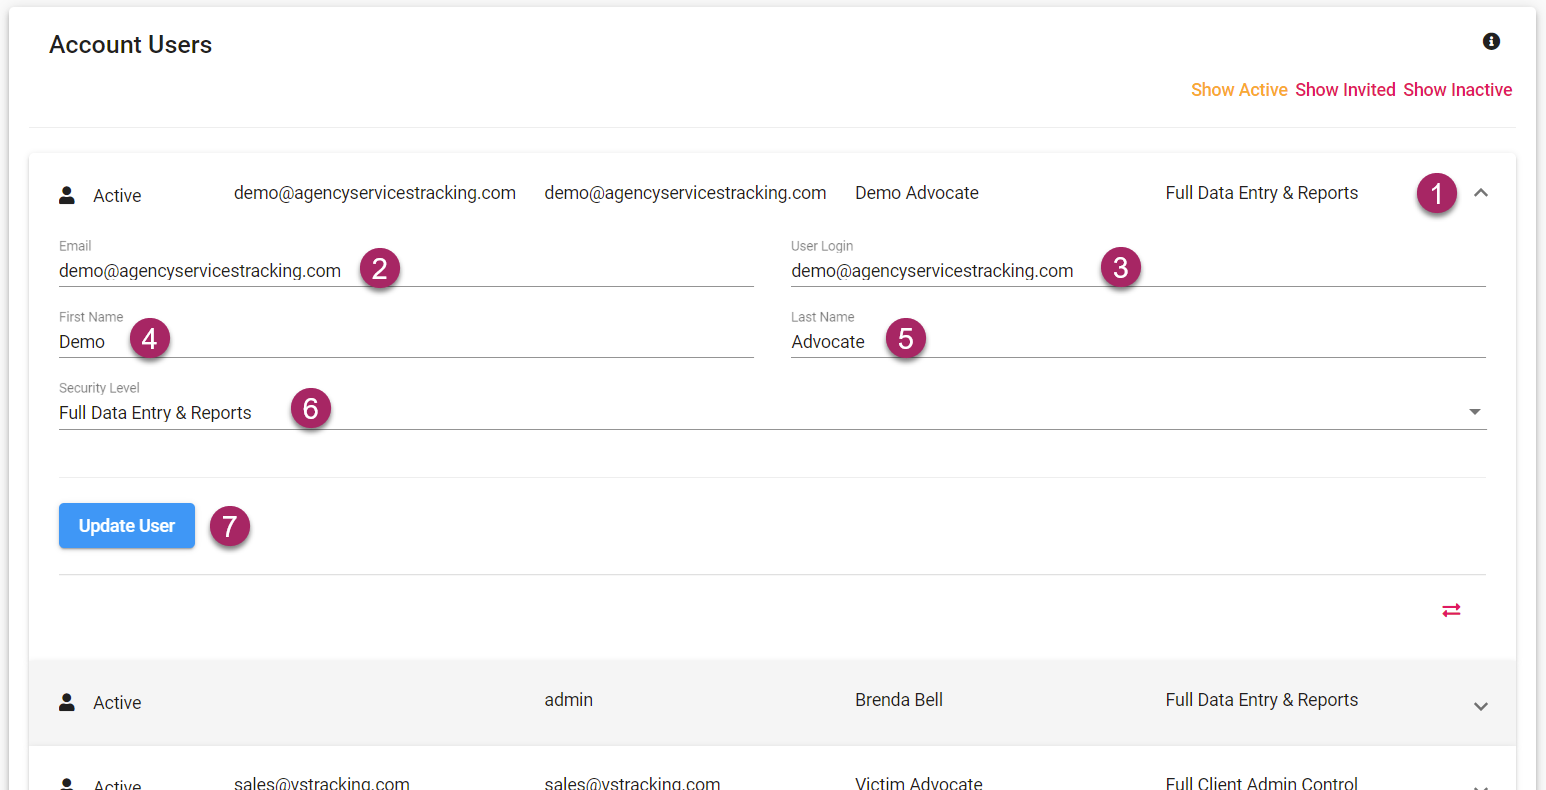
- To edit a user, expand the tab of the user you wish to edit by clicking the arrow icon on the right side of the desired tab.
- Change the user's email by clicking in the field below "email" and entering the new email you wish to assign to the user.
- A User Login can be assigned to the user, this is a unique id that identifies the user when they log into the software.
- If there is a change in the user's first name, it can be edited in the "First Name" field.
- If there is a change in the user's last name, it can be edited in the "Last Name" field.
- If a user is being allowed more, or less, security access, their security clearance level can be adjusted using the "Security Level" dropdown field. Security Levels will be detailed below.
- Once all desired changes have been made, click the blue "Update User" button to finalize and save your changes.
User Security Levels
- Full Client Admin Control
- User will have full control and access to the entire software: Admin screen to create and maintain custom configurations, etc; The ability to view ALL data entered (even things made confidential by others); The ability to delete names/cases out of the database.
- Full Data Entry & Reports
- Users can view all data entered EXCEPT data made confidential by others (unless they are assigned to view); This security level does NOT have access to the Admin screen and cannot delete names/cases from the database.
- Data Entry Only and Data Entry & Reports Limited by Advocate
- Users can only view the data they have entered and anything they are assigned to.
- Read
- Users can only view data. They CANNOT add or edit any data; will not see anything confidential unless they are assigned to it.
- Reports
- Users can generate, view, and print reports; Reports will include any non-confidential data and any confidential data they are assigned to view.
Add/Invite a New User
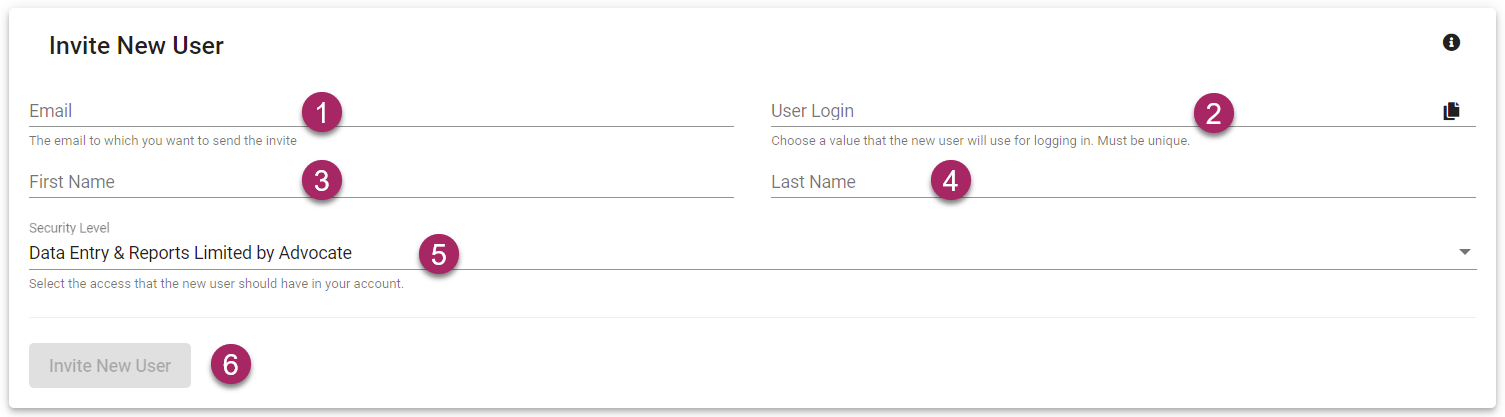
- Enter the new user's email into the field labeled "Email". An email will be sent to the invited user at this email address so be sure to check spelling before continuing.
- Enter a User Login (Username) for the invitee. This will be used by the invited user, in conjunction with a password they create from the invite email to log in to the software. If there is not a desired username, the user's email can be used, and clicking the icon on the right side of the field that looks like two sheets of paper will copy the email input during step 1 into the "User Login" field.
- Click the "First Name" field to enter the first name of the invitee.
- Click the "Last Name" field to enter the last name of the invitee.
- In the dropdown field below "Security Level", you can choose the appropriate level of security clearance for the new user.
- Once you have entered all info and checked for accuracy, the "Invite User" button will turn blue and you can send the New User invite.
