
Tags can be added to a location on the location's "Location Tags" tab.
Note: To add tags to a location, the Tag Manager Module must be enabled by an administrator on your account. They must also create tags for your agency to be added.
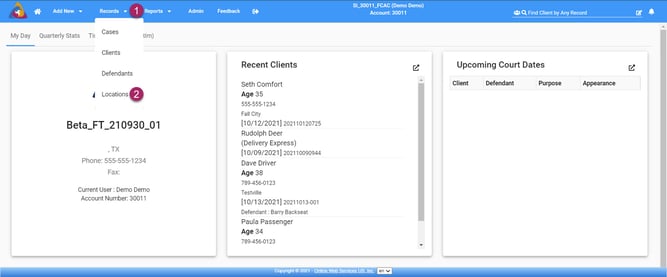
- To start, click the records dropdown on the top blue bar. This will open a dropdown menu showing the categories of records.
- Select "Locations" from the list and you will be taken to the Locations Screen where you can choose the location you wish to add tags to.
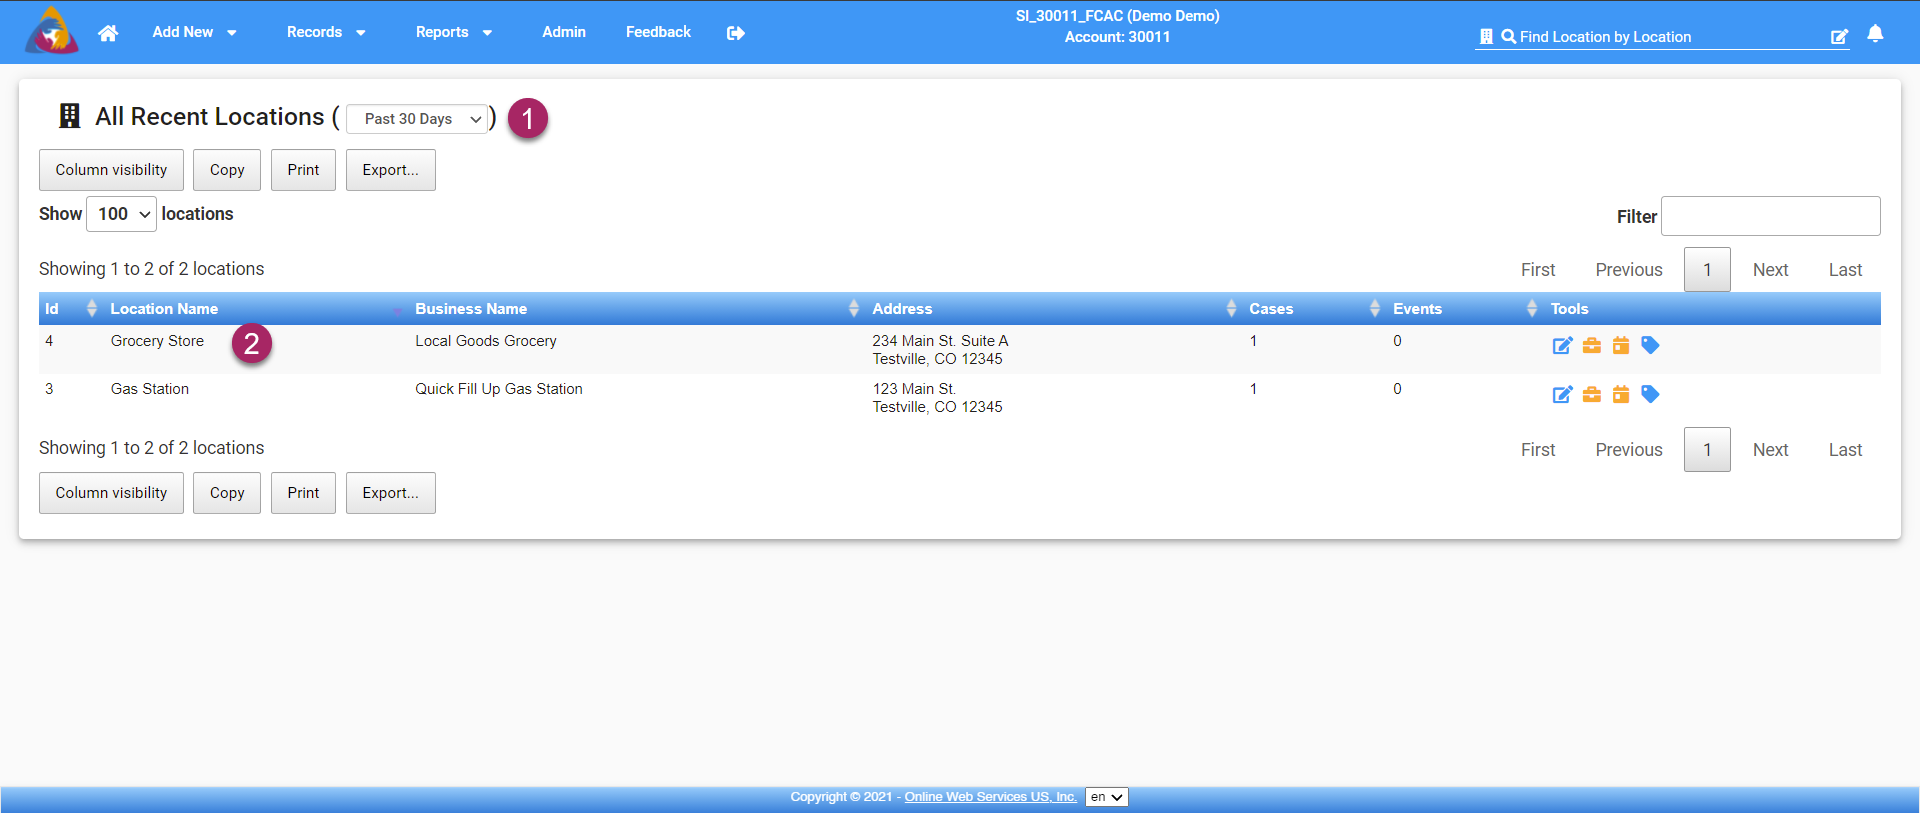
- Now you will have reached the Locations Screen and will be able to see all recently added Locations.
- Select the location you wish to add tabs to from the list by clicking on it.
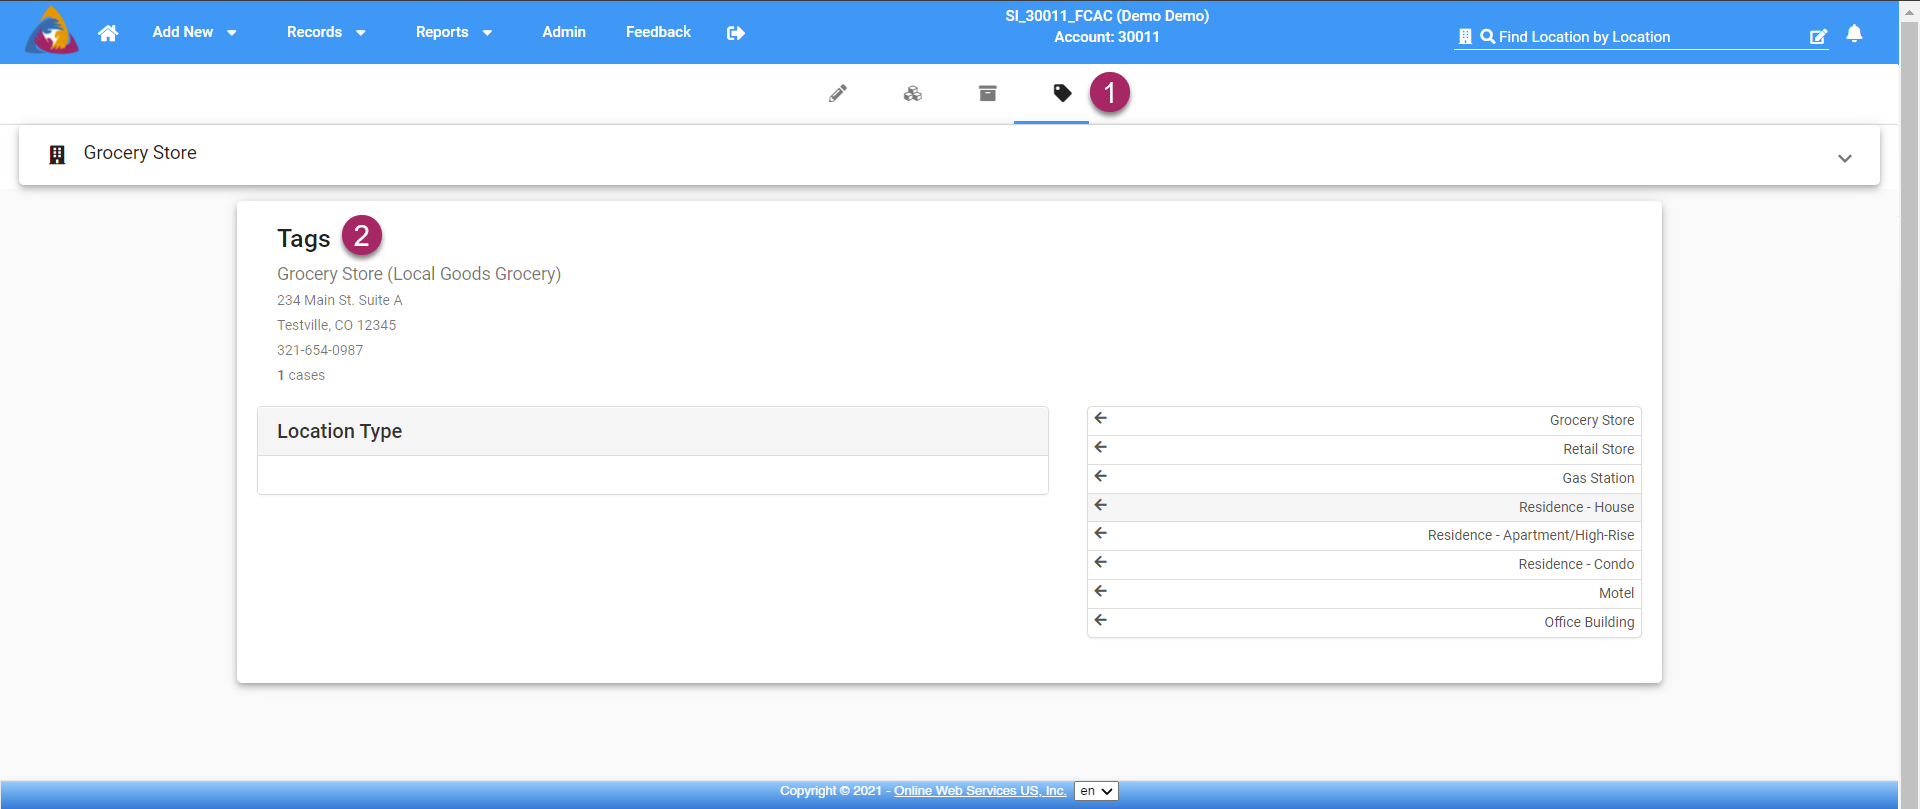
- You will now be taken to the location's Location screen. Select the "Location Tags" tab by clicking the icon that looks like a price tag. It is located o the row of icons below the top blue bar.
- This will take you to the "Location Tags" tab (shown above) where you can add tags to your location.
- On the "Location Tags" tab you will see the location you are adding tags to as well as its details.
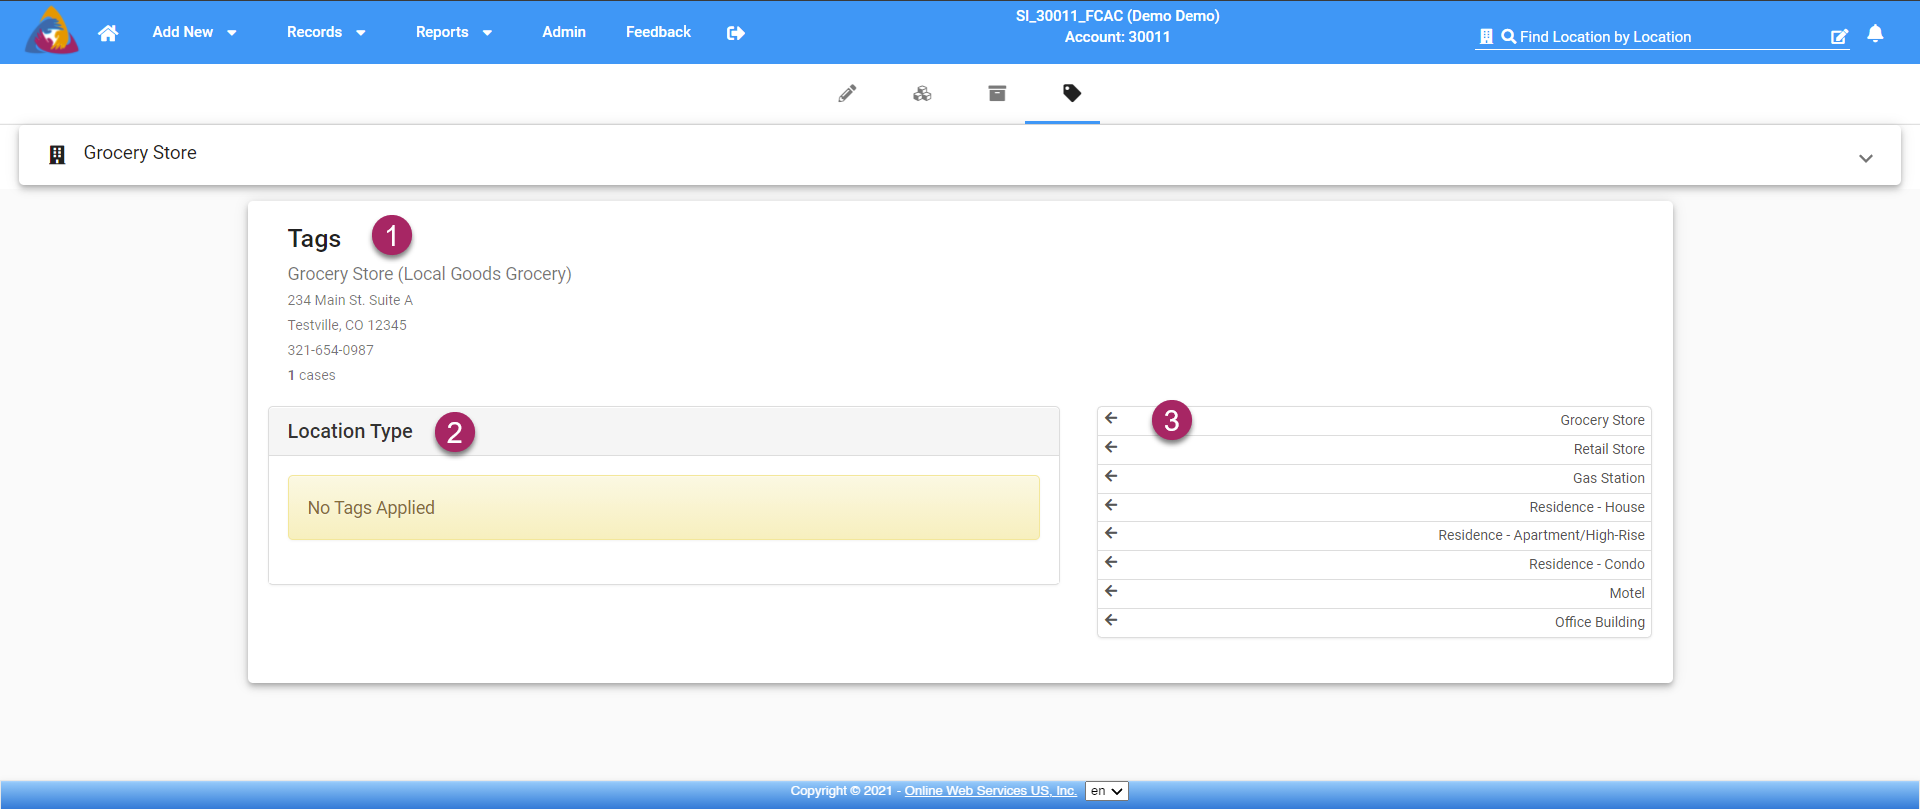
- Tags will be separated by category. In this case, there is only one category: "Location Type". Added tags will appear here.
- On the right side of the screen are available tags to add. Click on the tag you wish to add and it will be added to the corresponding category on the left side of the screen.
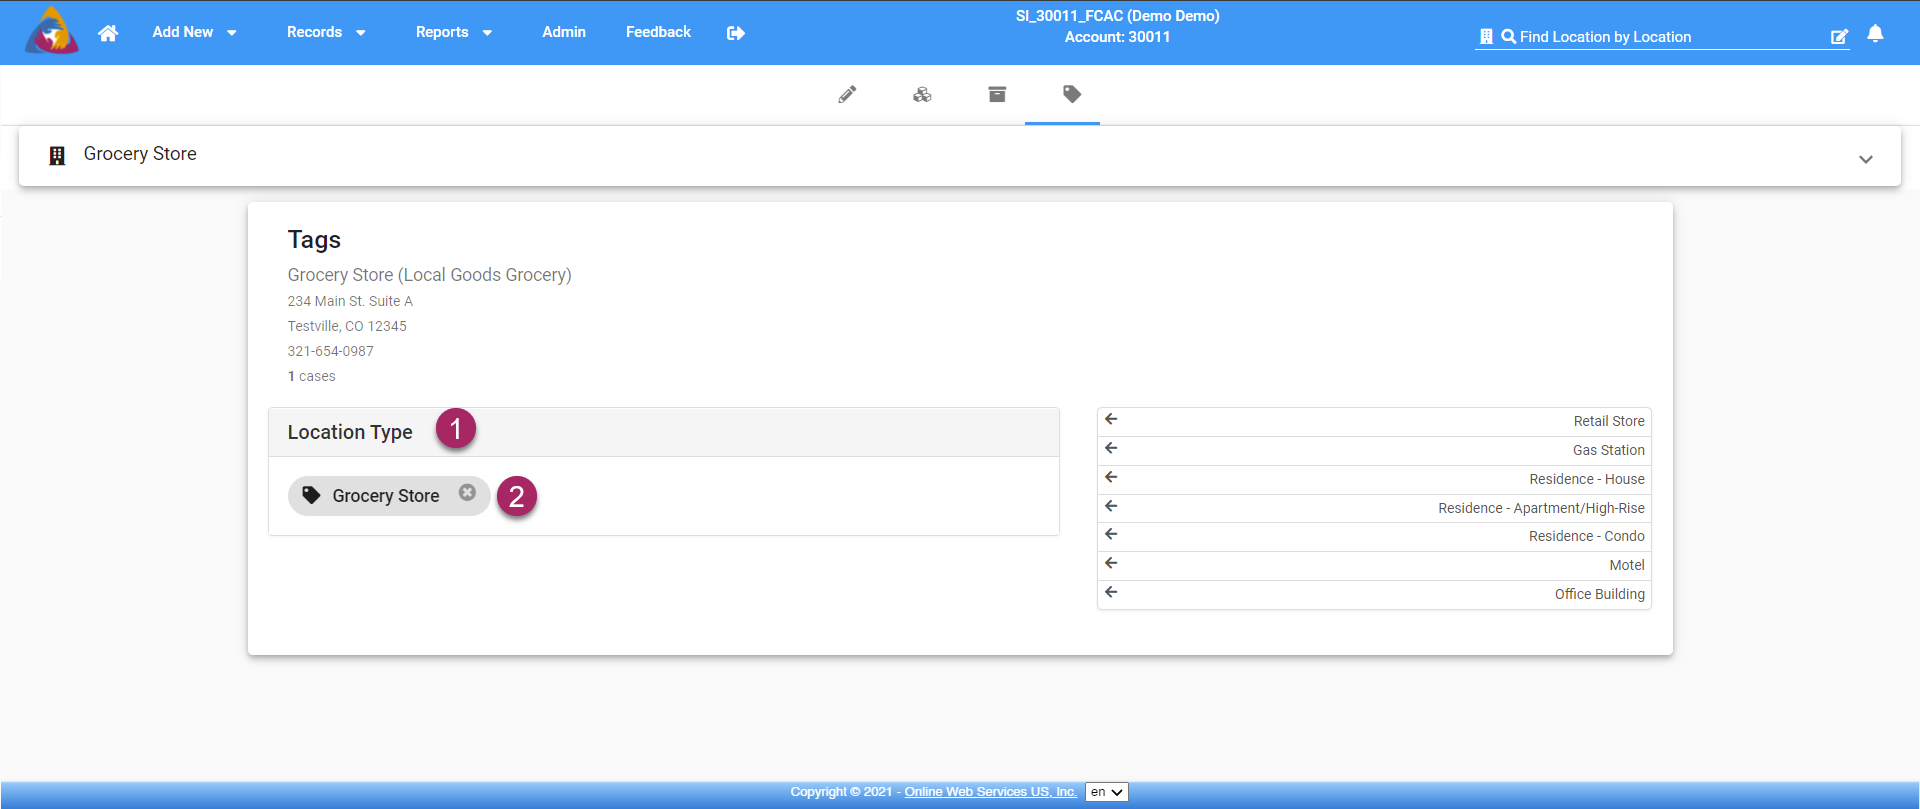
- Added tags will appear on the left side of the screen below their category.
- If you wish to remove a tag, click the "x" icon on the right side of the tag. This will remove the tag from the location and add it back to the list of options on the right side of the screen.