
The Human Trafficking Report can be accessed through the "Reports" dropdown on the top blue bar. It will show you details about cases involving human trafficking.
Note: Your agency must be using a version of the VST software that includes additional Human Trafficking features and functions. Talk to your admin to see if your software has these additional features. If you would like to add VST's Human Trafficking features, please contact your sales representative.

- To navigate to the Human Trafficking Report, first, click the "Reports" dropdown on the top blue bar.
- Next, select "Human Trafficking" from the dropdown list. Doing so will navigate you to the Human Trafficking Report.
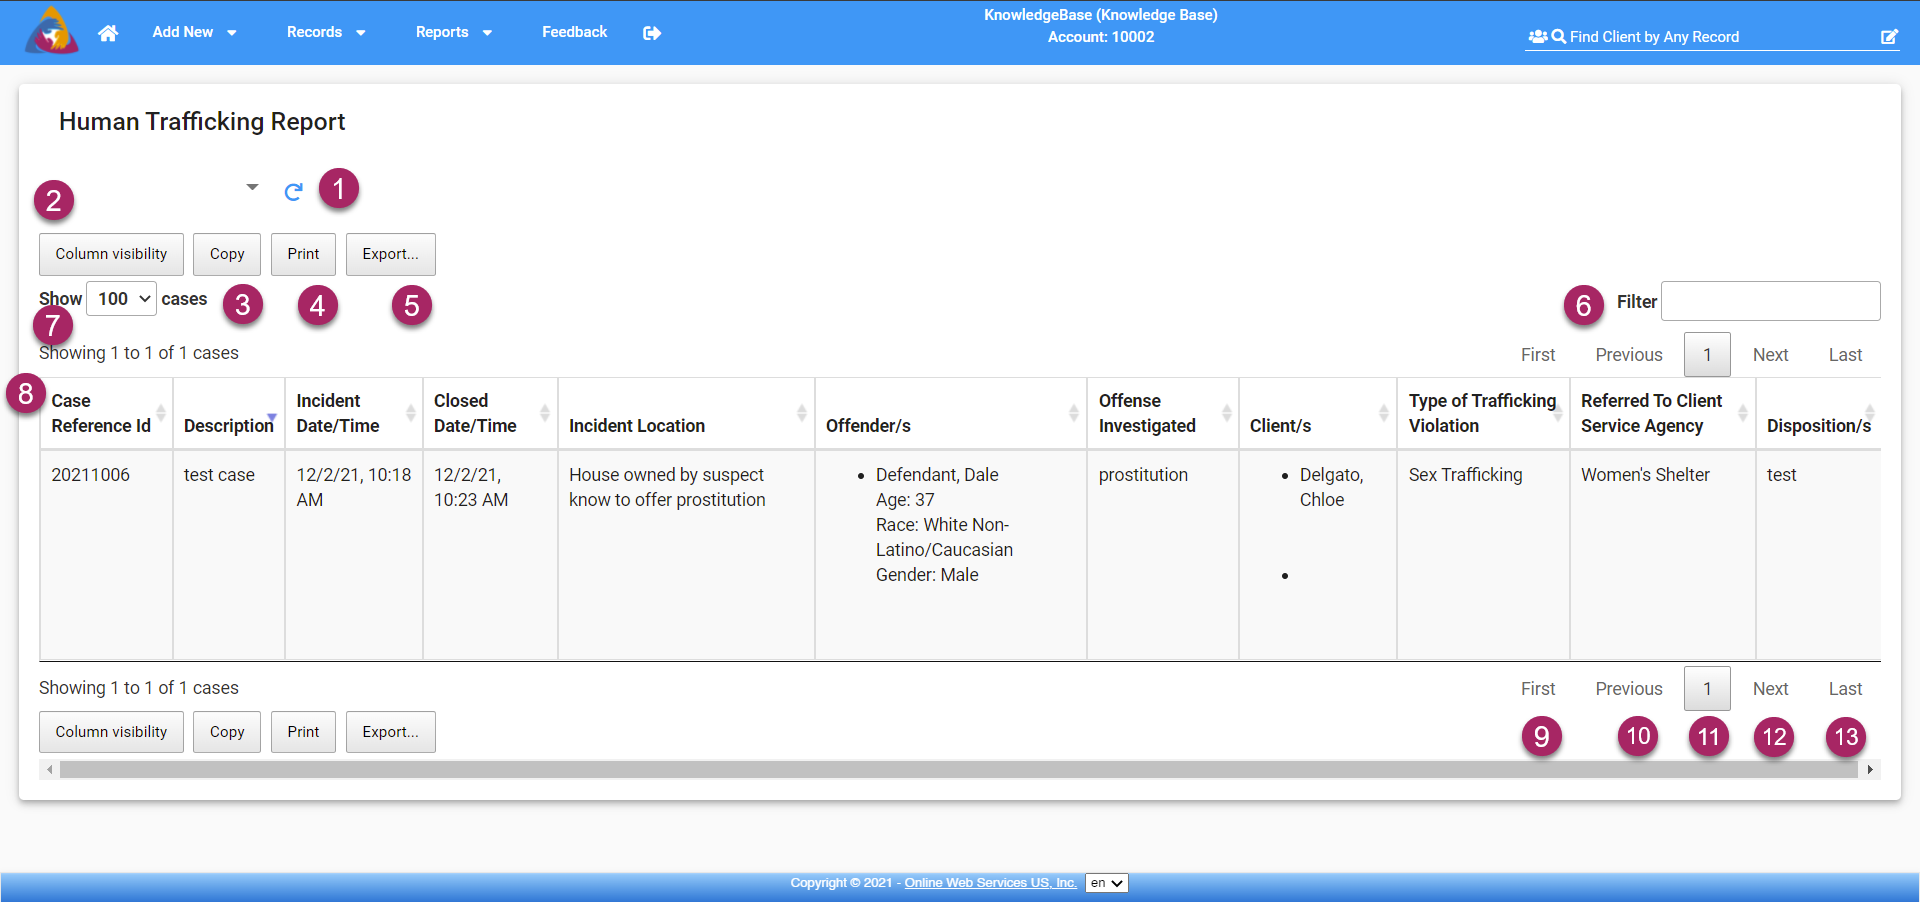
- At the top of the Human trafficking report, you will see a circular blue arrow icon. Clicking this icon will refresh the report to ensure that you are seeing the most up-to-date data.
- Below the refresh icon, you will see 4 grey buttons, the first of which, is labeled "Colum Visibility". This will open a list of the columns available for your report. By default, all columns will be activated. To deactivate a column and remove it from the report, click that item on the list and it will be disabled. Click it again to re-activate that column.
- The next button is labeled "Copy". Clicking this button will copy all of the data in the report so that it can be pasted into a spreadsheet.
- Clicking the button labeled "Print", will open a new tab displaying the report in a printer-friendly format. It will also open your computer's print window, allowing you to select a printer and print the report.
- The next button, labeled "Export", will create an exportable file that can be downloaded to your computer. Clicking the button will open a list of 3 file types that you can choose to export. Click the desired file type and you will be prompted to name and save your file.
- On the top right side of the report is a search box labeled "Filter". Here you can enter a name, case number, or other details to find specific information in the report.
- On the left side of the screen, below the 4 grey buttons, you will see a dropdown field labeled "Show ___ Cases". clicking this dropdown will allow you to adjust the number of cases shown per page. The number shown is the number of cases currently being shown per page.
- The lower portion of the page will show your report. At the top of the report, columns that separate data will be labeled in bold letters. Each case will be separated into its own row. Clicking on a row will take you to the Case Screen for the case in that row.
- At the bottom left of the screen (additionally, at the top right of the report), you will see buttons for navigating pages of the report. The first button is "First". Clicking this button, if you are on the second page or further, will take you back to the first page of the report.
- The next button is labeled "Previous". If you are on the second page or further, this button will take you back one page.
- The button in the middle will show you the current page that you are on.
- The button labeled "Next" will take you to the next page of the report.
- Finally, the button labeled "Last" will take you to the last page of the report.