
This article will discuss the Add New Defendant screen.
Add New Defendant
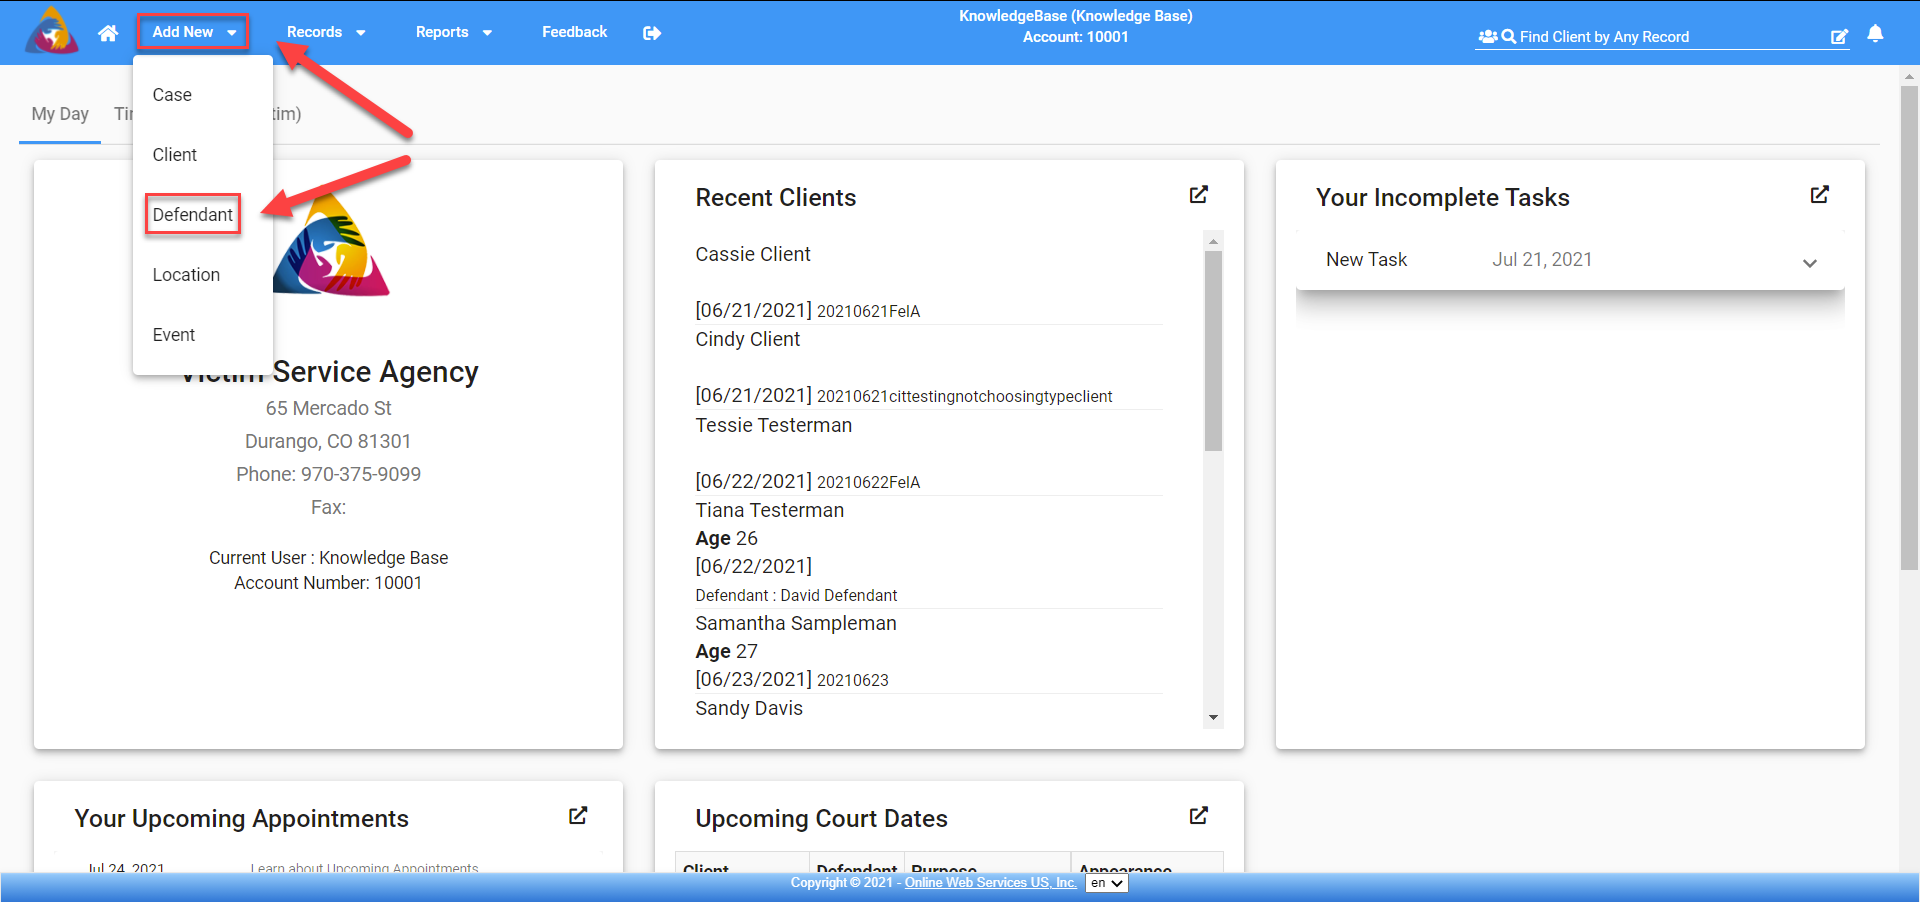
Note: The option to add a new defendant in this manner is available when the Defendant Manager Module is enabled in the Admin screen by an Administrator on your account. If you do not see the Defendant Option in the dropdown box you can check with the admin to see if it can be enabled.
From any screen in the software click on Add New in the top blue bar. Click on Defendant. (see below - Figure 1)
Figure 1
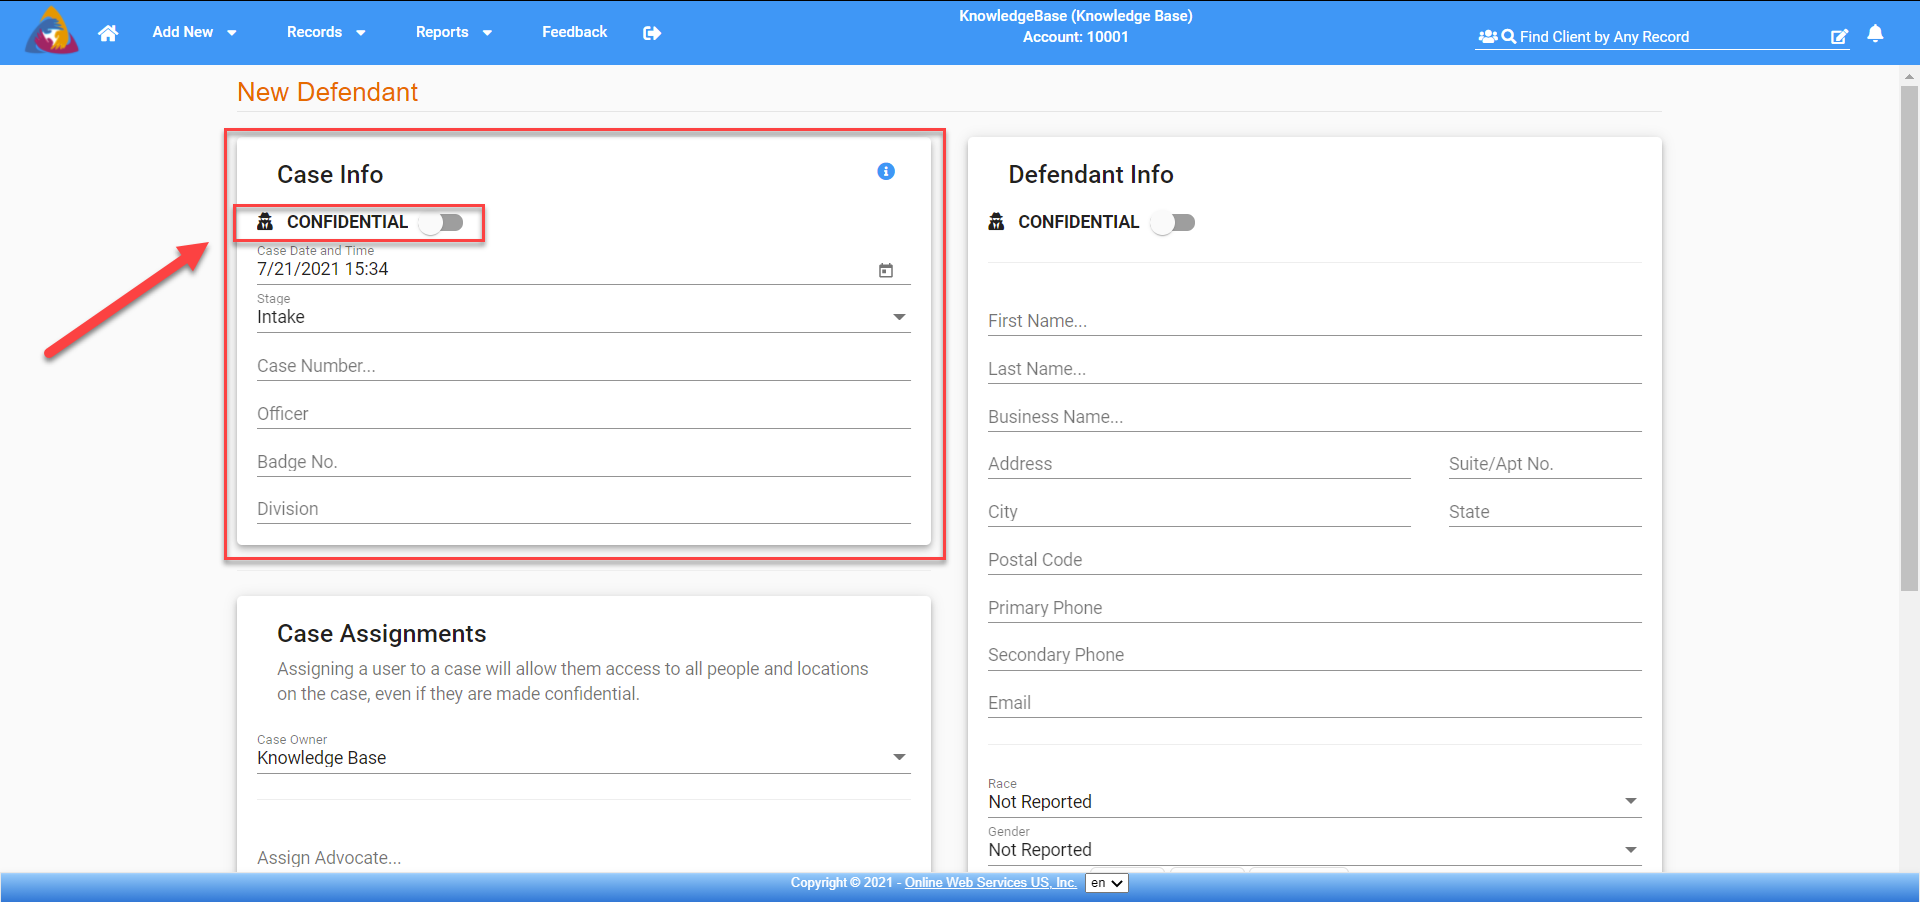
In the New Defendant screen, you will see 4 boxes for data entry: Case Info, Case Assignments, Defendant Assignments, and Defendant Info. (see below - Figure 2)
Figure 2

Case Info
The first box, Case Info, will allow you to add a new case with this defendant. The confidential button will allow you to make the defendant’s information confidential. This means that only the advocate or multiple advocates assigned to the defendant will be able to view the defendant’s information. (see below - Figure 3)
Figure 3
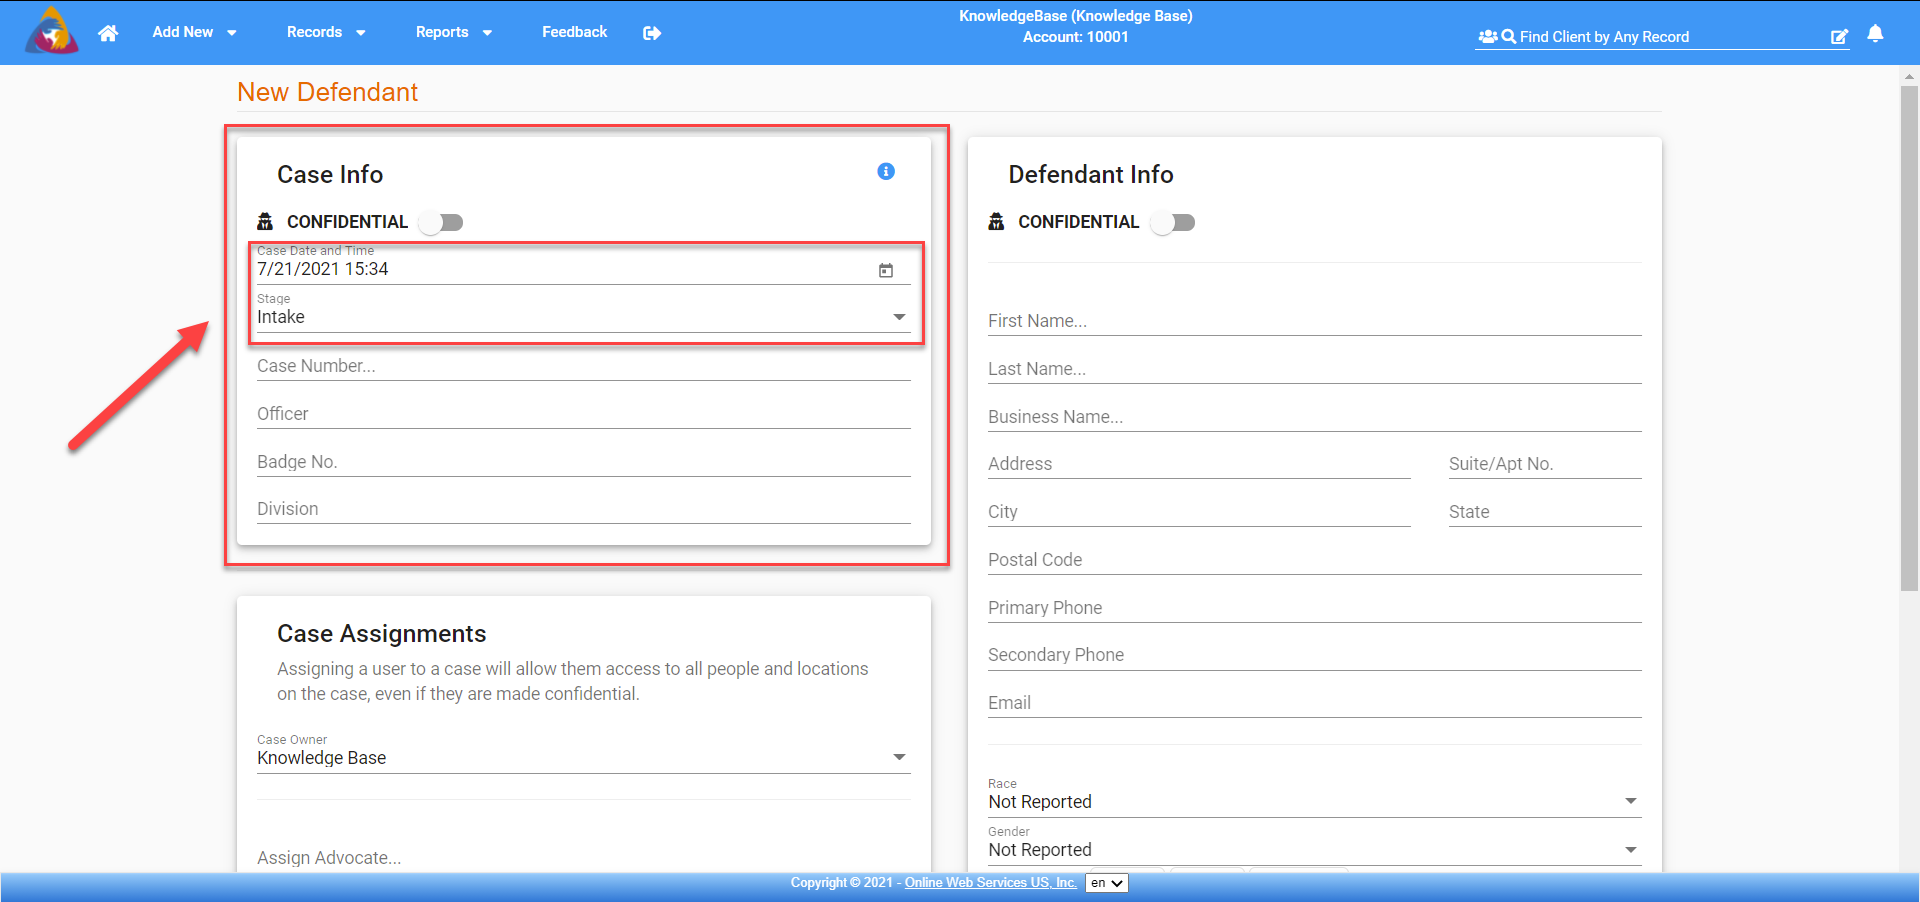
The case date and time is the date and time you receive the case and begin working on it (see below - Figure 4). The stage is a part of the Case Manager Module.
Note: If you do not see the stage field check with the admin on your account to see if Case Manager can be enabled. There is no additional charge for enabling the Case Manager. The ‘intake’ stage is a preloaded stage and your admin can create additional stages in the admin screen for your agency’s specific needs.
Choose the stage for the case you are entering for this defendant. (see below - Figure 4)
Figure 4
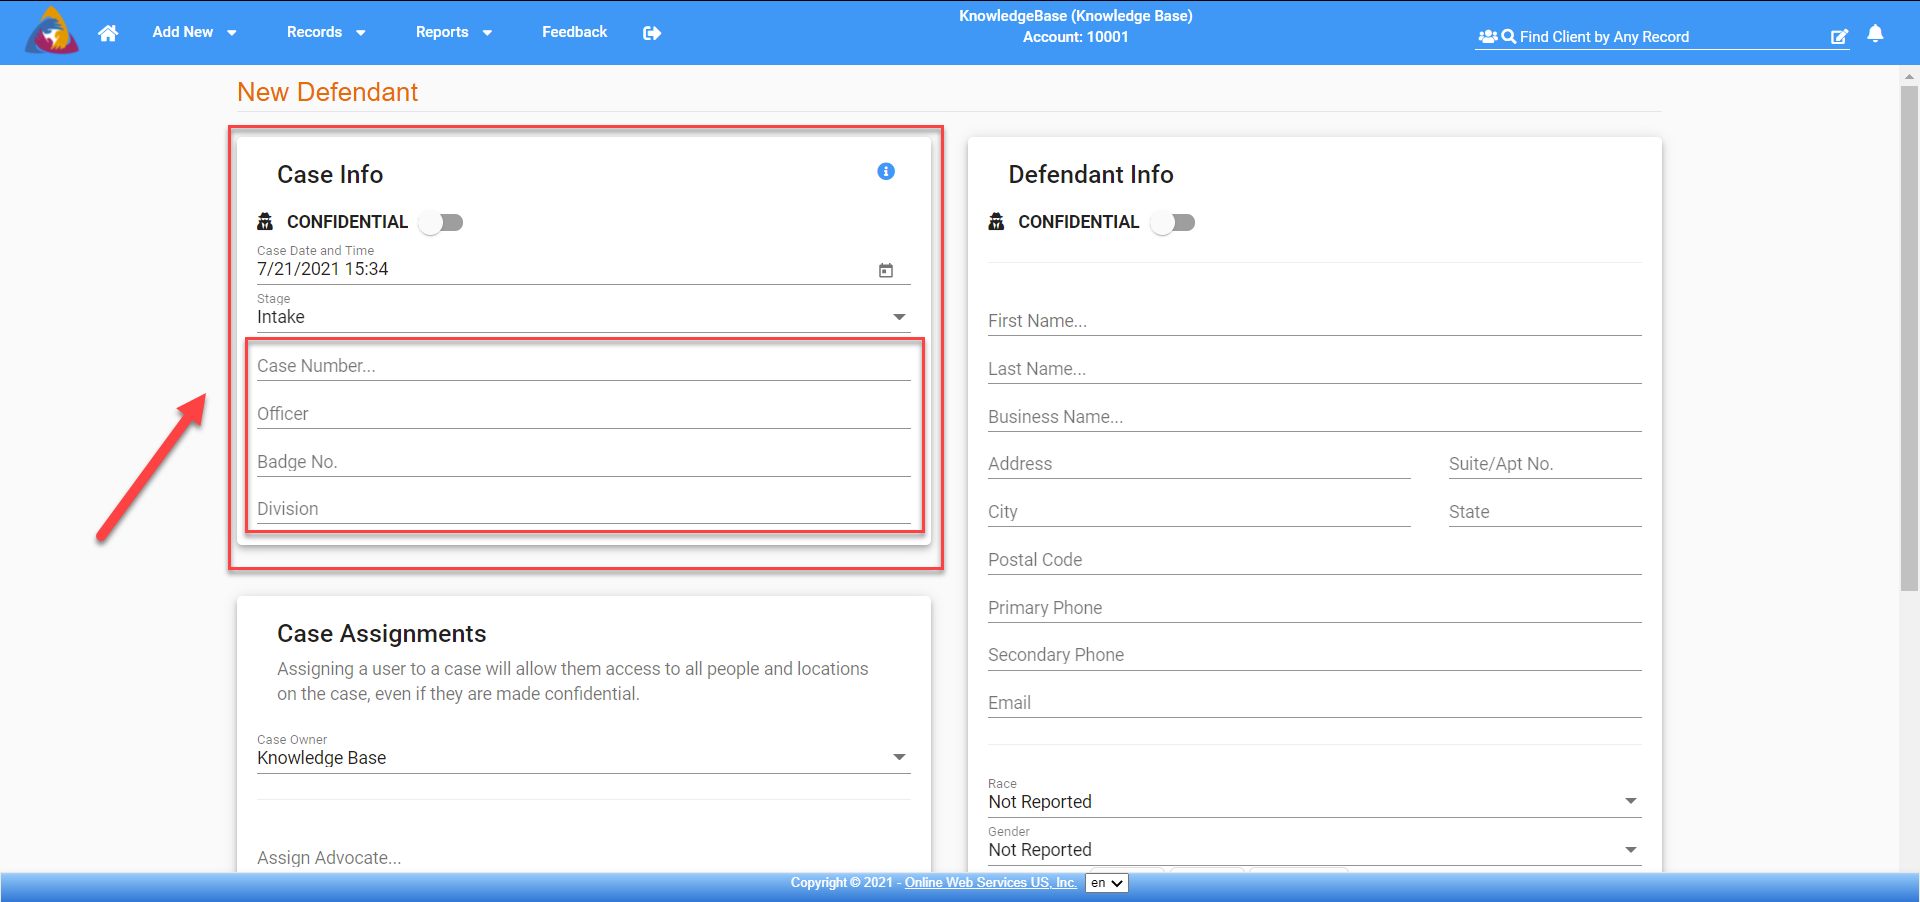
The case number will be whatever number your agency assigns to it. If you do not have a case number, the system will generate a unique sequential CASE ID number that you can refer to. The system will also display a list of similar or matching case numbers that you can choose. If you choose a case number from the list, this defendant will be added to the existing case that you chose. The rest of the data entry fields in the Case Info section, as well as the Case Owner in the Case Assignments section, will be ‘locked out’ to enter or change any data. Once you click Add Defendant you will be able to edit any of this information that you need to. If you chose a case number by mistake or chose the wrong case number you can use the arrows icon to the right to remove it and start again. If you want to create a brand new case for this new Defendant, you can use your tab key on your keyboard to cancel the list and move on to the next fields. (see below - Figure 5)
Figure 5
Case Assignments
In the Case Assignments box, you can select a Case Owner and assign an additional advocate, or multiple advocates at the case level, and in the Defendant Assignments, you can assign 1 or more advocates to the defendant. If the Case is made confidential, or if the defendant is made confidential the advocates that are assigned to each one will be able to view the information, as well as any administrators on the account. (see below - Figure 6)
Figure 6

Defendant Info
In the Defendant Info box, you can choose to make the defendant confidential. If the case was made confidential the defendant is automatically marked as confidential. (see below - Figure 7)
Figure 7

Similar to the Case Number, if you begin typing a name in the First Name, Last Name, or Business Name fields, the system will generate a list of similar or matching names that you can choose from. Doing so will ‘link’ this defendant and case associated with them to the defendant name that you selected. Again, the other data fields will be blocked from adding or editing data and when you click Add Defendant you will have the ability to edit the defendant’s information in those next screens. Also, if you want to enter new information and not choose one from the list you can use the tab key on your keyboard to cancel the list and move on to the next fields. (see below - Figure 8)
Figure 8

The Race and gender fields will default to Not Reported, however, you can choose any race and gender from the dropdown boxes. The date of birth is entered in the 2 digit month, 2 digit day, 4 digit year format. If you do not know the date of birth, you can click on the arrows icon to enter the person’s age. (see below - Figure 9)
Figure 9

Save and Finish
When you are finished filling in all the fields that you have information for click on Add Defendant at the bottom of the screen (see below - Figure 10). This saves the defendant and case to the database and brings you into the next screen: Defendant Case tab.
Figure 10
