This article will discuss the Add New Client screen.
Add New Client
From anywhere in the software click on Add New and select Client from the list. (see below - Figure 1)
Figure 1
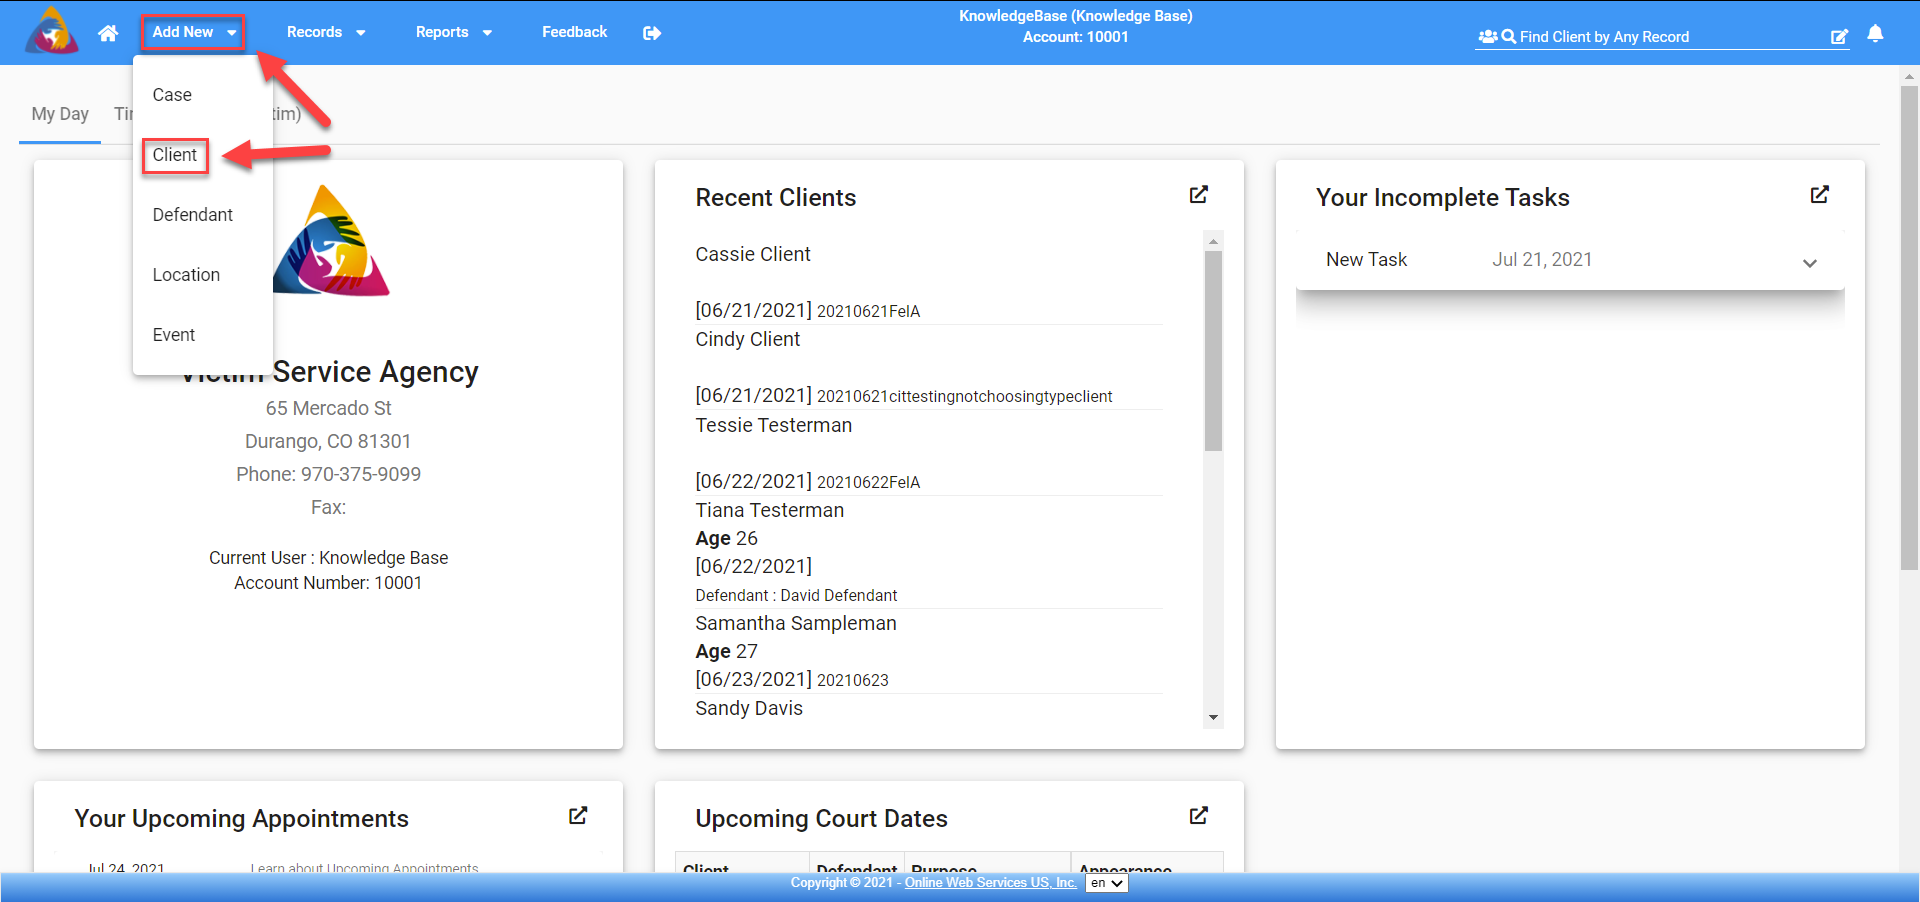
Figure 2
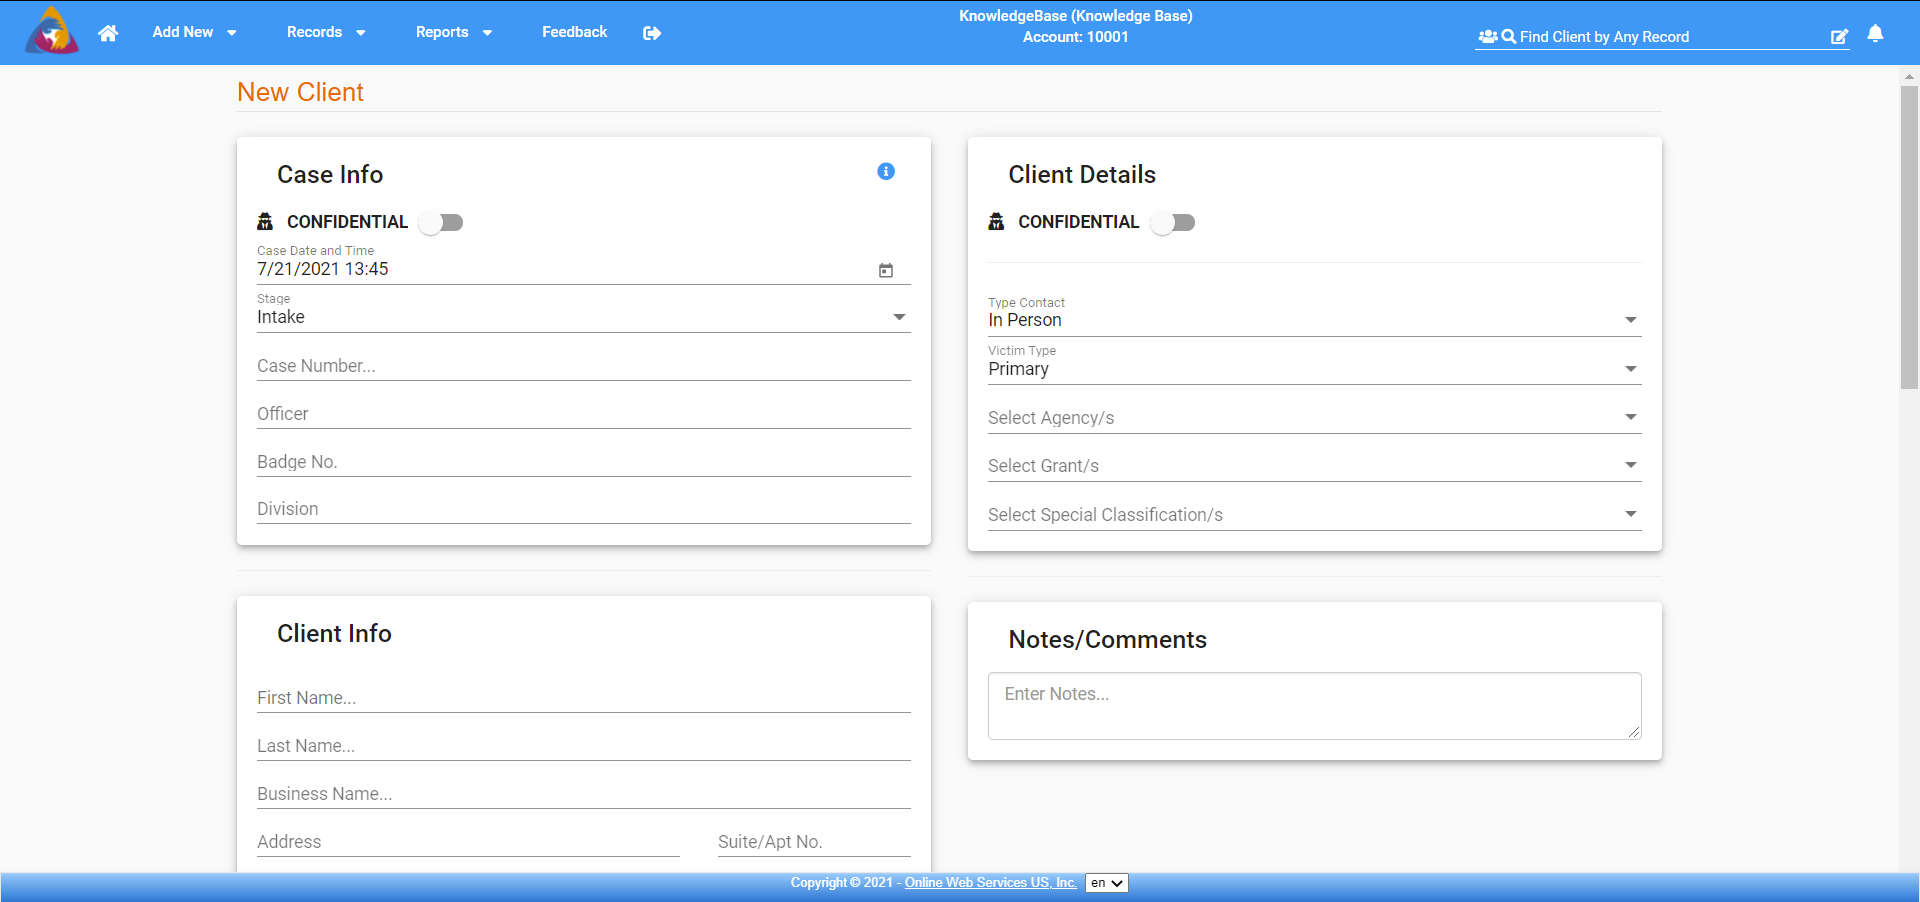
In the new victim screen (see above - Figure 2), there are 6 boxes and the Save/Continue button (see below - Figures 3, 8, 11-15).
Note: Some of the boxes that you see in your software will depend on which modules have been enabled by the Administrators on your account. If there are boxes in this video that you do not see on your account check with your admin to see if they can be added. There is no additional cost to the software to have these modules enabled.
Case Info
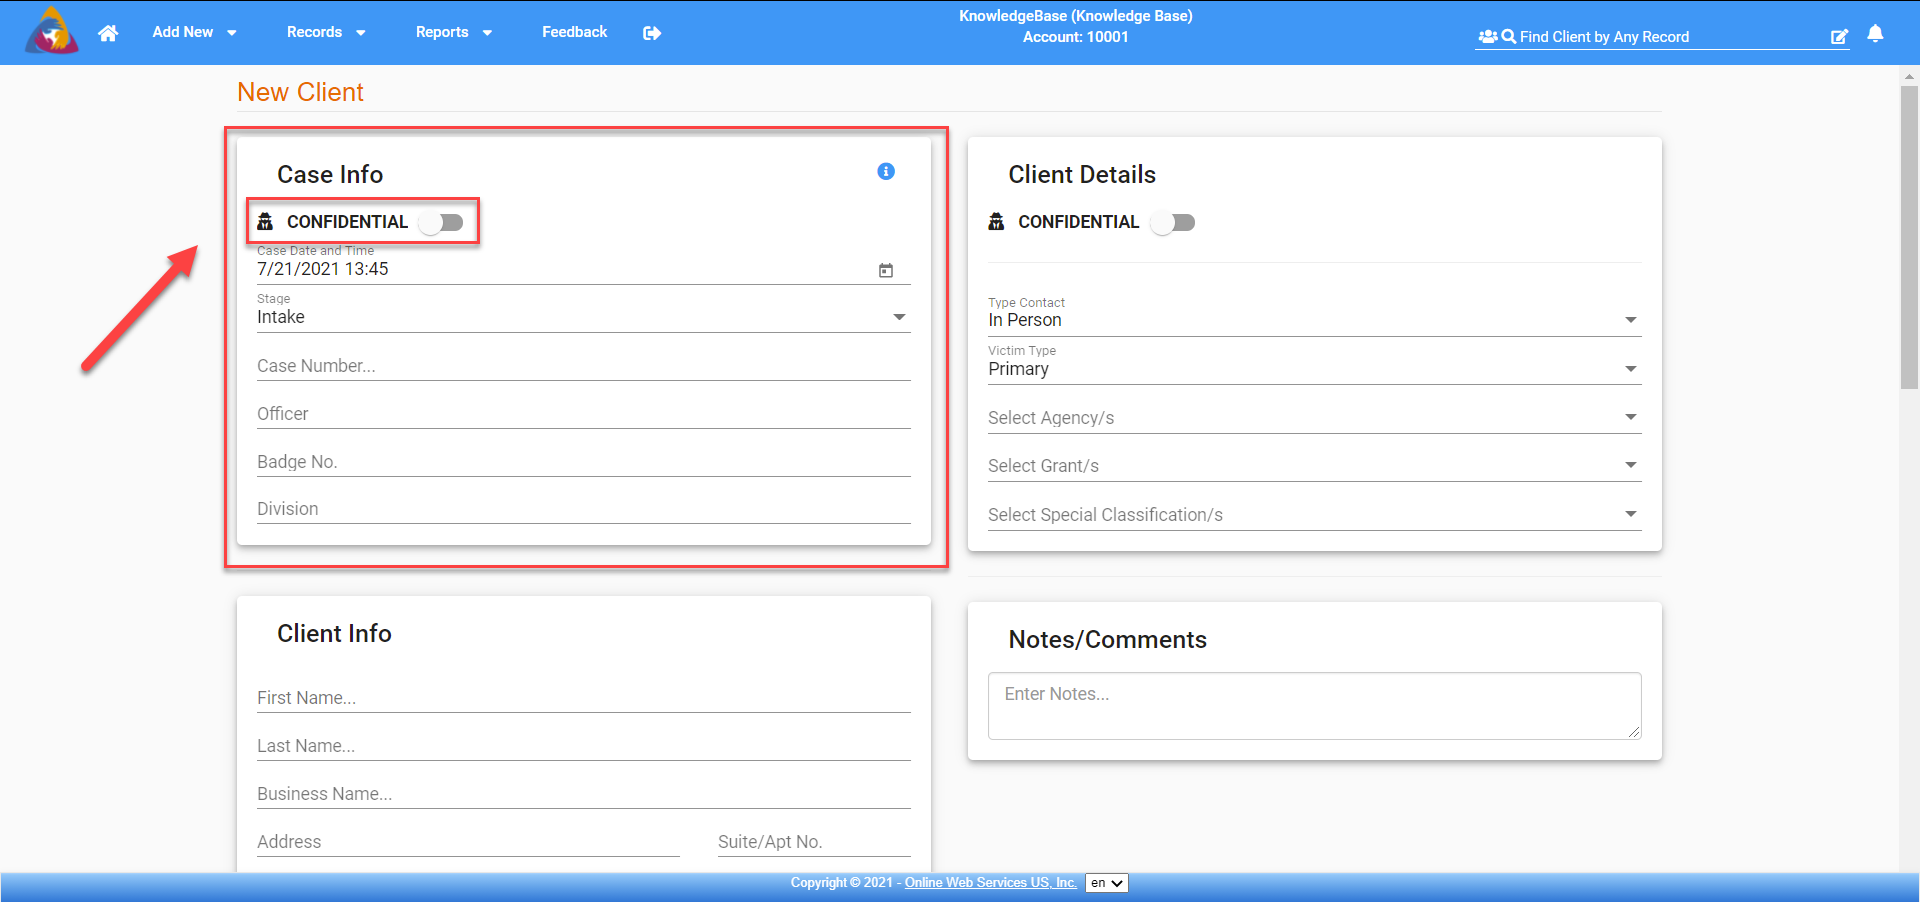
The first box is the Case Info box. This will be the basic information about the case that this victim you are entering has been involved in. At the top of the box is the confidential button. This will make the information confidential at the case level, meaning everything pertaining to this case will be confidential: Victims, defendants, etc. (see below - Figure 3)
Figure 3
The case Date and time is the Date and time you receive the case and begin working on it. The case stage is part of the Case Manager Addon that can be enabled by the Admin. If enabled the first stage, “intake”, is preloaded into the software and an Administrator can add additional case stages for the specific needs of your agency. (see below - Figure 4)
Figure 4

The Case Number is going to be whatever number is assigned by your agency or department. If you do not have a Case Number you can leave it blank and the system will generate a sequential, unique CASE ID number that you can use to reference this case. Office, Badge NO., and Division are optional fields. (see below - Figure 5)
Figure 5

When you begin typing the case number the system will display a list of case numbers that match or are similar. If the case for the client you are adding has already been entered and you would like to add this client to that case you can choose the case from the list and all the information for that case will fill in for you. This information cannot be edited at this point, however, you will be able to edit the information in the Client’s Case Information screen after you have clicked on Save/Continue. (see below - Figure 6)
Figure 6

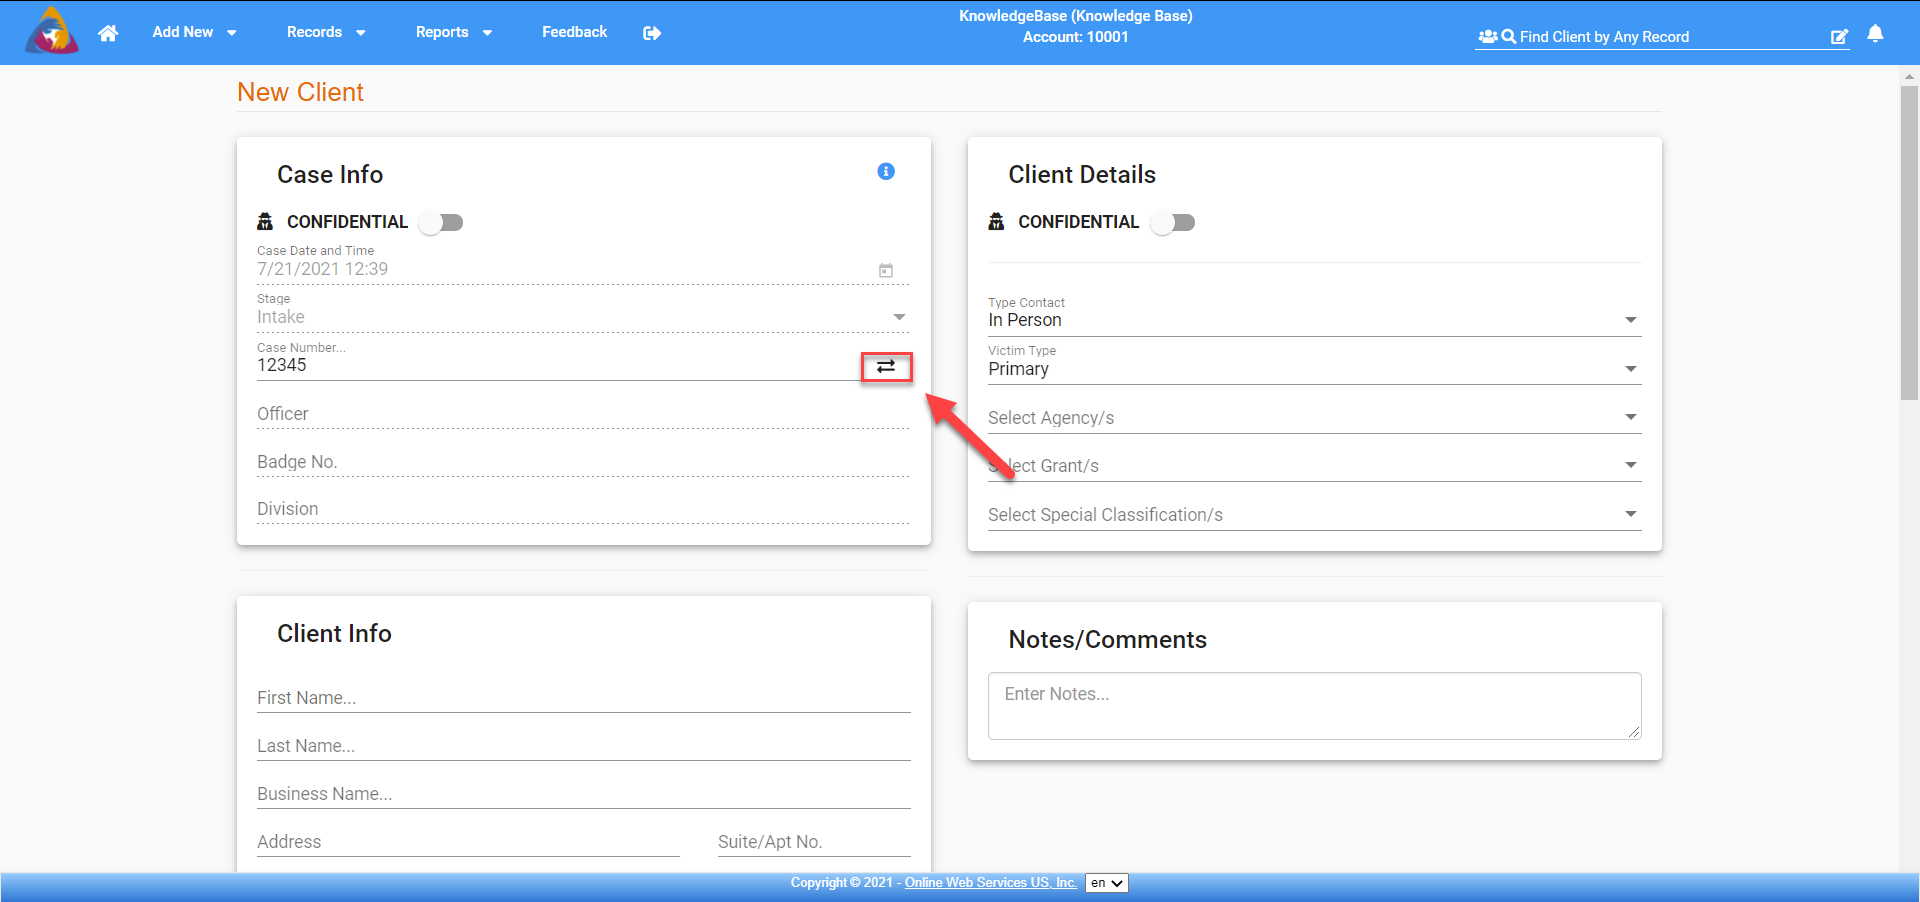
If you click on a case number by mistake, or you click on the wrong case number you can use the arrows icon to the right to back it out and start again. (see below - Figure 7)
Figure 7
If you do not want to choose a case number from the list, you can simply finish typing the correct case number and use the tab key on your keyboard to go on to the next data entry field.
Client Info
The only information in this screen that is required is either a Victim First Name and a Victim Last Name OR a Business Name. The only exception to that rule is if you were to choose Anonymous as the Victim Type in the Client Details Box. Enter as much of the information as you have for the victim info, the more information you enter the better off you are in the future with searching, reporting, adding new cases, and so on. (see below - Figure 8)
When typing the information into the First Name, Last Name and Business Name fields the system will search the database for names that match or are similar. The list will also display other information about each person to help you determine if any of those names is the person you are entering as a new victim or client. Choosing the name from the list will ‘link’ the other case or cases for this person to this new case you are creating. (see below - Figure 8)
Figure 8

Click on a name to use that person’s information for the new case. The rest of the fields in this section will gray out and can not be edited at this time. Once you save this new case/client you will be able to edit the information in the Client Information screen. (see above - Figure 8)
Figure 9
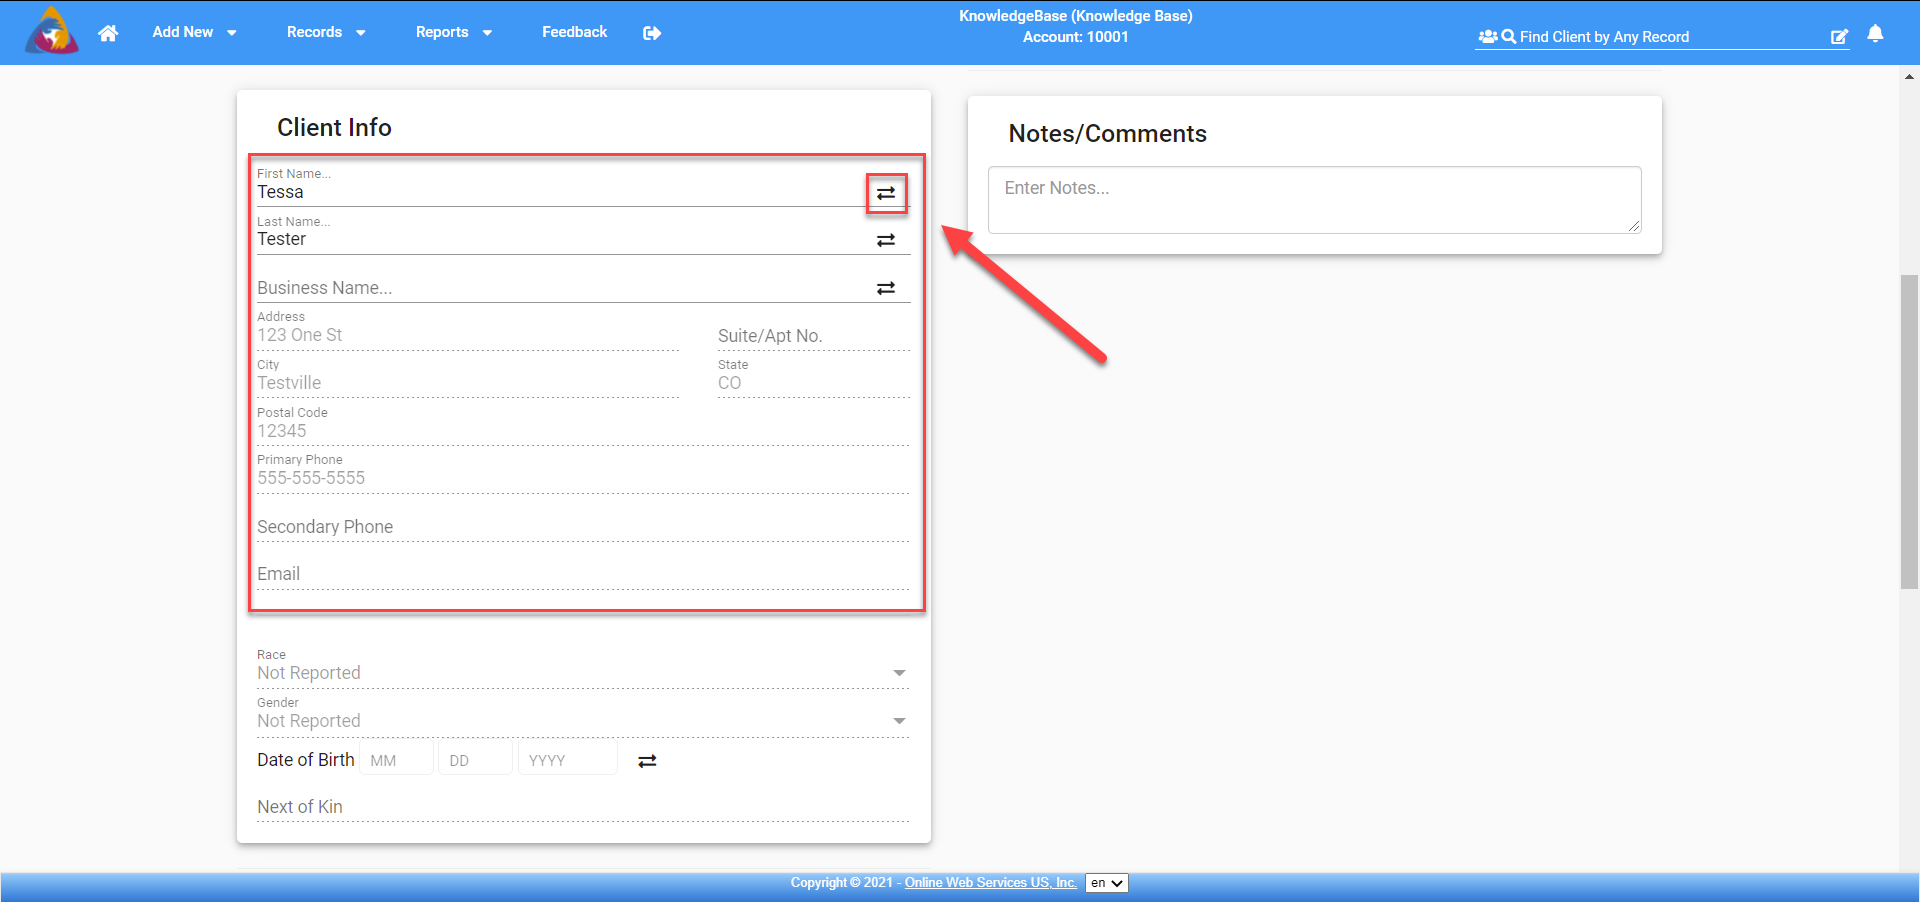
If you choose a name by mistake or choose the wrong name, you can use the arrow icon to the right of the name field to back it out and start over (see above - Figure 9). If you do not want to choose a name at all, you can use the tab key on your keyboard or click away from that field to go to the next field and continue typing the information for this client.
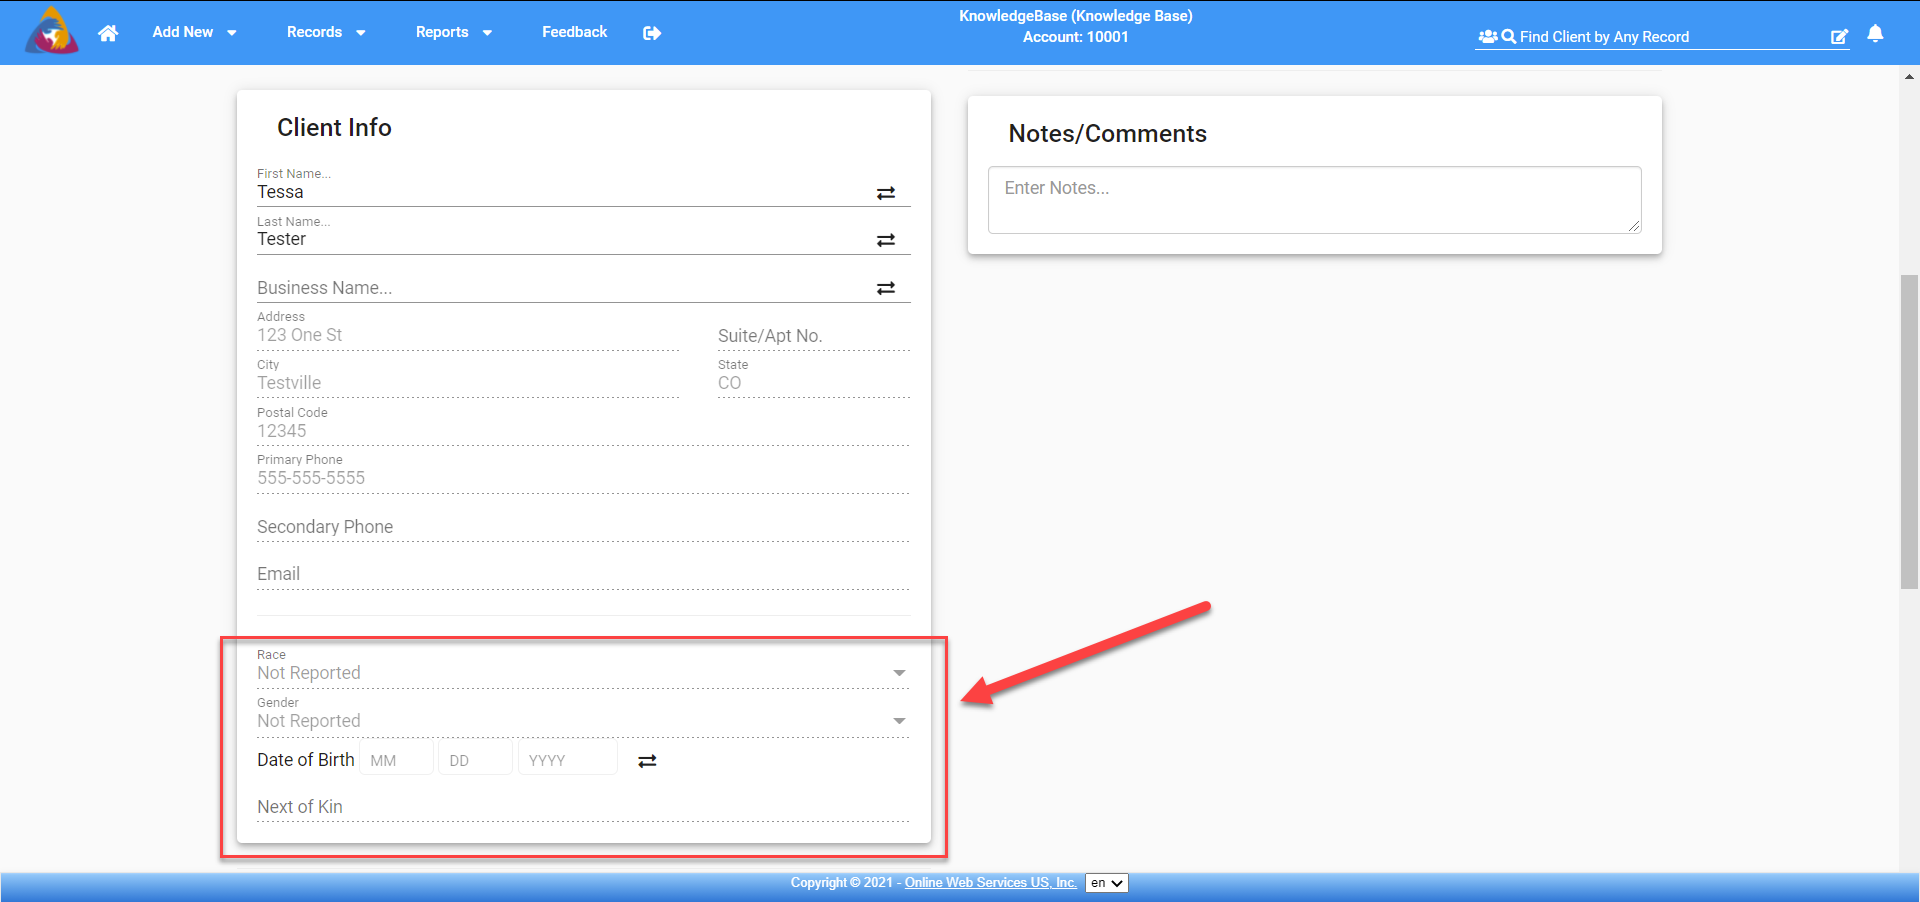
The Race and Gender will default to Not Reported for Grant reporting purposes, however, you can choose any race and gender from the dropdown box. The date of birth is entered in the 2 digit month, 2 digit day, 4 digit year format. If you do not know the date of birth but you know how old they are you can click on the 2 arrows icon to enter their age. If you do not know the birthdate or their age, you can leave it blank and the program will count it as Not Reported just like the race and gender. (see below - Figure 10)
Figure 10
Case Assignments
In the Case Assignments box, The Case Owner will default to you, however, you can choose any user from the list to make the Case Owner. You can also assign other Advocates to the Case. This would give them access to the case even if the case is made confidential. Only the users who do not already have viewing permissions, Administrators on the Account, will be included in the list to choose from. These permissions will cover the entire case including any victims, defendants, etc. added to the case. (see below - Figure 11)
Figure 11

In the Client Assignments box, the Primary Advocate will default to you, however, just like the case assignments, you can choose a different user from the list to be set as the primary advocate. Below that you can assign other advocates to the client/victim giving them permission to see the victim’s information, even if the client/victim is made confidential. Just like the Case Assignments only the users that do not already have the ability to view the victim’s information will be included in the list to choose from and you can choose multiple users to assign. (see below - Figure 12)
Figure 12

Client Details
At the top right column of boxes, you will find the Client Details box. In this box, you can choose to make this specific victim’s information confidential, but if the case itself is not made confidential the victim will automatically be made confidential. You will select the type of client they are from the dropdown box. The default is Primary. (see below - Figure 13)
Figure 13

Select 1 or more agencies, grants, and special classifications. (see above - Figure 13)
Notes/Comments
Enter any notes for the case or victim. These notes will be saved with the case file and will be displayed in the Notes tab of the Client’s Information screens. (see below - Figure 14)
Figure 14

Add Defendant
Note: the Defendant Manager Module must be enabled by an administrator on your account before you are able to add defendant records. For more info, see the article: What is the Defendant Manager Module?
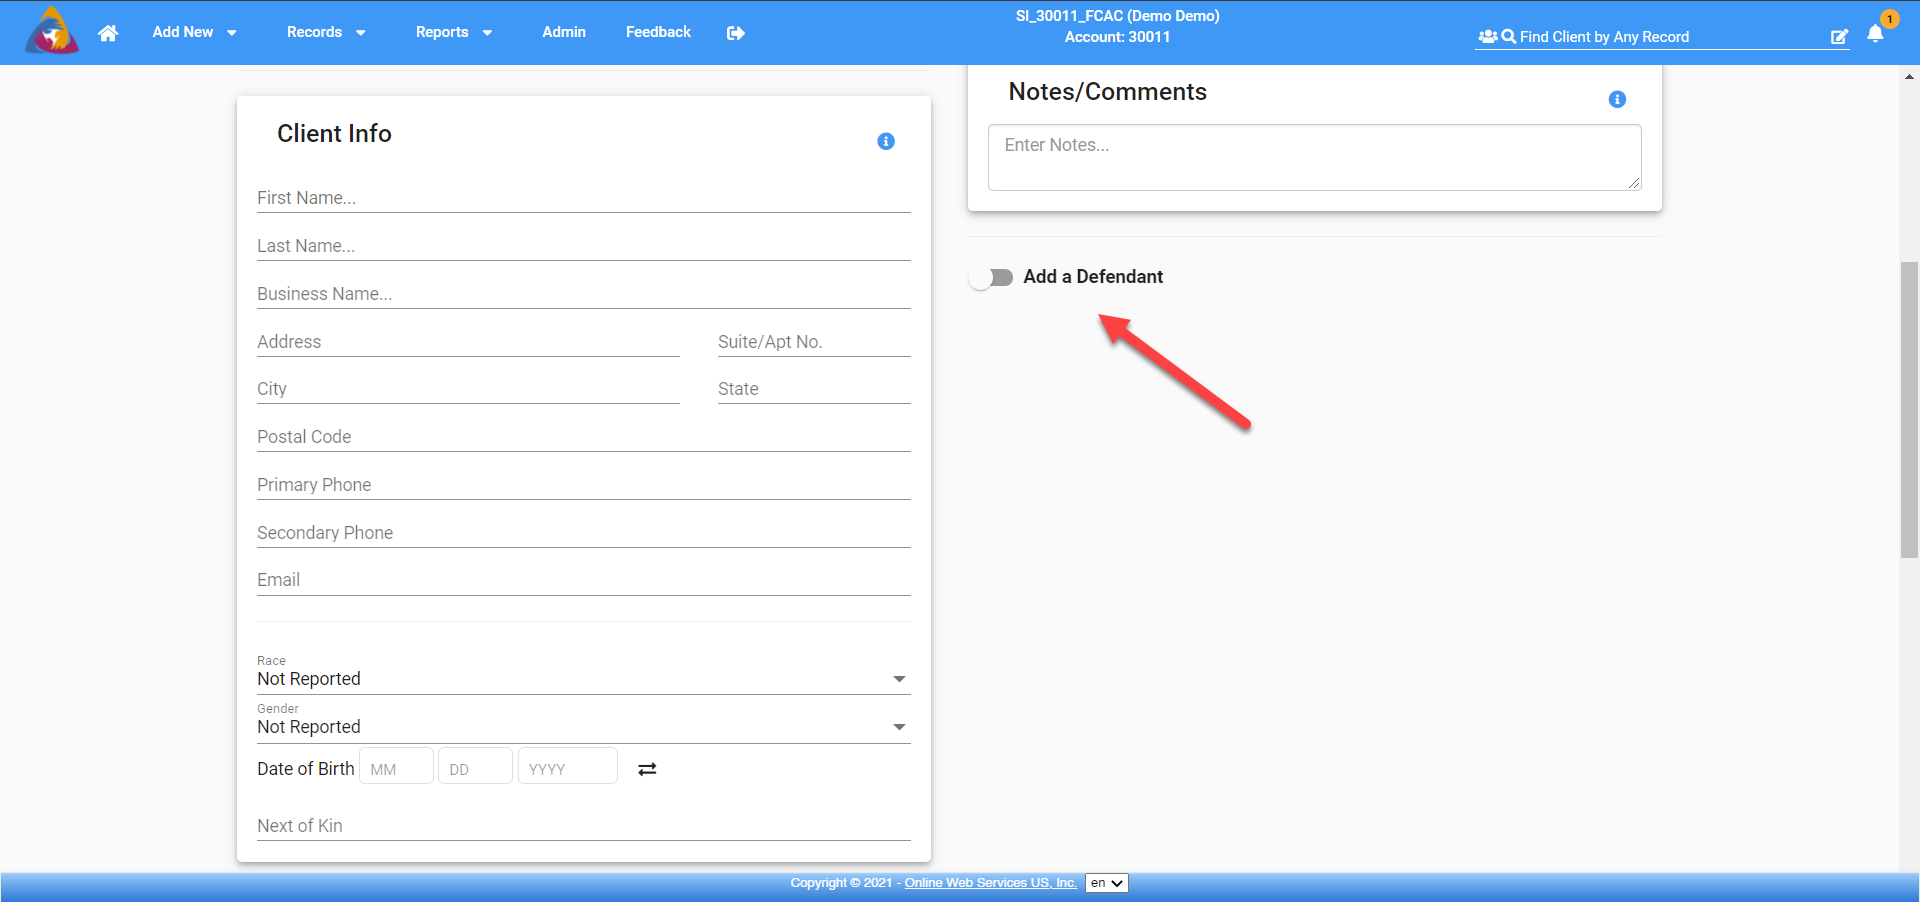
Below the Notes section, you will see a toggle button labeled "Add a Defendant". Click this button and a block will appear that allows you to enter information for a defendant.
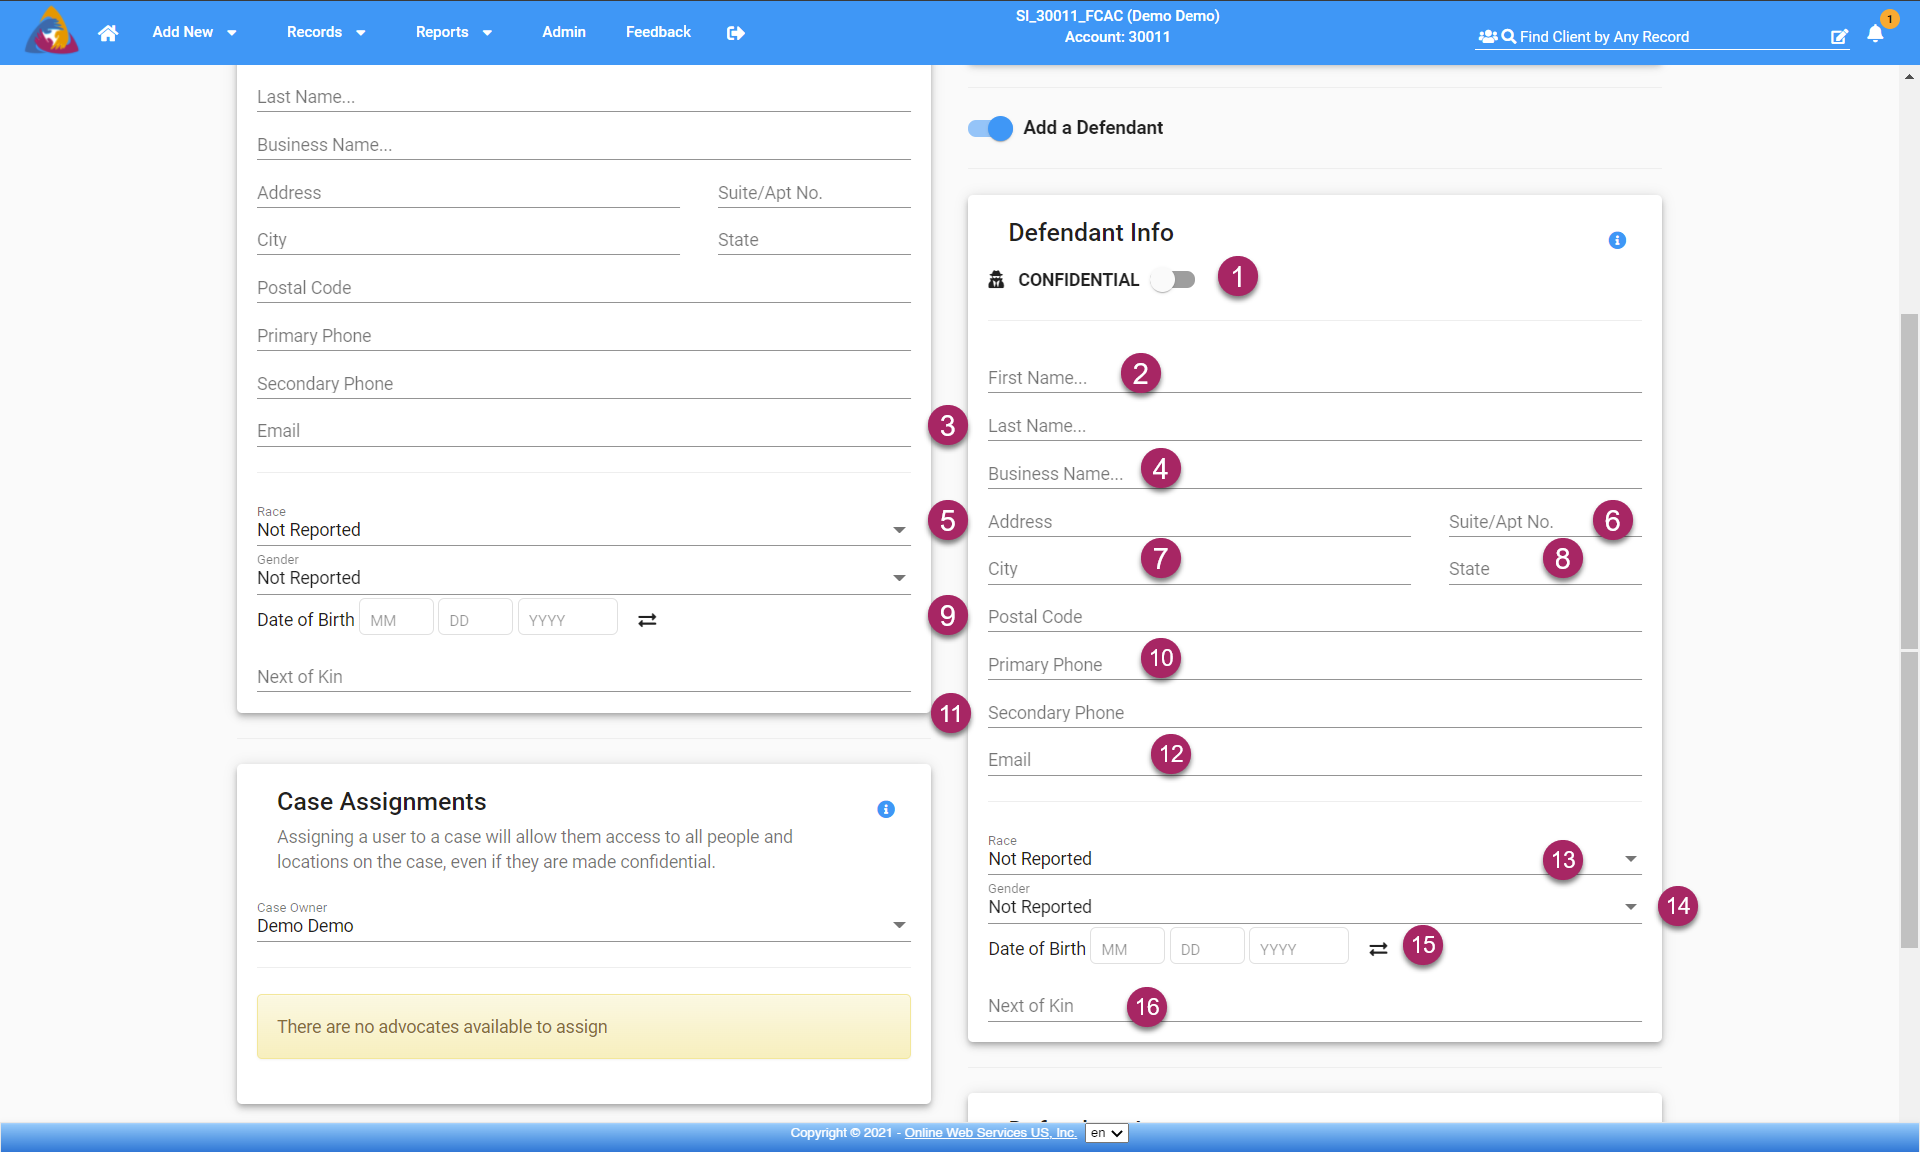
- To begin adding a defendant, determine if the defendant's information will need to be confidential. If it does, click the toggle button next to "CONFIDENTIAL" and the information added will only be visible by you, anyone you grant access to, and administrators on the account.
- Below, enter the first name of the defendant.
- Next, enter the last name of the defendant.
- If the defendant has a relation to a business, enter the name of the business in the field labeled "Business Name".
- Moving down you can enter an address for the client in the field labeled "Address".
- To the right, you can enter a unit number (if applicable) in the field labeled "Suite/Apt No".
- Below you can enter the City in the field labeled "City".
- To the right, you can enter the state in the field labeled "State". You can enter the state either as a state abbreviation or enter the full state name.
- Next, enter the postal code of the address in the field labeled "Postal Code".
- Enter the defendant's phone number in the field labeled "Primary Phone".
- If there is another phone number you can use to contact the defendant, enter that number in the field labeled "Secondary Phone".
- If the defendant has an email address, enter it into the field labeled "Email".
- Below the defendant's basic information you can begin adding their demographic information starting with their race. Click the dropdown field labeled "Race" or click the arrow icon on the right side of the field and a dropdown will open showing a list of race options for the defendant. Choose the correct race by clicking on it.
- Next, you can enter the gender of the client. Click the dropdown field labeled "Gender" or click the arrow icon on the right side of the field to open a dropdown list of genders. Select the correct gender by clicking it.
- There are three fields next to "Date of Birth"; one for the month, day, and year. Enter the defendant's birth date into these fields. If you do not know their date of birth but know their age, click the icon to the right that looks like 2 arrows facing in opposite directions. This will change the field to a field labeled "Age" and you can type in the age of the defendant.
- Lastly, if there is a known next of kin for the defendant, enter their name into the field labeled "Next of Kin".
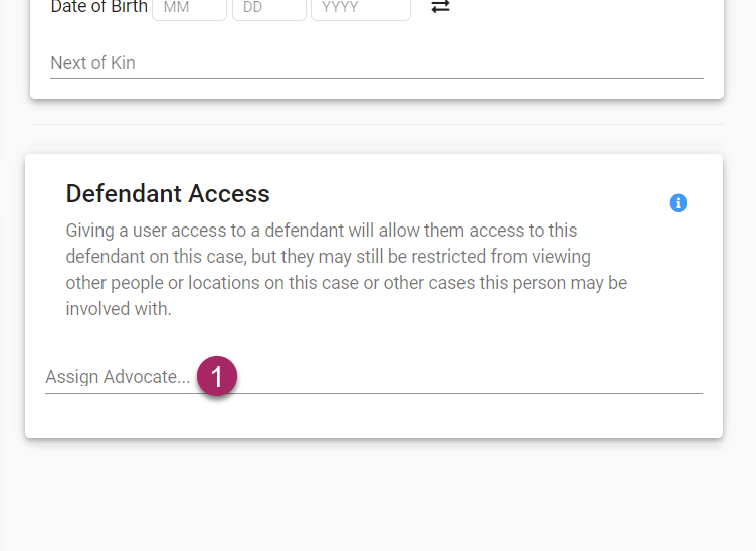
- Below the Defendant information block, you can assign advocates to be able to view the defendant and their information. This is especially useful if the defendant or the case has been marked as confidential but another advocate needs to gain access.
Finish and Save
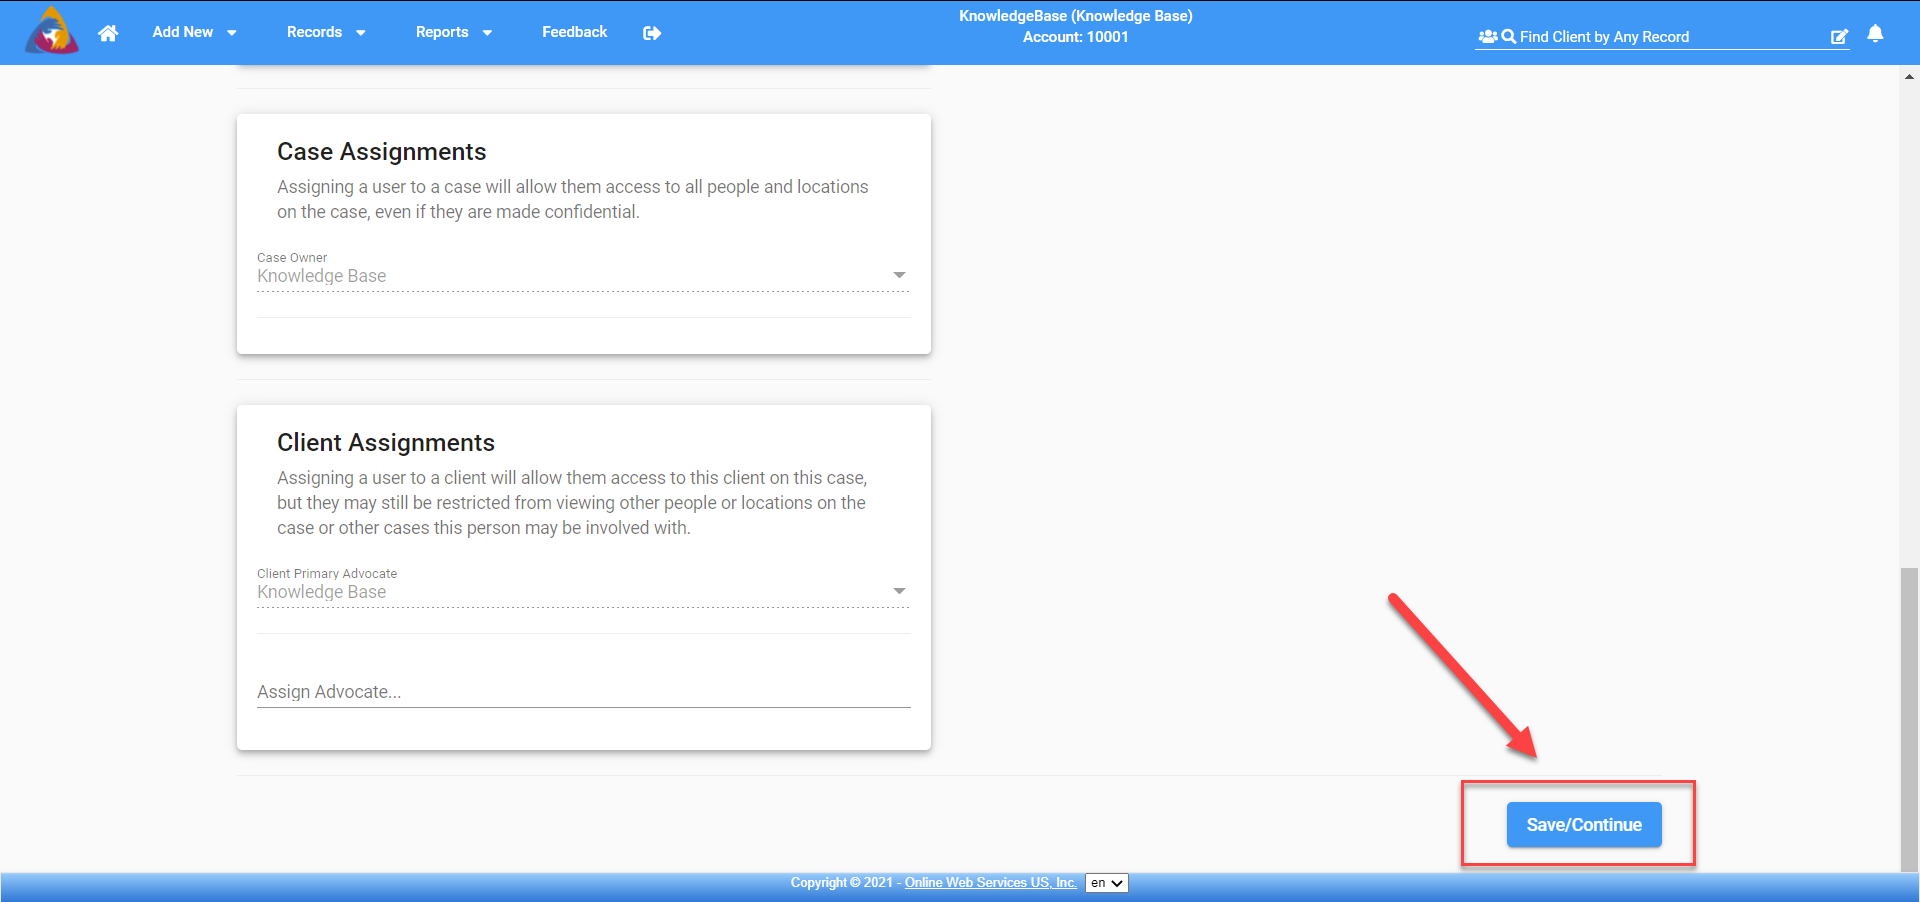
When you are finished click Save/Continue in the bottom right corner of the screen (see below - Figure 15). This will save the client to the database and bring you into the next screen and next step of the process: Adding the Victimization or multiple victimizations for this Client/Case.
Figure 15