
Events can be viewed and edited on the Event Screen of the event you wish to edit.
Note: An administrator on your account must activate the "Events Manager" Module in the Admin Settings before events can be added, viewed, and edited. For more information, see the article: What is the Event Manager Module?
This article will cover how to view and edit Events using the four information blocks on an Event's "Event Screen":

- To get to the Events Screen, start by clicking "Records" on the top blue bar.
- A dropdown will open, select "Events" from the dropdown and you will be navigated to the Events Screen (shown below).

- The Events Screen will show you a list of all recent events entered into the system.
- Select the Event you wish to view/edit by clicking on the row of the Event.
- Alternatively, you can click the blue pencil icon on the right side of the Event's row and you will be taken to that Event's screen (Shown Below).
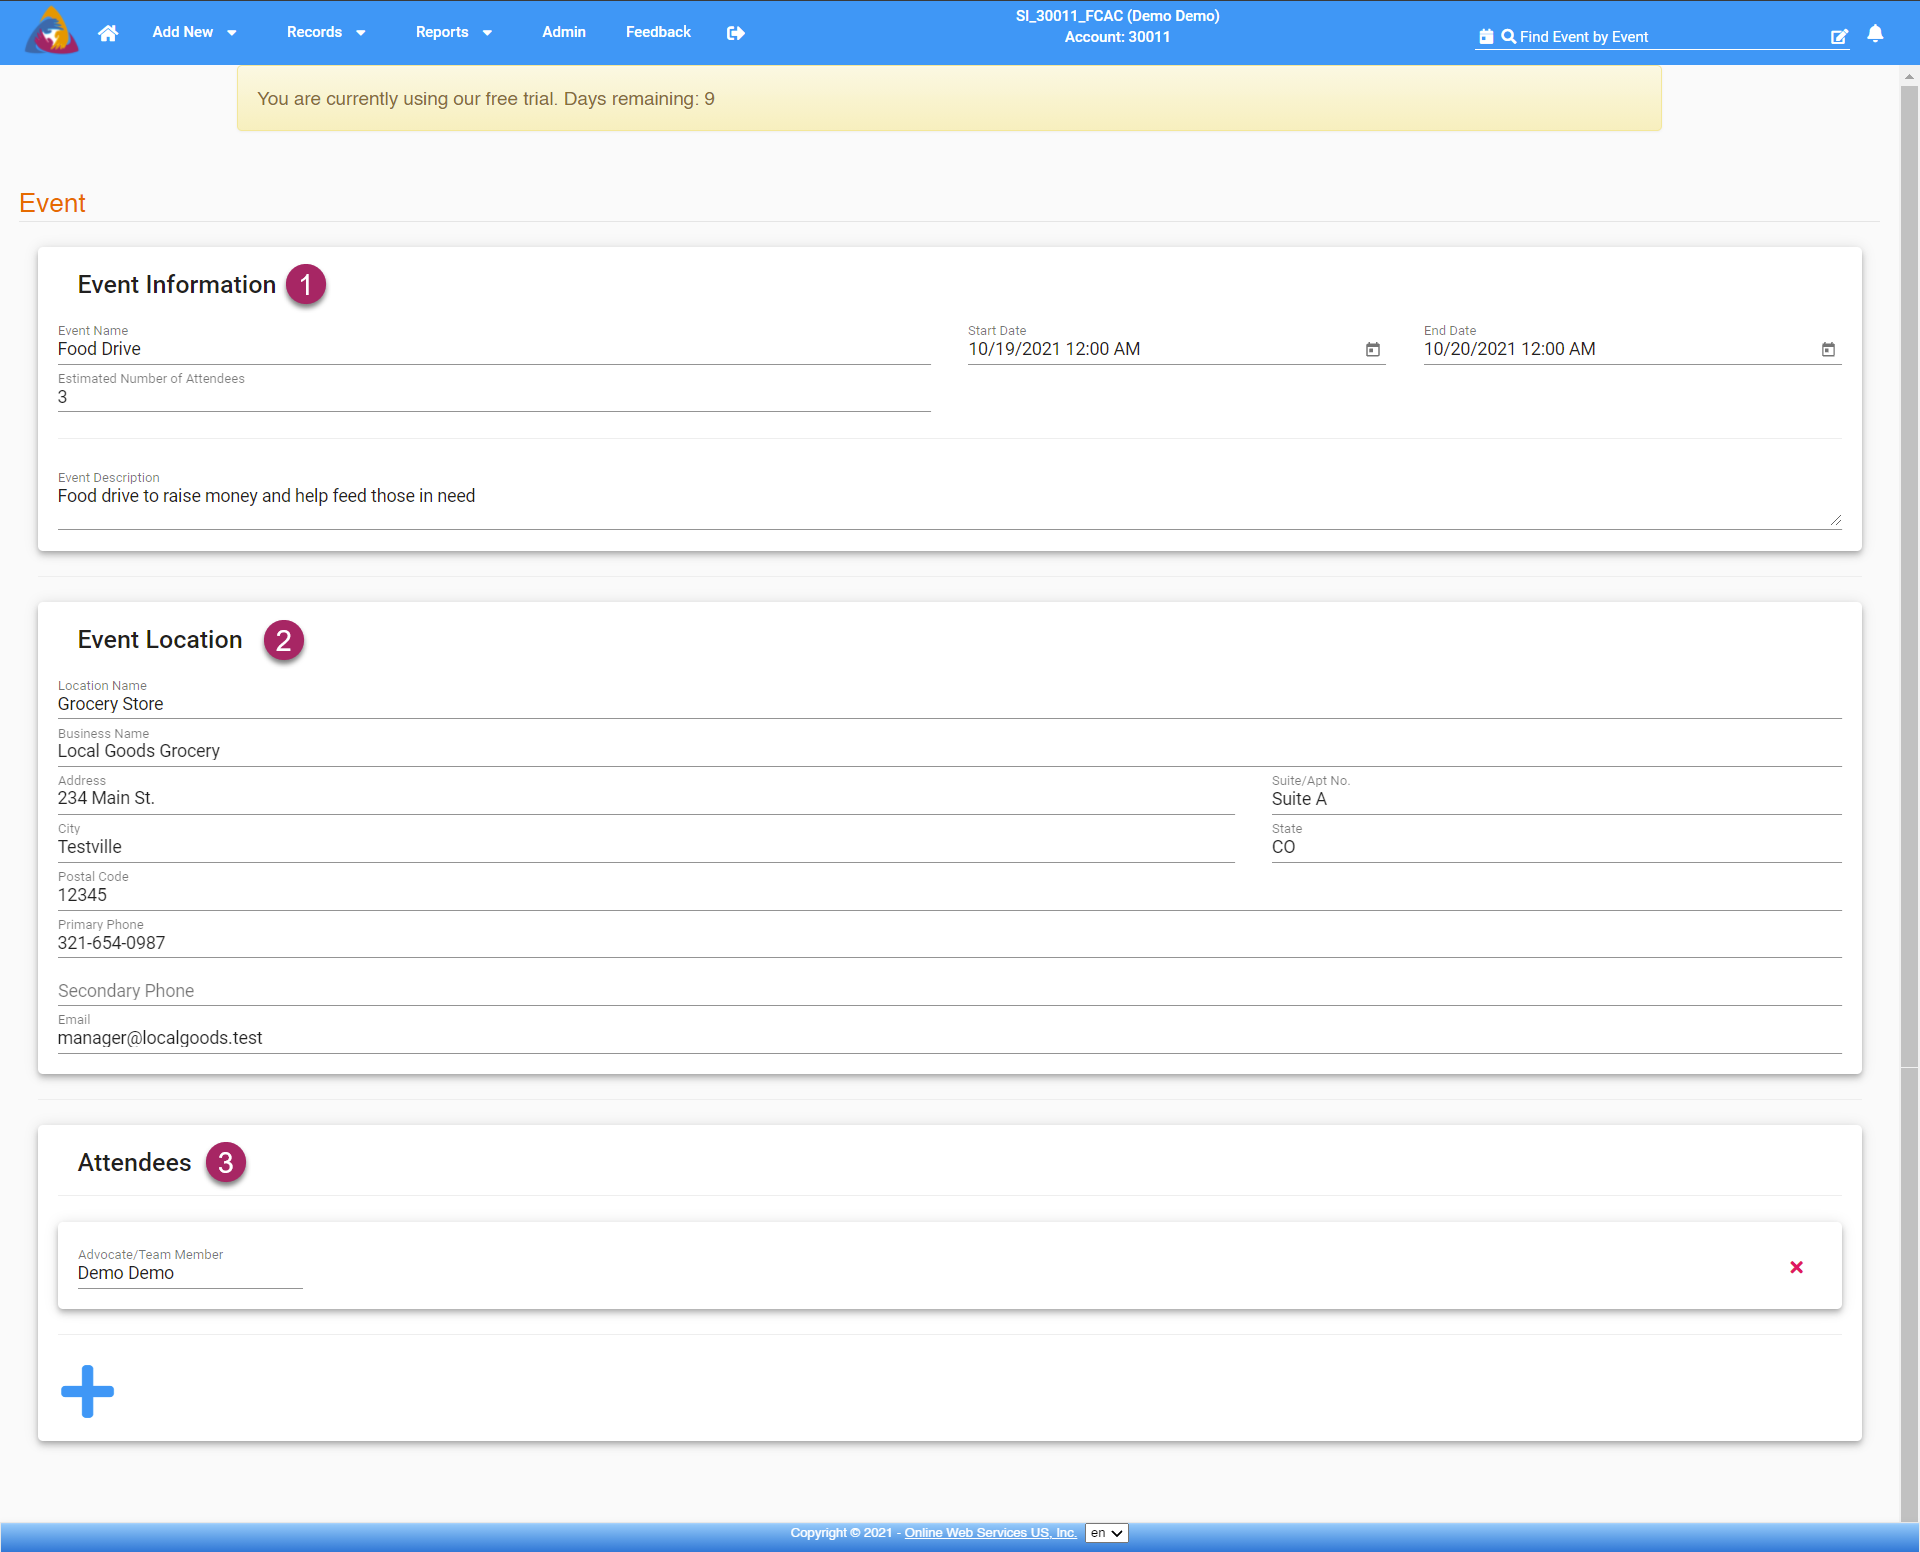
You will see three blocks on the Event Screen:
- Event Information
- Event Location
- Attendees
Each of these blocks will be detailed below.
View/Edit Event Information
The first block on the Event Screen allows you to edit Event information.
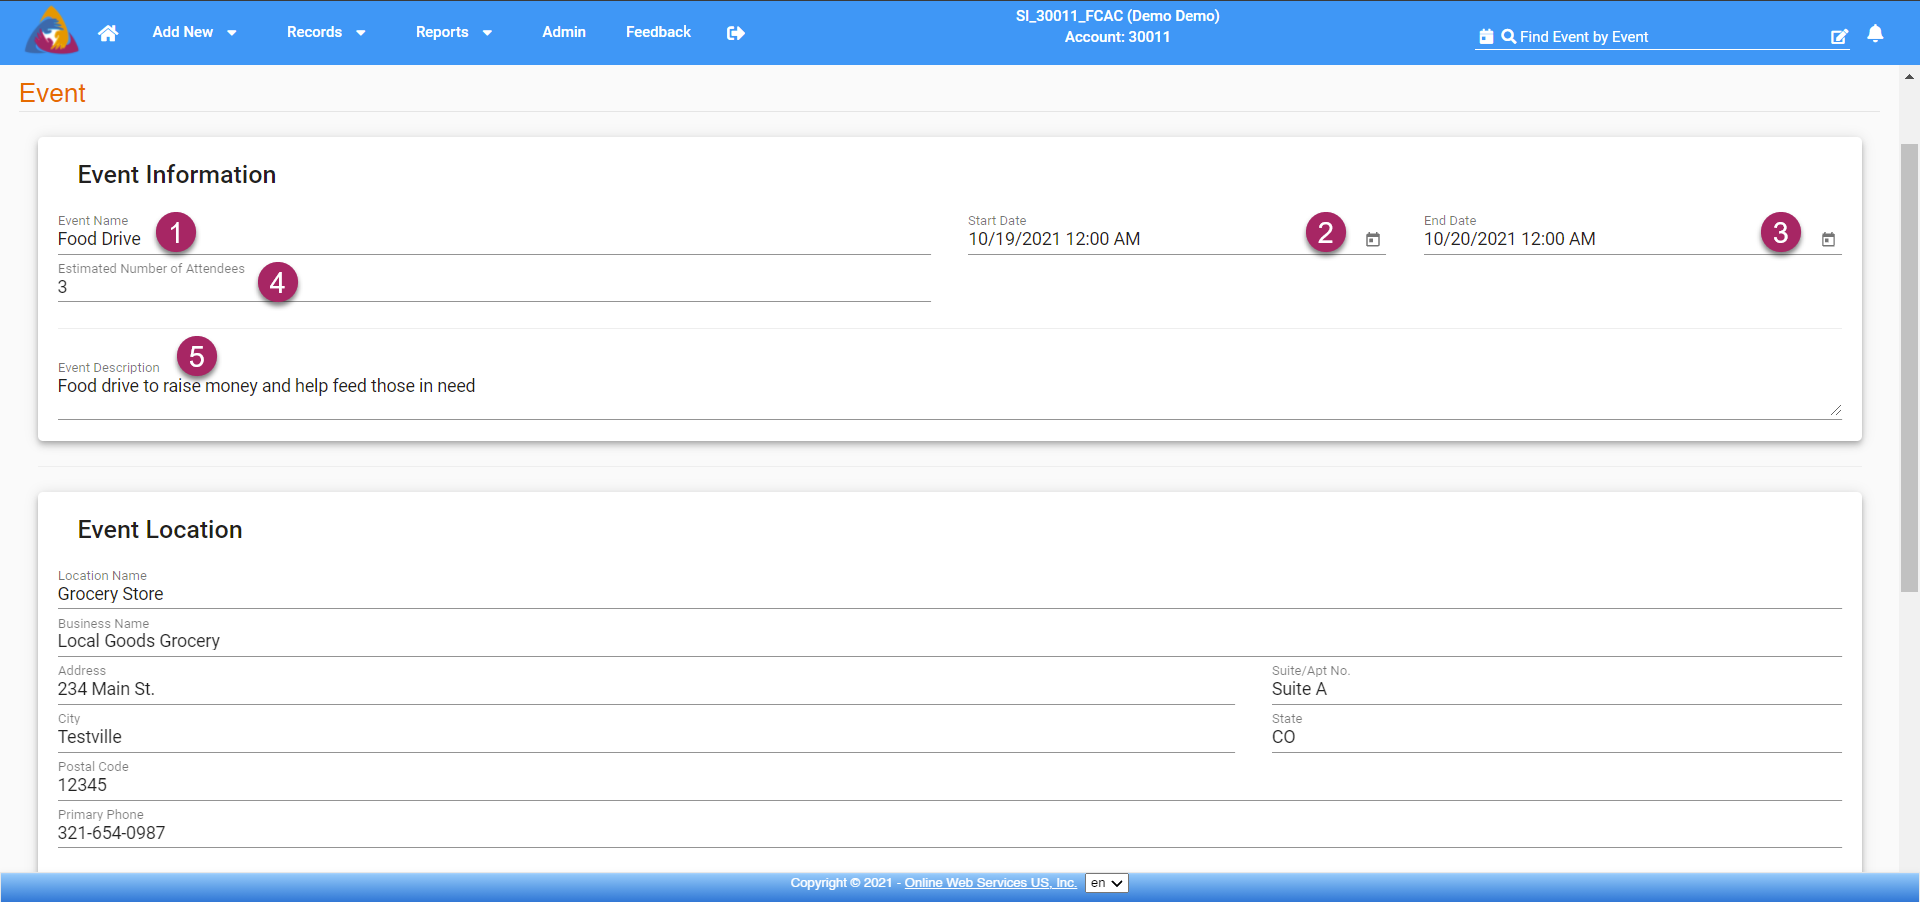
- You can change the name of the Event by clicking in the field labeled "Event Name"
- To the right, is a field for the Start Date of the Event. Click the calendar icon on the right side of the field and a calendar will open allowing you to choose a start date and time for the event.
- The next field allows you to change the End Date of the Event. Click the calendar icon on the right side of the field and a calendar will open allowing you to choose an end date and time for the event.
- Edit the amount of attendees you think the Event will have in the field labeled "Estimated Number of Attendees
- The final field "Event Description" gives you space to describe the event and its purpose.
View/Edit Event Location
The next block is the Event Location Block. It allows you to view and edit details about the location of the Event.

- The first info field is the "Location Name". Click on the field to make changes to the name of the location.
- If the location is a business, you can add/edit the name of the business in the field labeled "Business Name".
- The next field, "Address", lets you enter the physical address of the location. City, State, and postal code can be entered in the following fields.
- Next, you can add/edit a unit number for the location in the field labeled "Suite/Apt No.".
- Moving down, you will see a field labeled "City" directly below the "Address" field. Here you can add/edit the name of the city where the location is located.
- To the right of the "City" field is a field labeled "State" here you can enter either the full name of the state or its abbreviation.
- Moving down, you will see a field labeled "Postal Code". Click the field to enter the postal code of the location.
- A phone number can be added or edited in the next field "Primary Phone".
- If the location has another phone number, perhaps to a landlord or property manager, it can be entered in the field labeled "Secondary Phone Number".
- Lastly, a field labeled "Email" is provided to enter an email address for contacting the location.
View/Edit Attendees
The third block allows you to add and remove "Attendees" for the event.

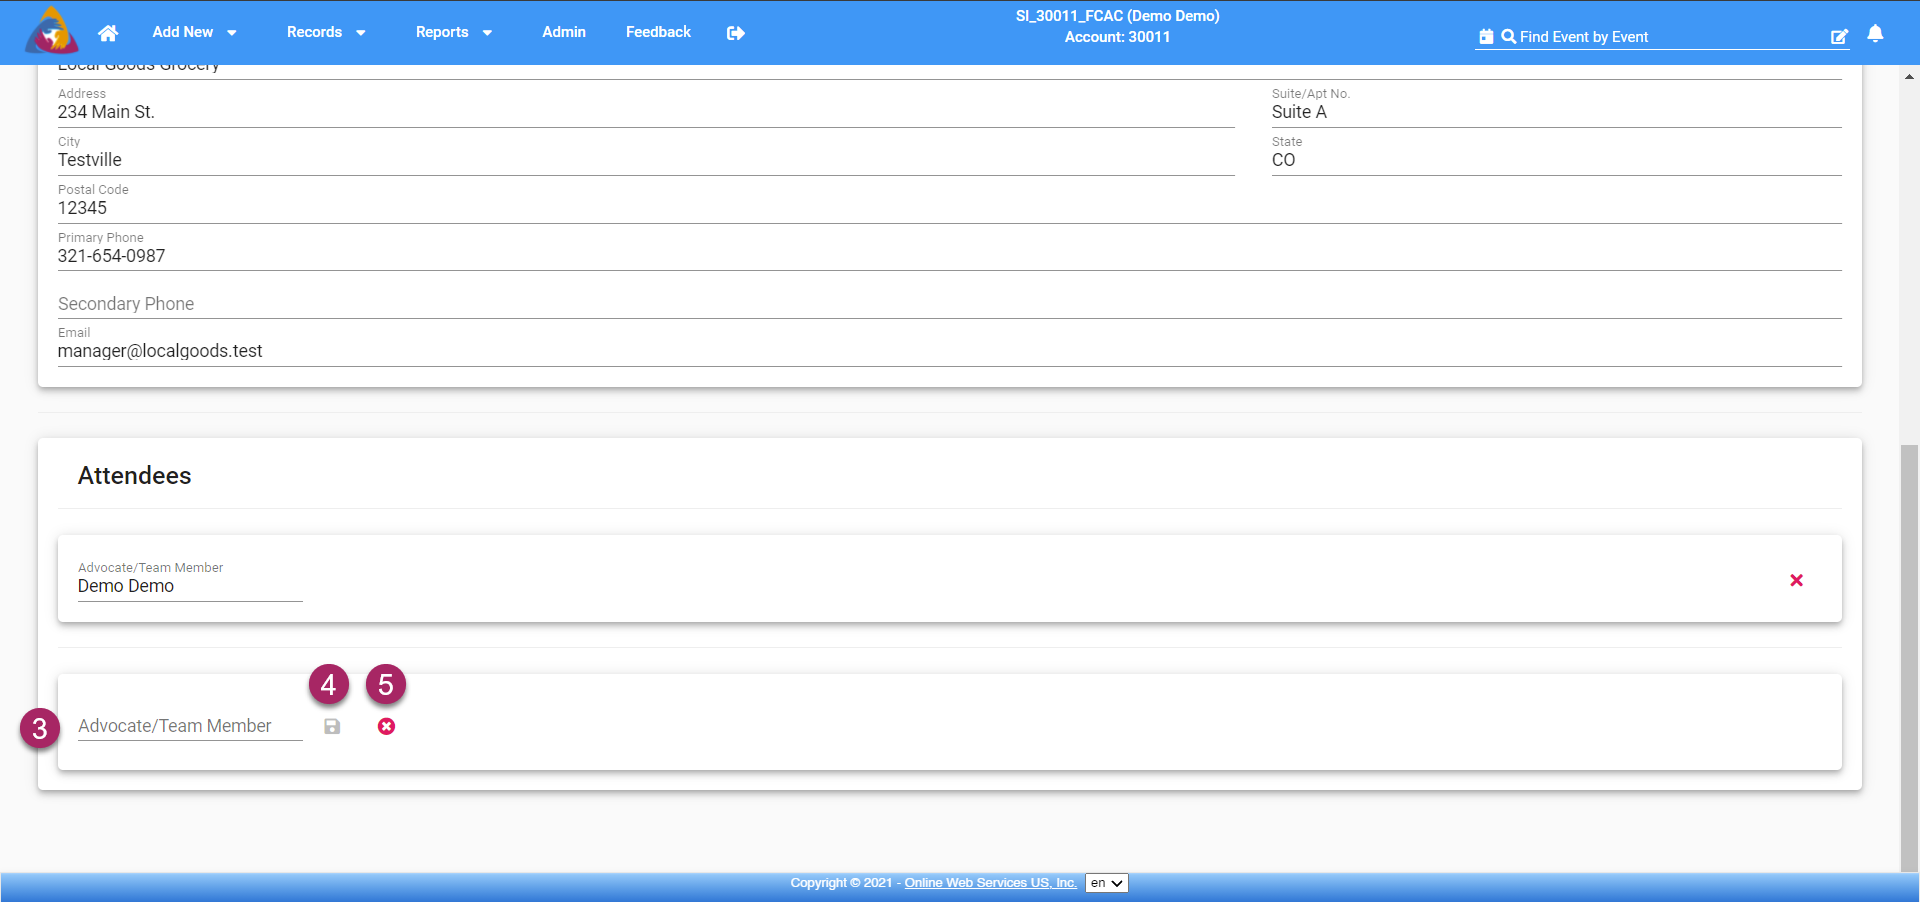
- If you add an Event to the system, you will be added by default as an Attendee. If you wish to remove yourself, click the red "x" icon on the right side of the tab containing your name.
- To add Attendees, first, click the blue "+" icon at the bottom of the block.
- This will open a tab with three options. The first is a field labeled "Advocate/Team Member". Start typing the name of whom you would like to add and a dropdown will appear with matching names in your agency. Click the name of the person you wish to add.
- After selecting someone, the floppy disk icon to the right of the field will turn blue. You can now click it to save the Attendee.
- If you wish to cancel adding an Attendee, click the red "x" icon to the right of the floppy disk icon and your changes will be canceled.
View/Edit Event Tags
Note: An administrator on your account must enable the Tag Manager Module before you can add, view, and edit tags for locations. For more information, see the article: What is the Tag Manager Module?

- Event Tags are separated into categories. The name of the category will appear on the left side of the block. Categories are not in your system by default and must be created by an administrator on your account. For more info, reference the article link at the top of this section.
- Add tags by clicking in the field labeled "Add Tag...". Clicking this field will open a dropdown list of all available tags for that category. Tags are not in your system by default and must be added to each category by an administrator on your account. For more info see the linked article at the top of this section.
- If you wish to remove tags, click the grey "x" icon on the right side of the tag you wish to delete.