
Your Upcoming Appointments shows you a quick overview of appointments you have with clients soon.
Note: The Appointment Manager Module must be enabled by an administrator on your account before you will be able to add, view, and edit appointments.

- Your Upcoming Appointments are located on the bottom middle of the home screen.
- All of your upcoming appointments will be listed, each with its own dropdown tab.
- If you wish to view all of your appointments, click the icon that looks like an arrow pointing out of a box. Clicking this will take you to the "All Upcoming Appointments" screen where you can view and edit appointments.
- For quick editing, expand the dropdown for the appointment you wish to view/edit. Expand the dropdown by clicking the down arrow icon on the right side of the appointment's dropdown.
- Anyone with the Full Client Admin Control security level will have the option of changing the view from their own upcoming appointments to a specific Advocate's upcoming appointments or ALL Advocates combined.
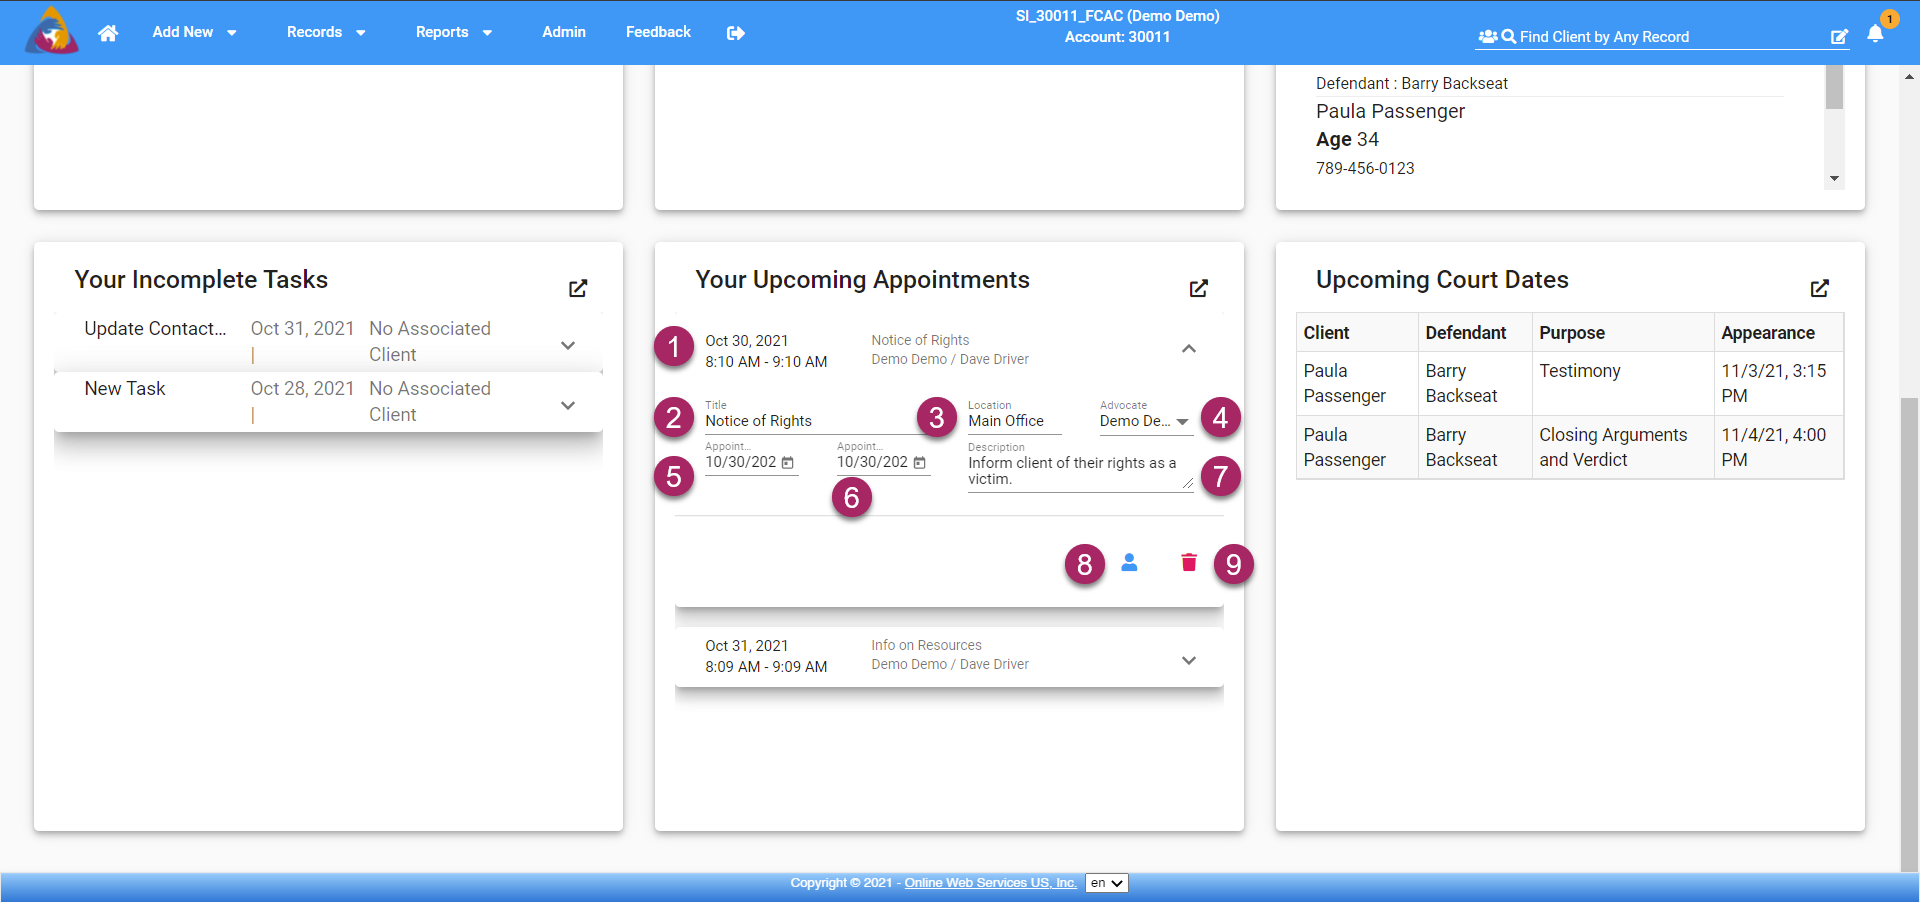
- Once the dropdown has been expanded, you will be able to edit the selected appointment. At the top of the dropdown, you will see the details of the selected appointment.
- The next field, "Title" will allow you to change the name of the appointment.
- To the right, is a field labeled "Location". Here you can input the name of the location where the appointment will be.
- The dropdown field labeled "Advocate" will let you pick the user that needs to be at the appointment. You will be the default selection.
- The next field is labeled "Appointment Start Date/Time". Click the calendar icon in this field will open a calendar allowing you to select a start date and enter a start time for the appointment.
- To the right, you will see a field labeled "Appointment End Date/Time". Once again, click the calendar icon in this field and a calendar will open allowing you to select an end date and enter an end time for the appointment.
- Add a description of the event to provide more detail in the field labeled "Notes".
- If you need to view the details of the client involved with the appointment, click the blue silhouette icon.
- If you wish to delete a task, do so by clicking the red trash can icon at the bottom right of the task.