
Notes and services have now been combined, Add notes to provide more detail about clients and keep records of services provided to clients.
Navigating to a Client's Notes/Services Tab
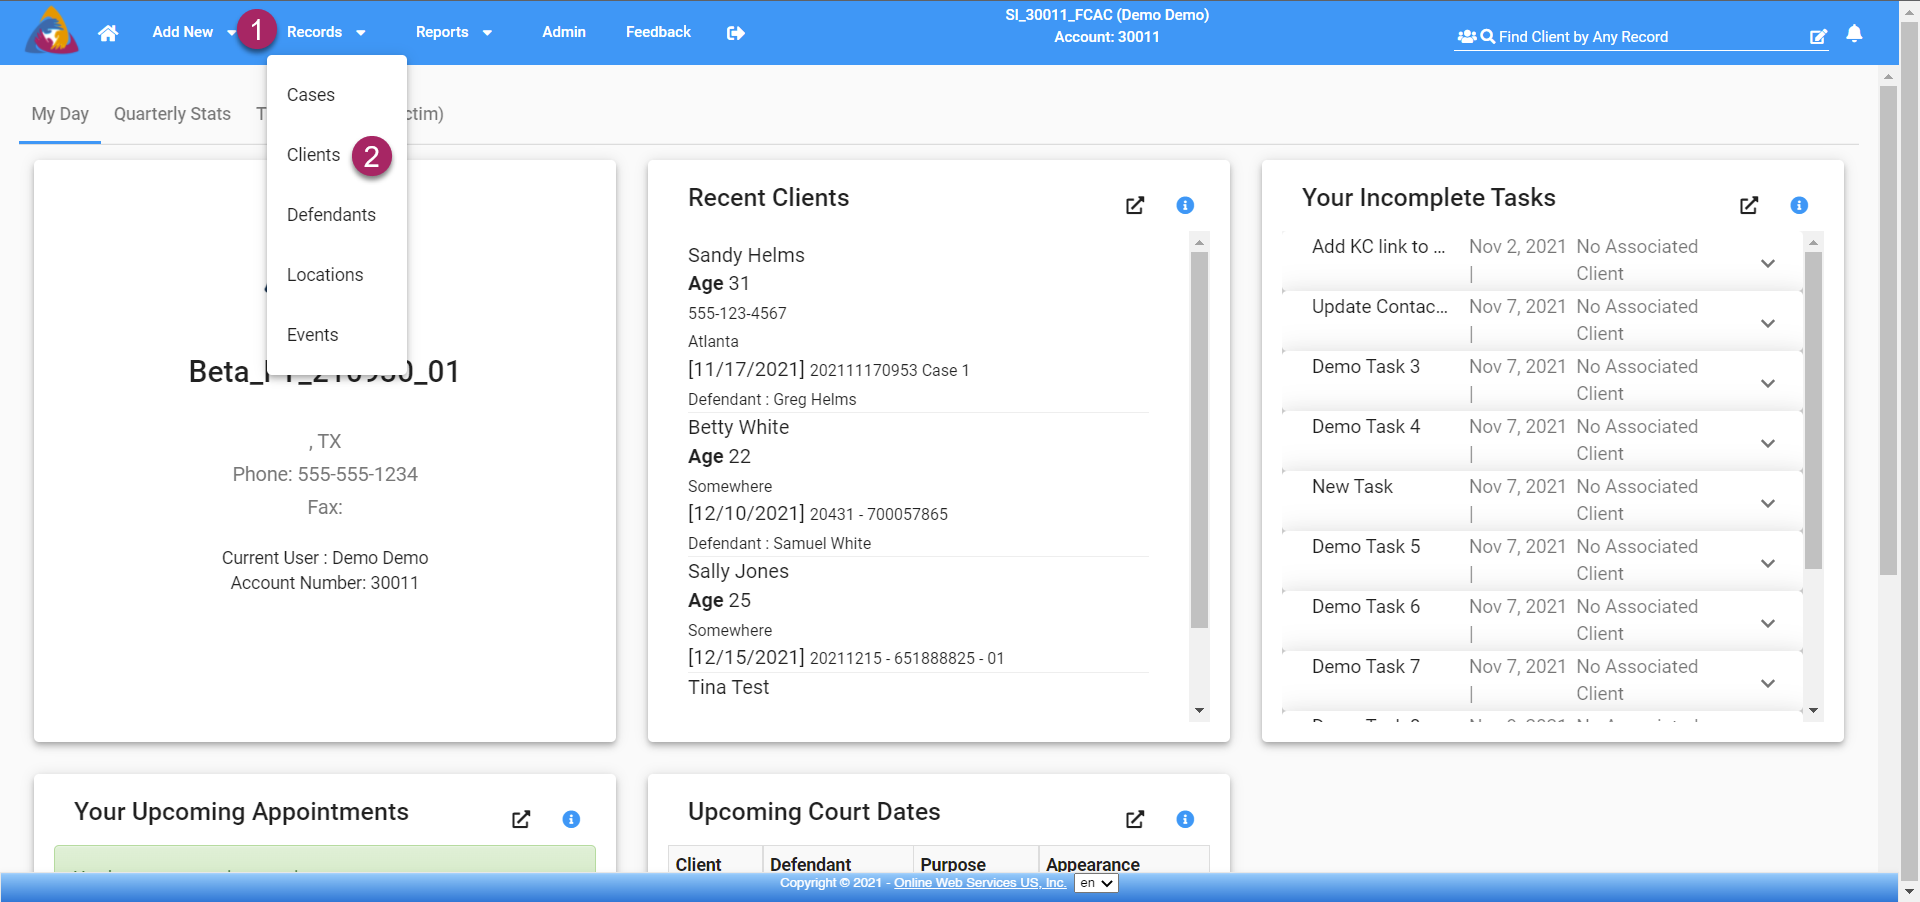
- To start, click the "Records" dropdown on the top blue bar. This will expand the dropdown to show the types of records in your system.
- From the dropdown list, select "Clients" by clicking on it. This will navigate you to the Client List Screen (shown below).
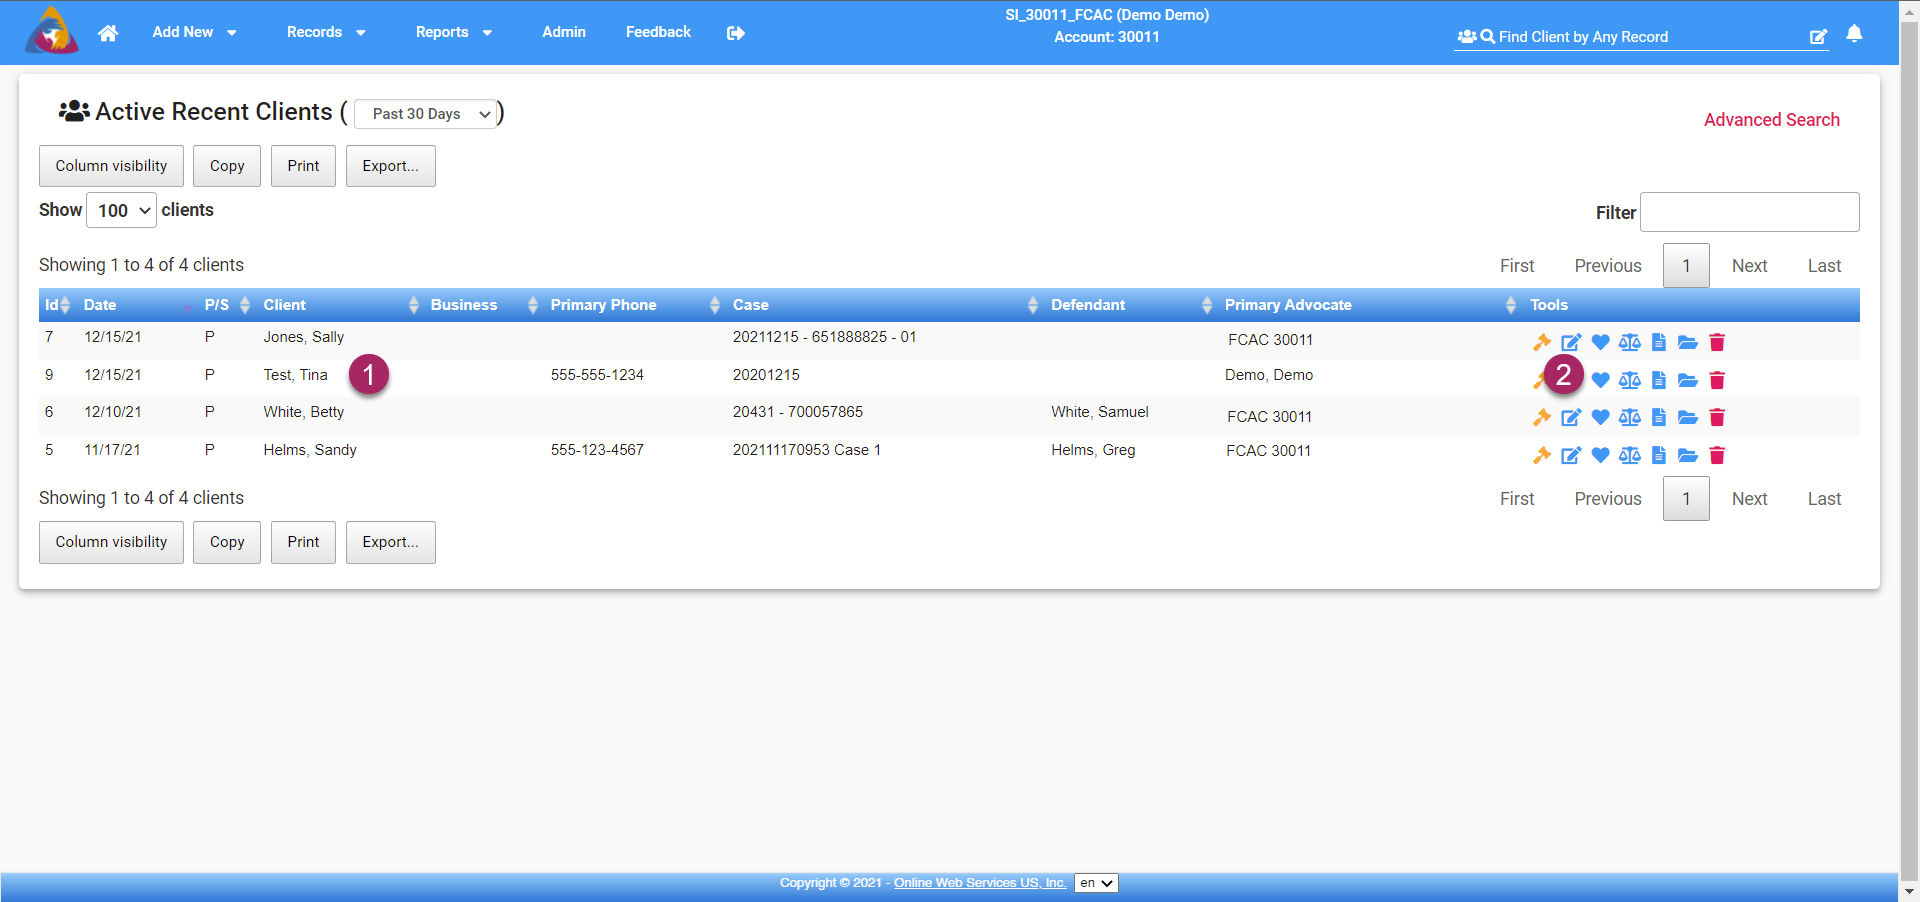
Next, you will need to select a client that you wish to add notes and/or services to.
- Select a client from the list by clicking on the row containing their information. This will take you to the Client's Screens. You will arrive on the Notes/Services tab.
- Alternatively, you can click the heart-shaped icon on the right side of a client's row. This will also navigate you directly to the Notes/Services tab.
Notes

Once you are on the Notes/Services tab, all functions for entering and viewing notes will appear on the left side of the screen.
- To add a note, start by entering the date and time for the note in the field labeled "Note Date". Click the calendar icon on the right side of the field and a pop-up calendar will open allowing you to select the date and time of entry. This field will default to the current date and time.
- Next, enter your note(s). Click in the text box and begin typing.
- Above the text box are formatting options for your note.
- If the note you are entering is confidential, you can mark it as such by clicking the toggle button labeled "CONFIDENTIAL".
- Once you are finished the "Add Note" button below the text box will turn blue. Click the button to save your note.
- Your saved notes will appear in the list below the note entry block. The top of each note will display the date and time of entry as well as the advocate who entered it. The content of the note will be displayed underneath.
- If you wish to make edits to a note, click the blue pencil icon at the bottom of the note you wish to edit.
- To print the note, click the blue printer icon at the bottom of the note you wish to print. This will create a printer-friendly version of the note and will open your computer's print window allowing you to send the document to your printer.
- If you need to delete a note, click the red trashcan button on the bottom right side of the note.
Services
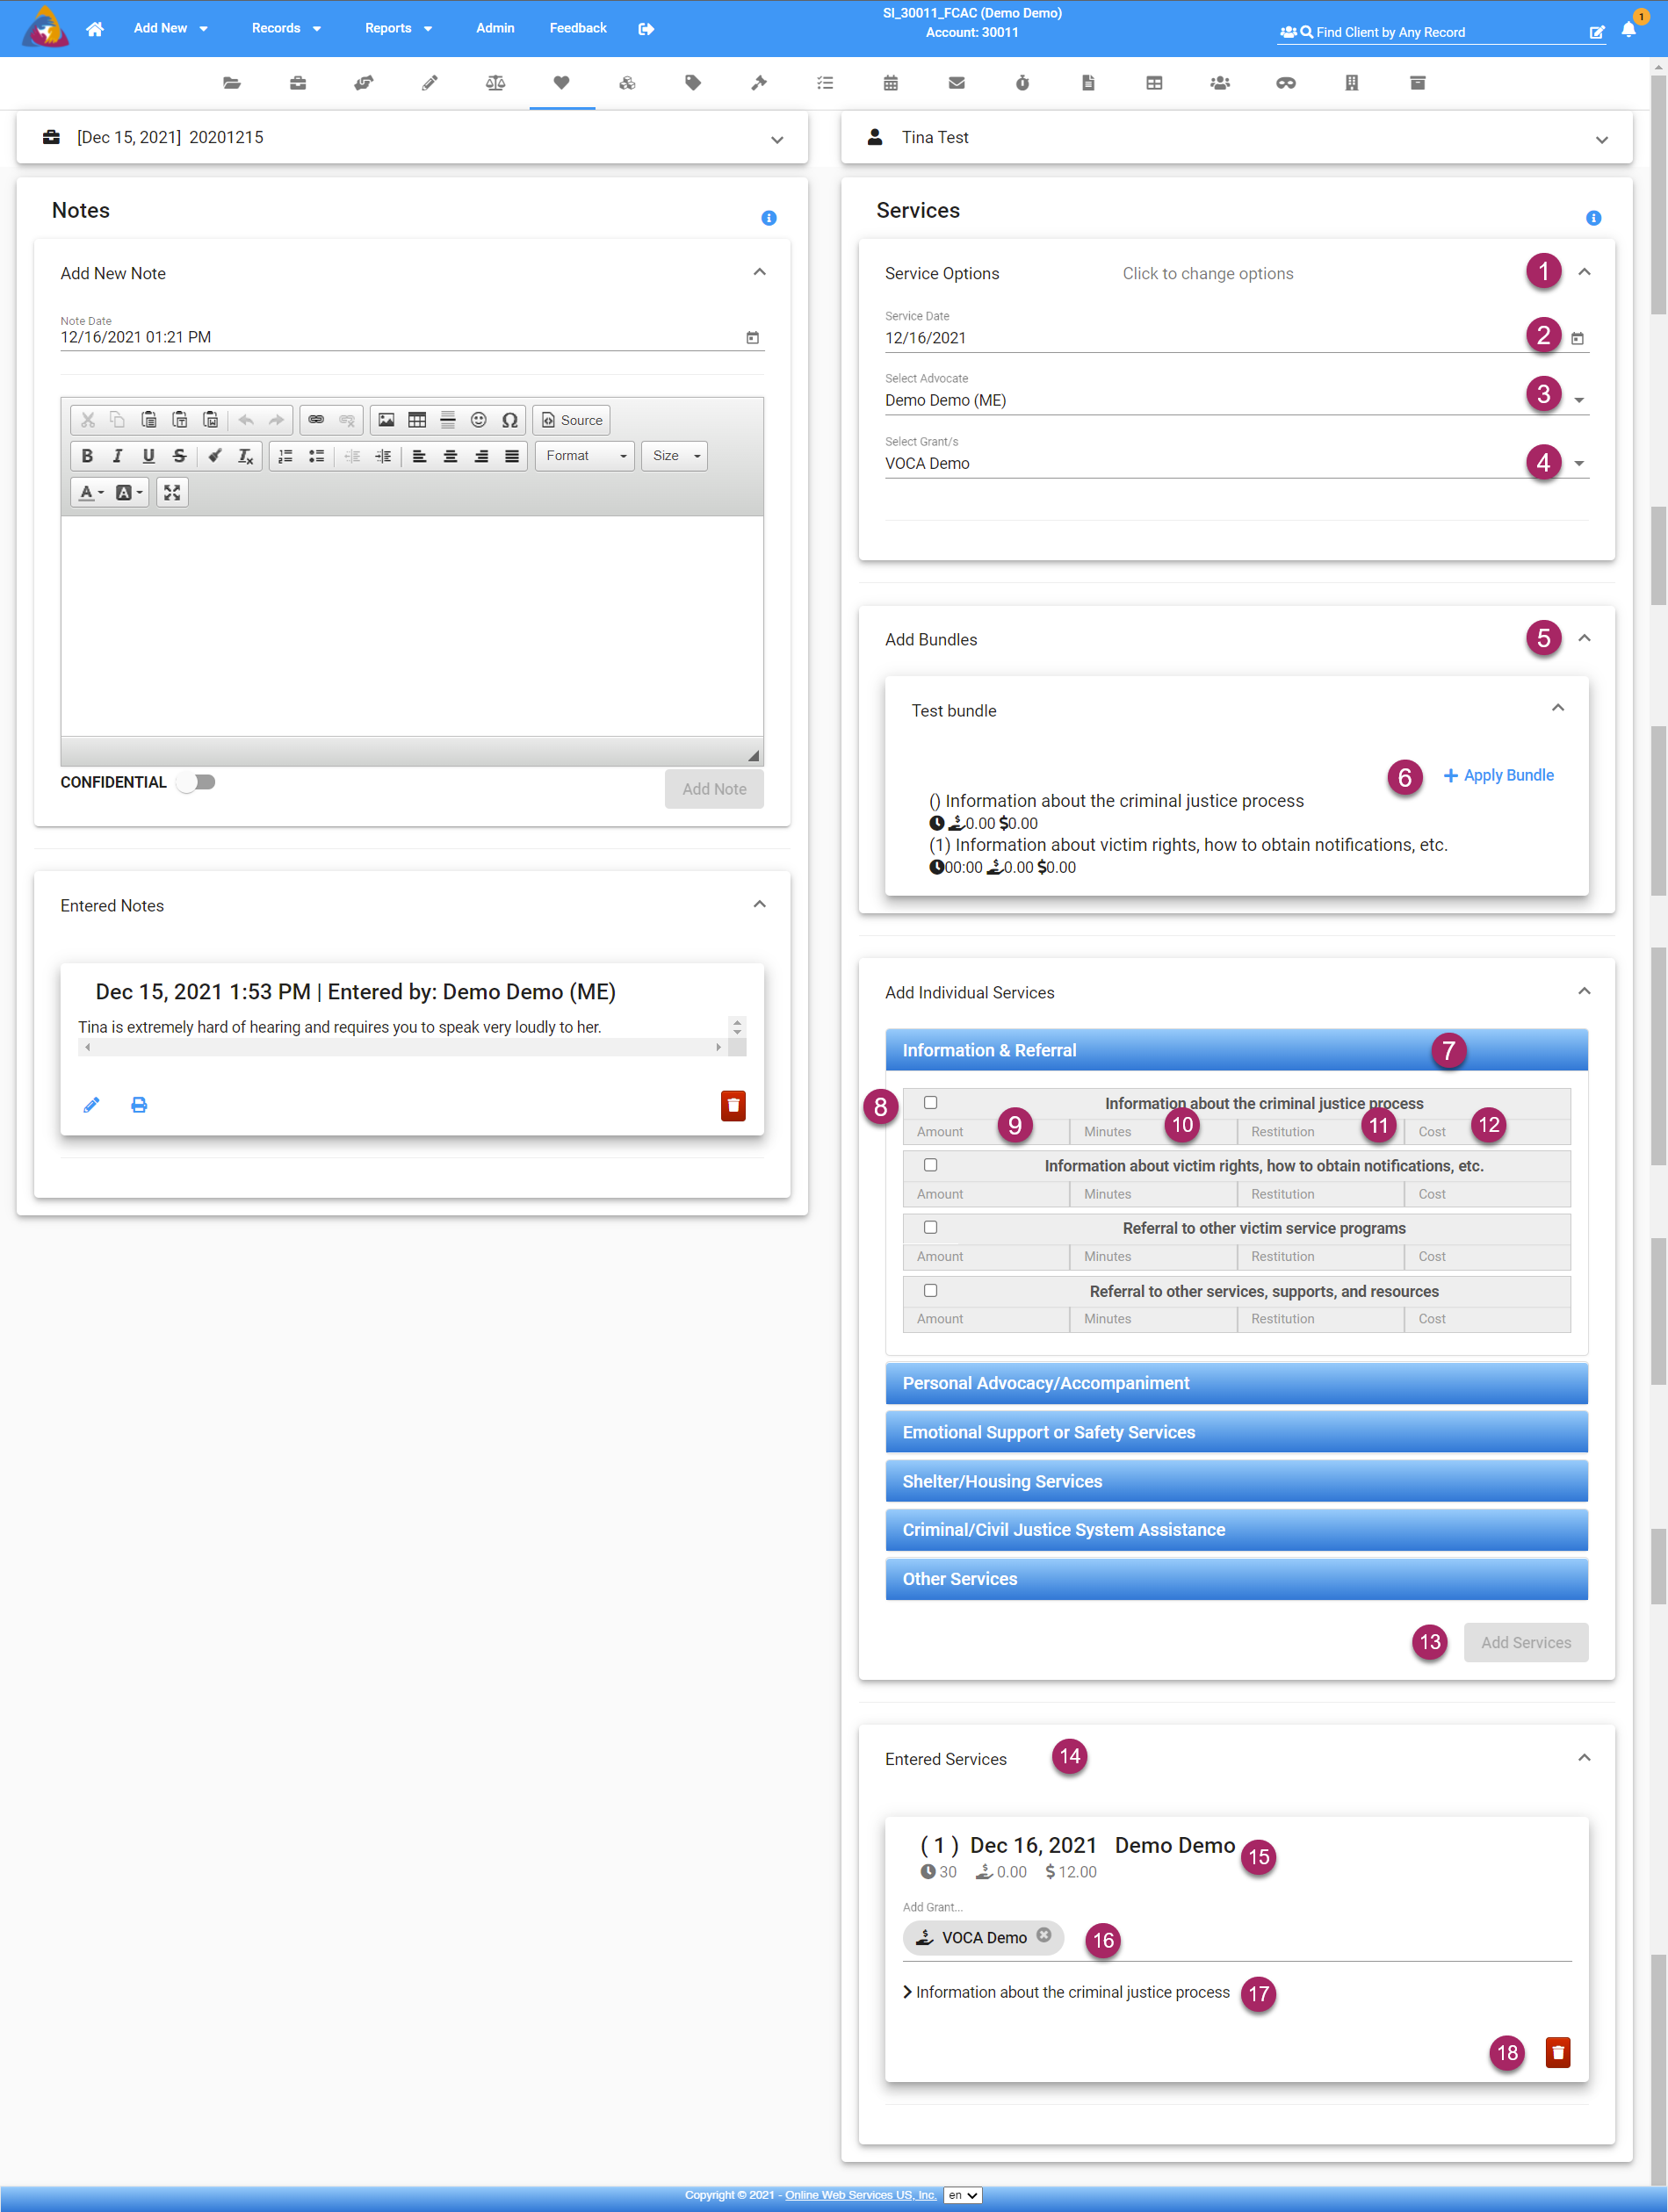
- To start adding a service, click the first dropdown block on the right side of the screen labeled "Service Options". The dropdown will expand to show 3 fields for basic service information.
- The first field in the block is labeled "Service Date". Click the calendar icon on the right side of the field to open a pop-up calendar that will allow you to select a date and time for the service. The default will be the current date and time.
- Next, click the field labeled "Select Advocate". A list of advocates will drop down and you can select the advocate who provided the service to the client. You (the current user) will be the default for this field.
- The last field in the block is labeled "Select Grant(s)". Click this field will drop down a list of the grants for your agency. Select the grants that apply to this service by clicking on them.
- The next block allows you to add Service Bundles to the client. Each bundle that has been entered into your system will be shown in a list. Click on a bundle to see the services included in the bundle. Clicking a bundle will also reveal a "+ Apply Bundle" button.
- Clicking the "+ Apply Bundle" button will add that bundle of services to your client. For more information about Service Bundles, see the article: What is the Service Bundles block?
- The next block allows you to add individual services. Services are split into categories, each with its own blue tab. Clicking a category tab will expand the tab to show all of the services in that category.
- Select a service to add from a category by clicking the correlating checkbox at the top left of the service. Multiple services can be checked to be added at once.
- Below the name of the service, enter the amount (how many) of that service that was provided. For example: if the client came in twice for information about the criminal justice process, then you would enter "2" as the amount.
- Next, enter the time spent providing the service in the field labeled "Minutes". Please enter the time in minutes. For example: if the service took 2.5 hours, enter "150".
- If any restitution was paid to the client, enter the amount ($) that was spent.
- The last piece of service info is "Cost". In this field enter the cost ($) to your agency (aside from any restitution) to provide the service.
- Once you have selected and entered details for all services you are adding, click the button labeled "Add Services" to save your updates.
- The final block is labeled "Entered Services" This will show a list of all services entered for this client.
- Each service will have its own block within the "Entered Services" block. The top of each service block will show the details of the service.
- Grants can be added and removed from entered services in the field labeled "Add Grant". Add new services by clicking the field and selecting grants from the dropdown list that opens. Remove grants by clicking the round "X" button on the right side of the grant you wish to remove.
- Click the name of the service provided and it will expand to show the Amount, Minutes, Restitution, and cost fields. These fields can be edited by clicking on them. All changes to Entered Services will be saved automatically.
- If you wish to remove a service, click the red trashcan button on the bottom left side of that services block.
If a Case Has More Than One Client
If you have more than one client on a case and want to copy the notes from one client on the case to another client on the same case you can do so using the copy icon  in the top right corner of the notes section.
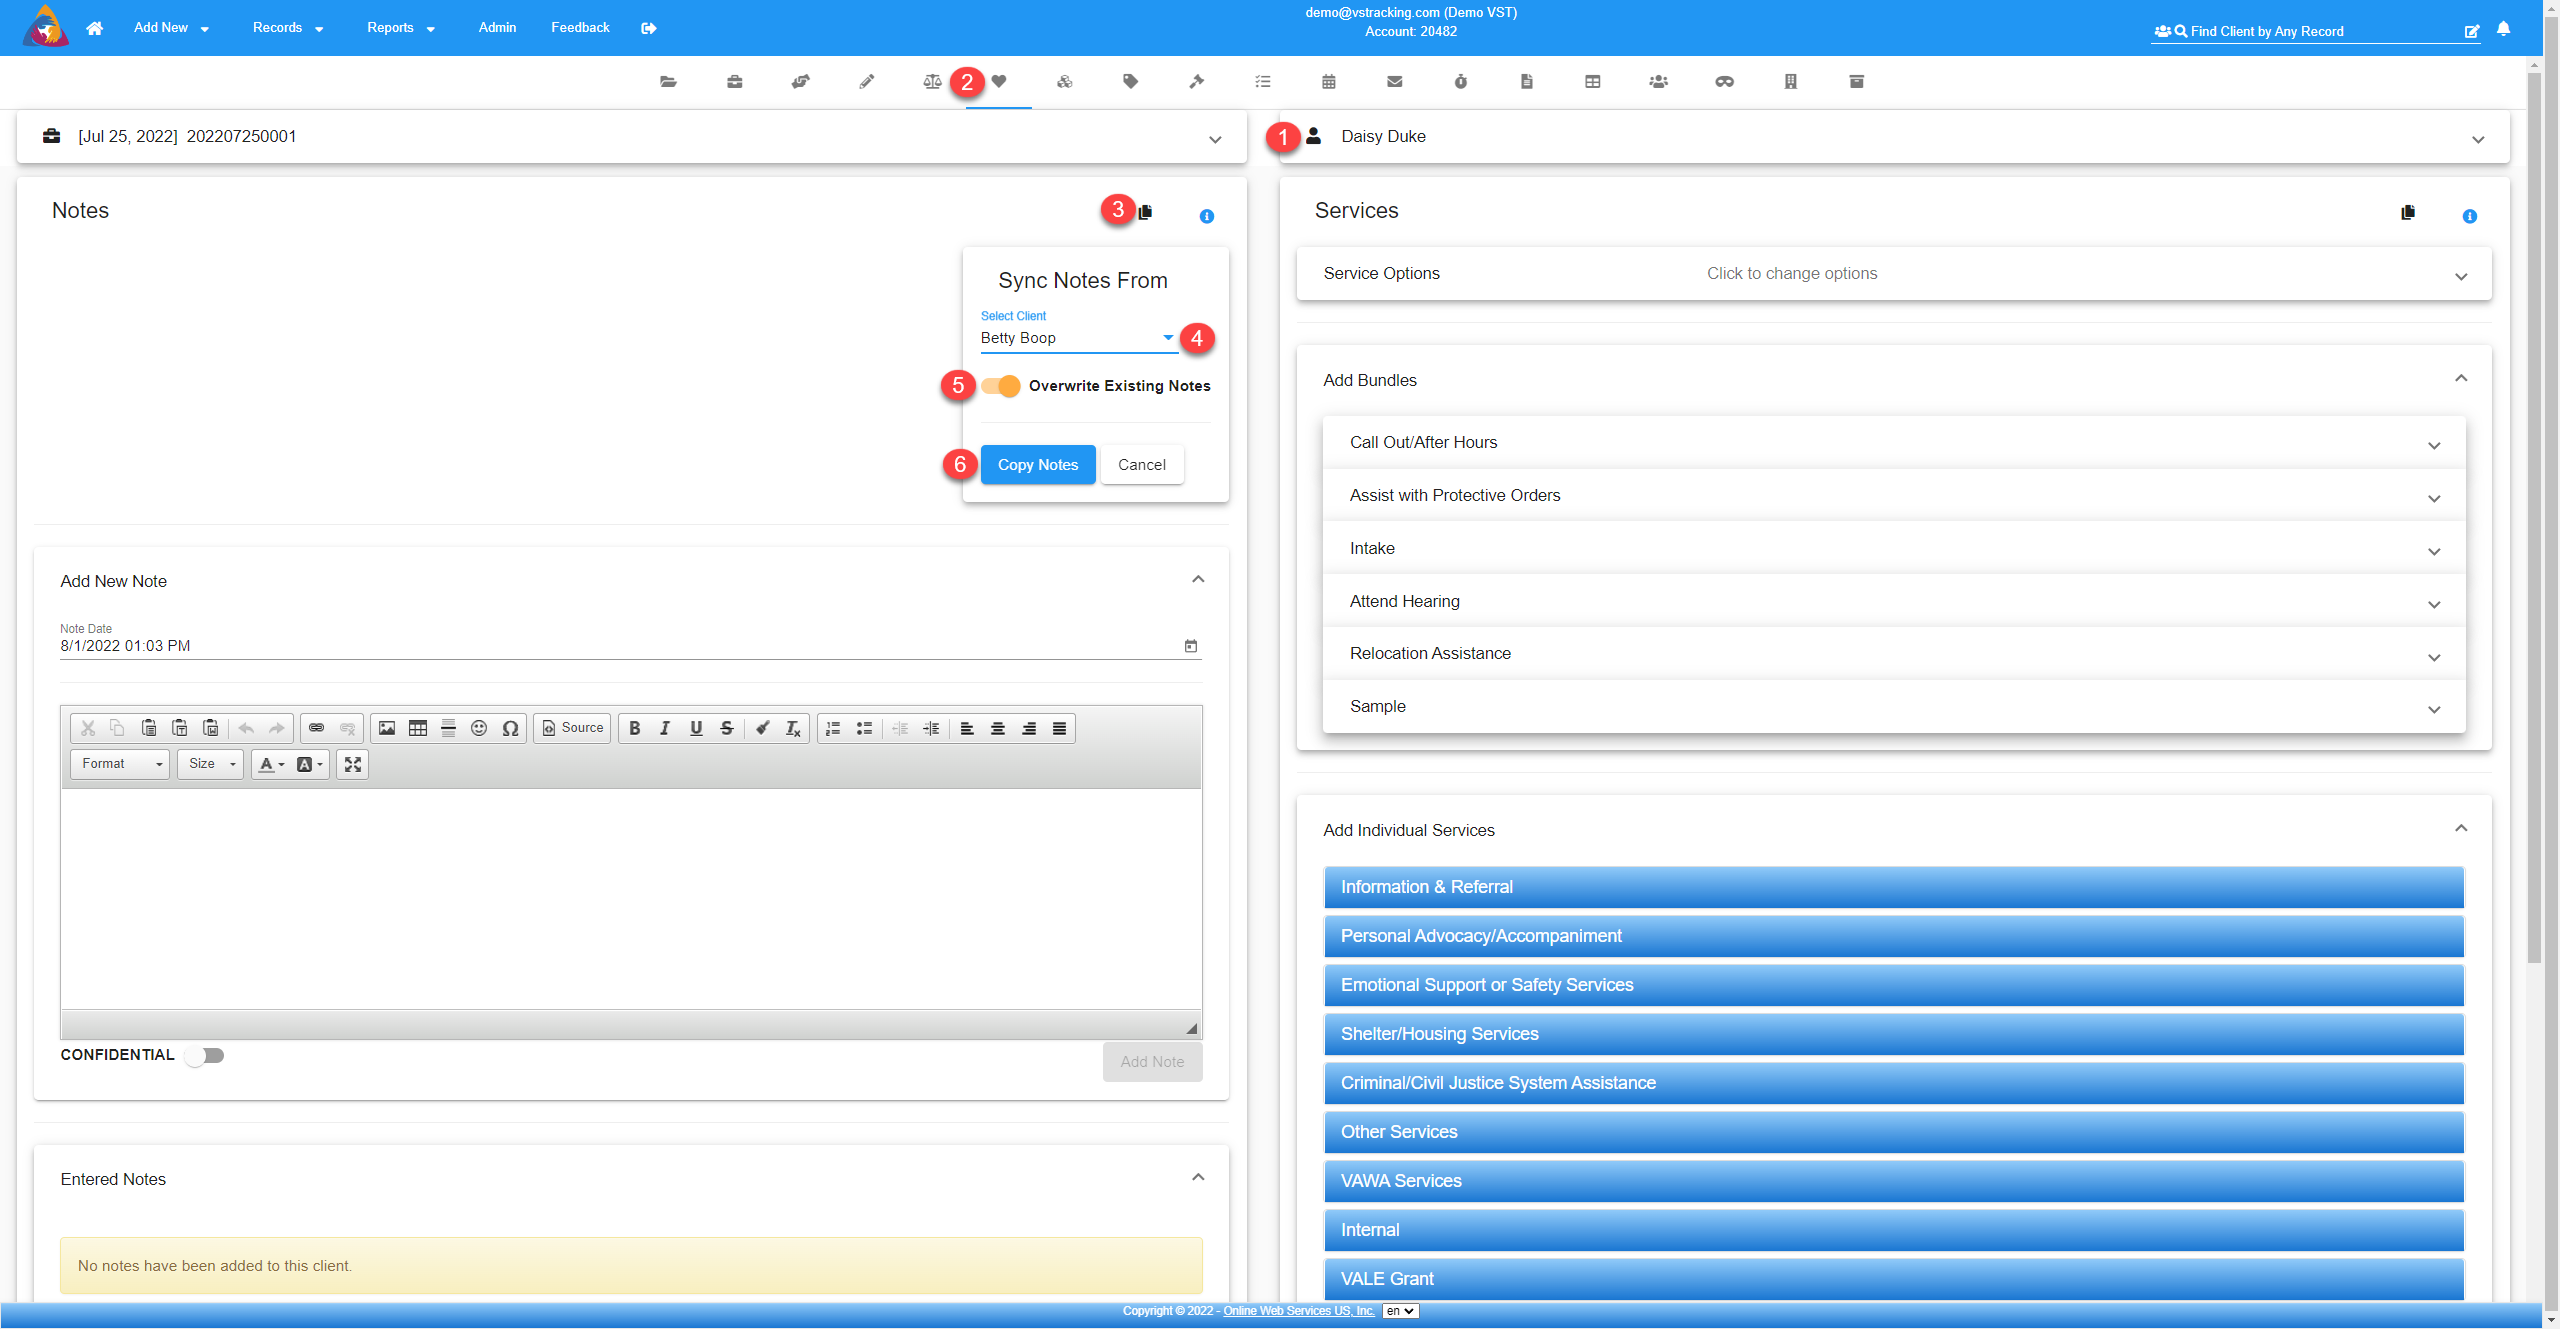
1. Access the client screens of the client you want to copy the notes TO.
2. Click on the Notes and Services tab.
3. Click on the  copy icon.
4. Choose the client you want to copy the notes FROM.
5. Choose to overwrite the notes on the clients screen. This means that any notes that are currently displayed on this screen will be REPLACED with the notes from the other client. OR you can turn off the Overwrite button and just add the copied notes to the clients other notes displayed.
6. Click on the blue Copy Notes button.
Please be aware that if you copy notes from a client that does not have notes to a client that does have notes (and use the Overwrite option), the notes will be replaced with blank. It will seem that the notes have 'disappeared'.