
Workflows allow you to create stages for Cases and Events. They can be added and edited on the Workflows tab in the admin settings.
This article will discuss:
- Edit Case Stages
- Add New Case Stage
- Set Default Case Stage/Deactivate Case Stage
- Edit Event Stages
- Add New Event Stage
- Set Default Event Stage/Deactivate Event Stage
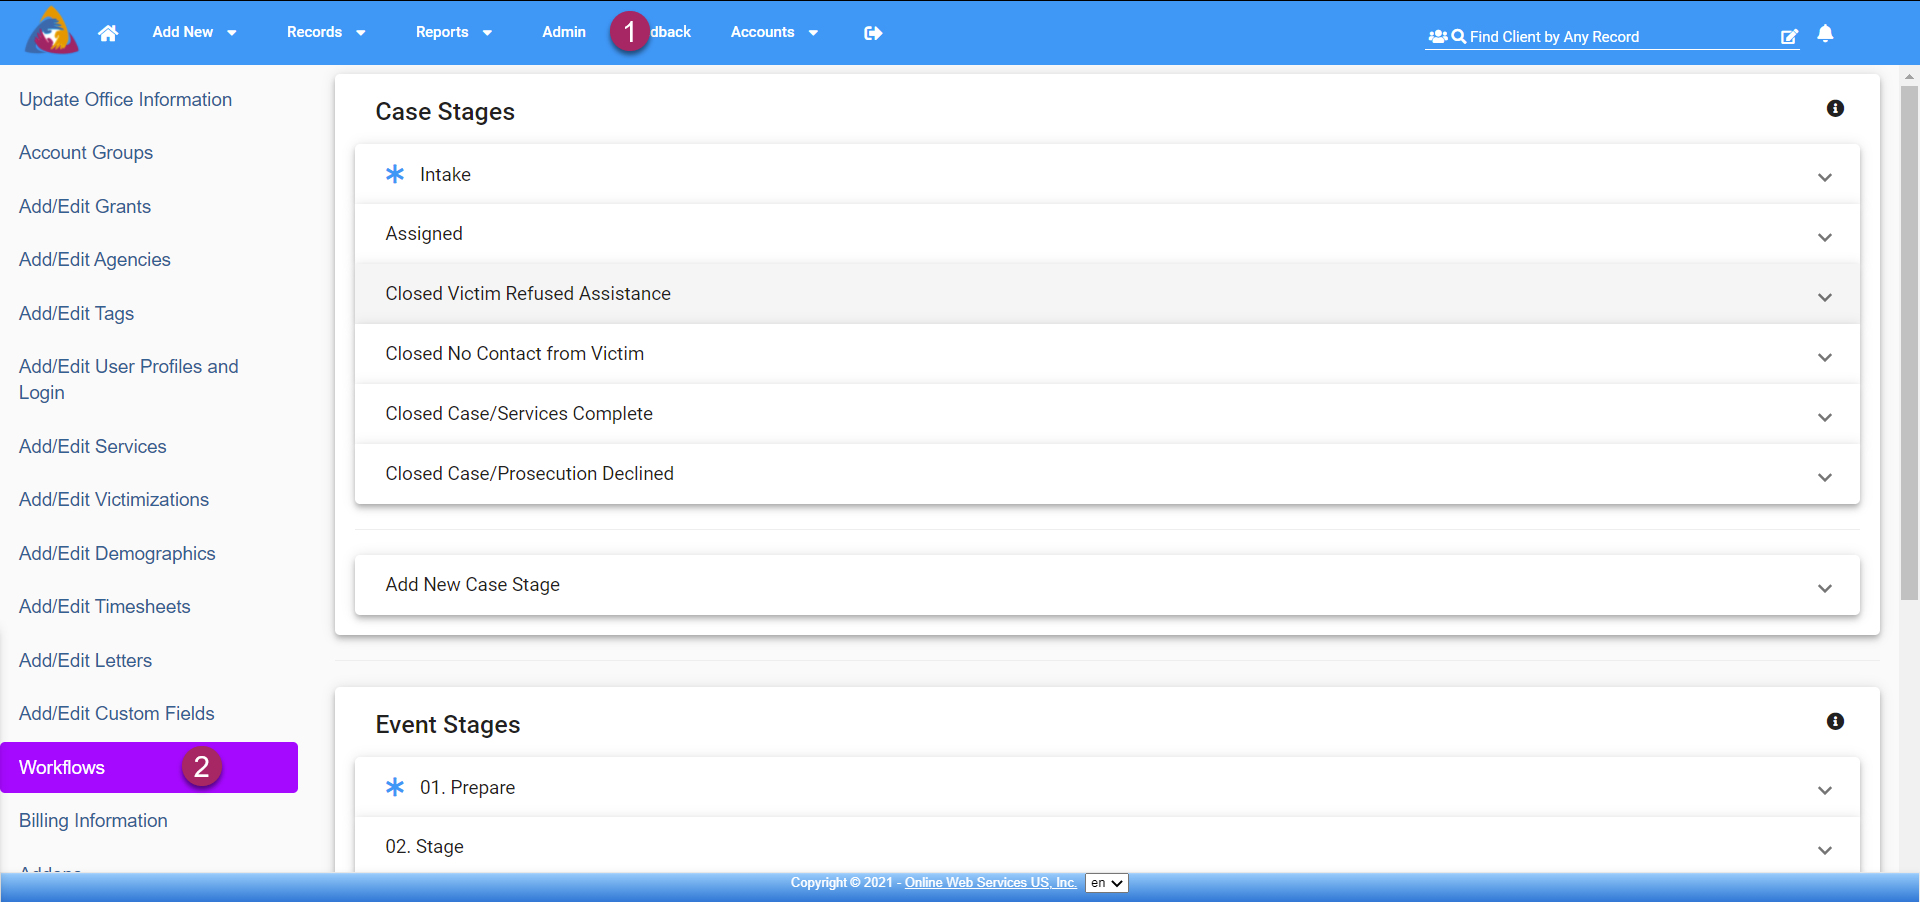
- Start by navigating to the admin settings by clicking the "admin" button on the top blue bar.
- Next, navigate to the Workflows tab located on the left side of the screen.
Edit Case Stages
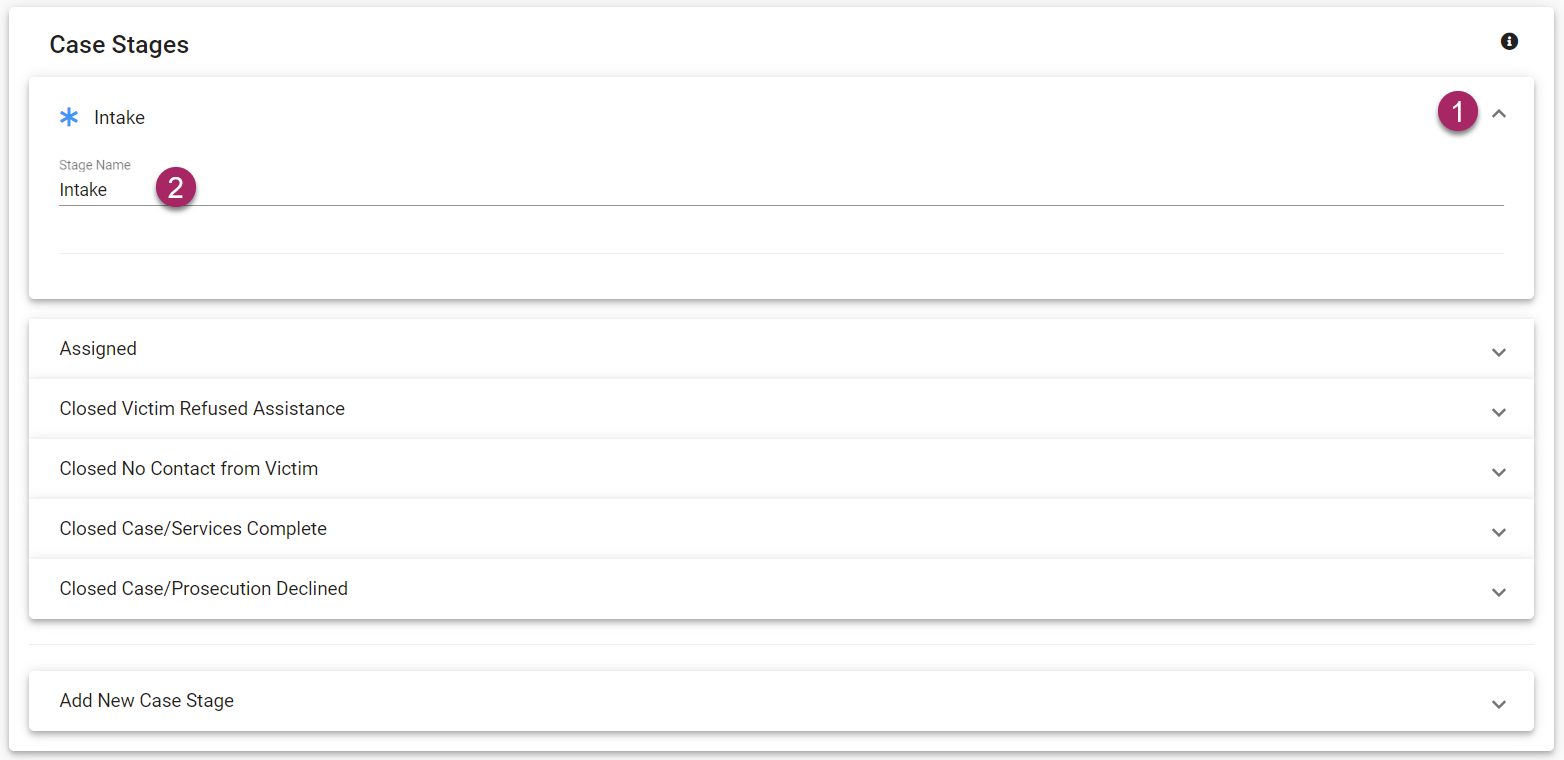
- To edit a Case Stage, start by expanding the tab of the Case stage you wish to edit by clicking the arrow icon on the right side of its tab.
- Click in the field below "Stage Name" and you will be able to edit or change the name of the selected Case Stage.
Add New Case Stage
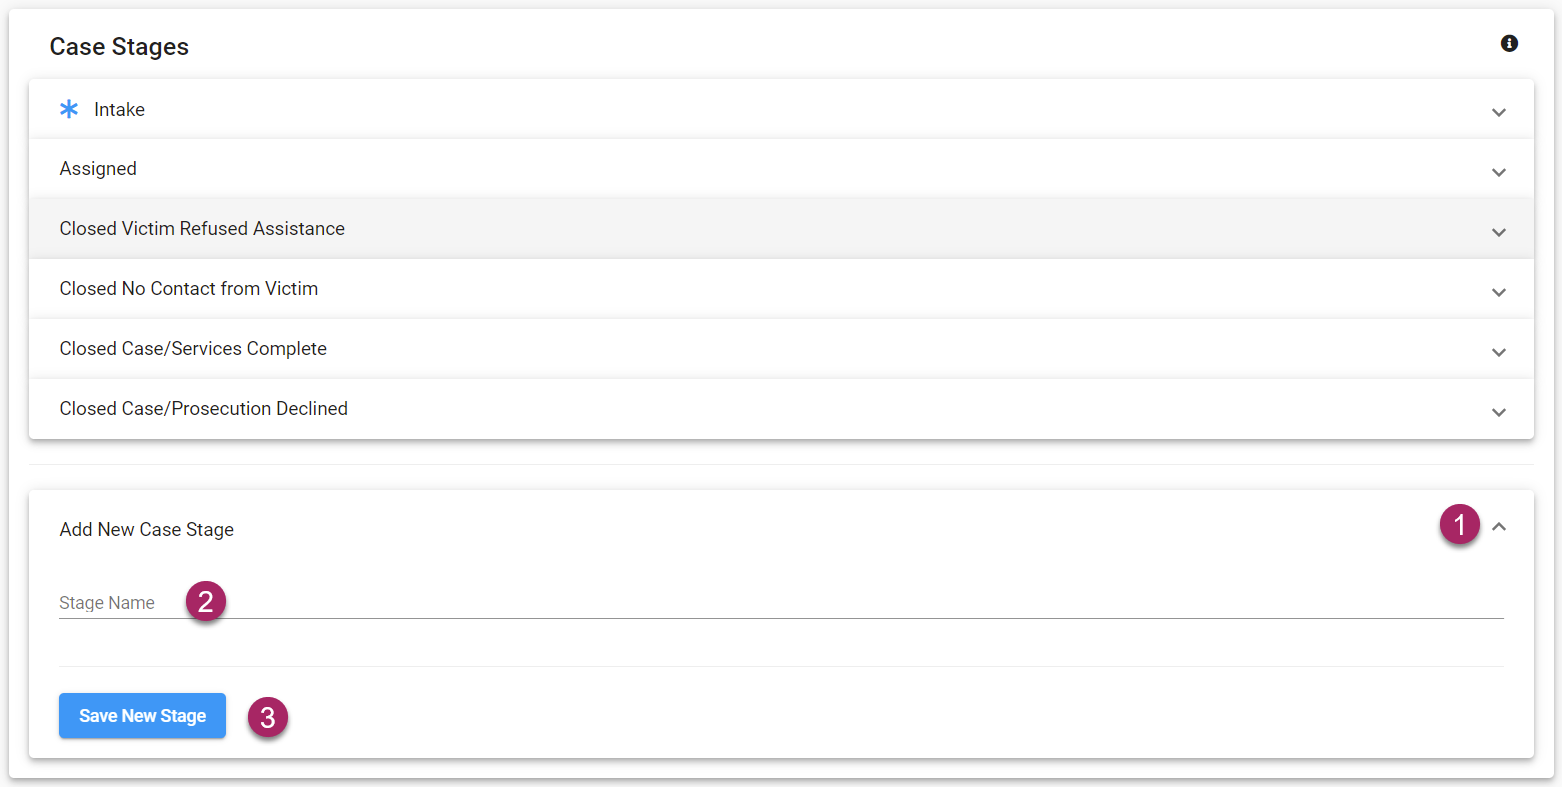
- Begin by expanding the Add New Case Stage tab by clicking the arrow icon on the right side of the tab.
- Click in the field labeled "Stage Name" and enter a name for your new Case Stage.
- Once you are finished, click the blue "Save New Stage" button to save your new Case Stage.
Set Default Case Stage/Deactivate Case Stage

- The current default Case Stage is marked by a blue asterisk next to its name.
- To change the default stage, start by expanding the tab of the Case stage you wish to set as the new default. Expand the tab by clicking the arrow icon on the right side of the desired Case Stage tab.
- Once the tab has been expanded, you can click the blue asterisk at the bottom of the expanded tab. Changes will be saved automatically.
- If you wish to deactivate a Case Stage, click the icon that looks like two arrows facing in opposing directions.
Edit Event Stages

- To edit an Event Stage, start by expanding the tab of the Event stage you wish to edit by clicking the arrow icon on the right side of its tab.
- Click in the field below "Stage Name" and you will be able to edit or change the name of the selected Event Stage.
Add New Event Stage
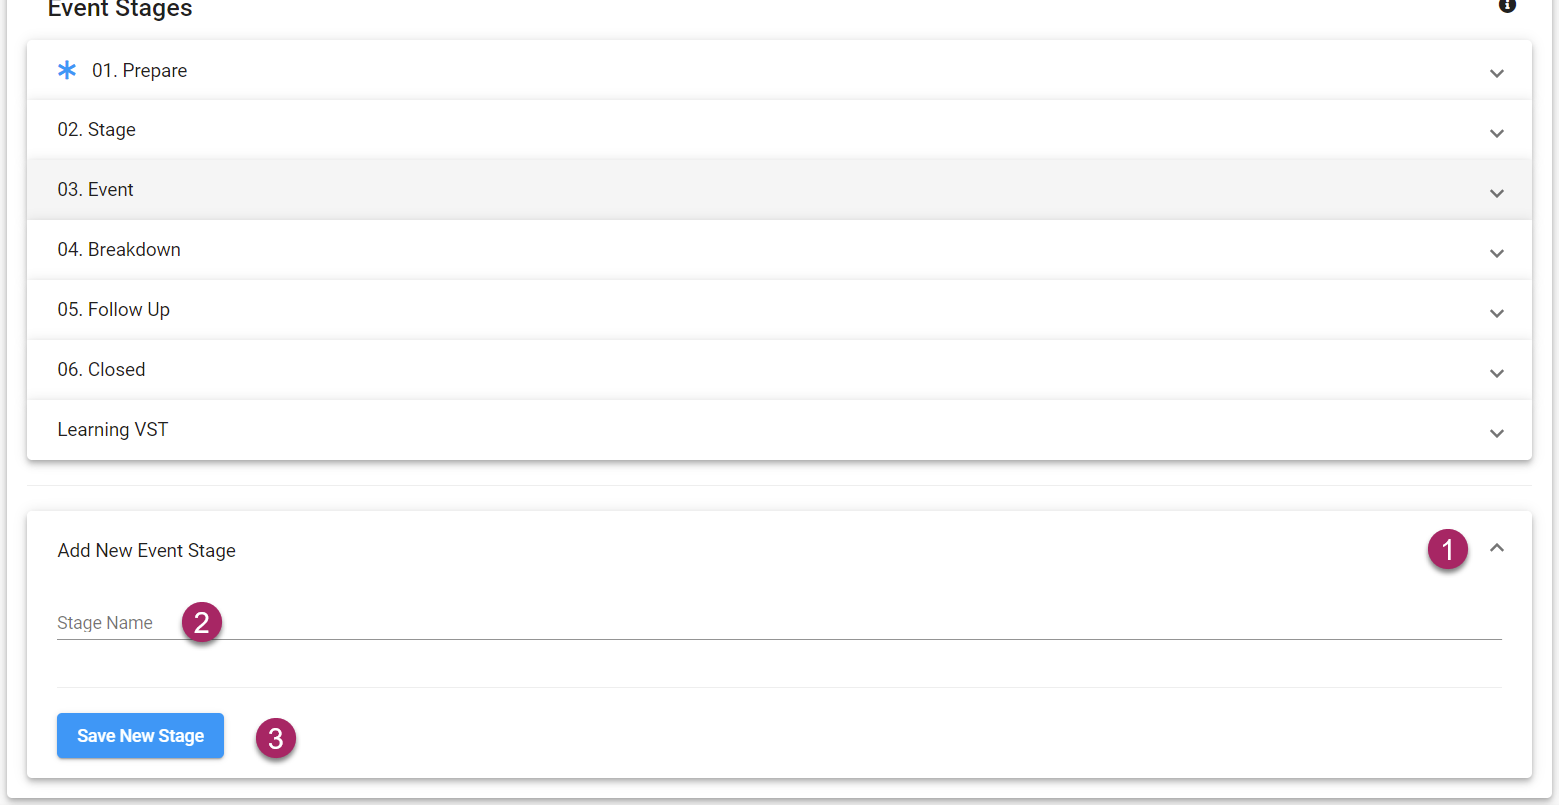
- Begin by expanding the Add New Event Stage tab by clicking the arrow icon on the right side of the tab.
- Click in the field labeled "Stage Name" and enter a name for your new Event Stage.
- Once you are finished, click the blue "Save New Stage" button to save your new Event Stage.
Set Default Event Stage/Deactivate Event Stage
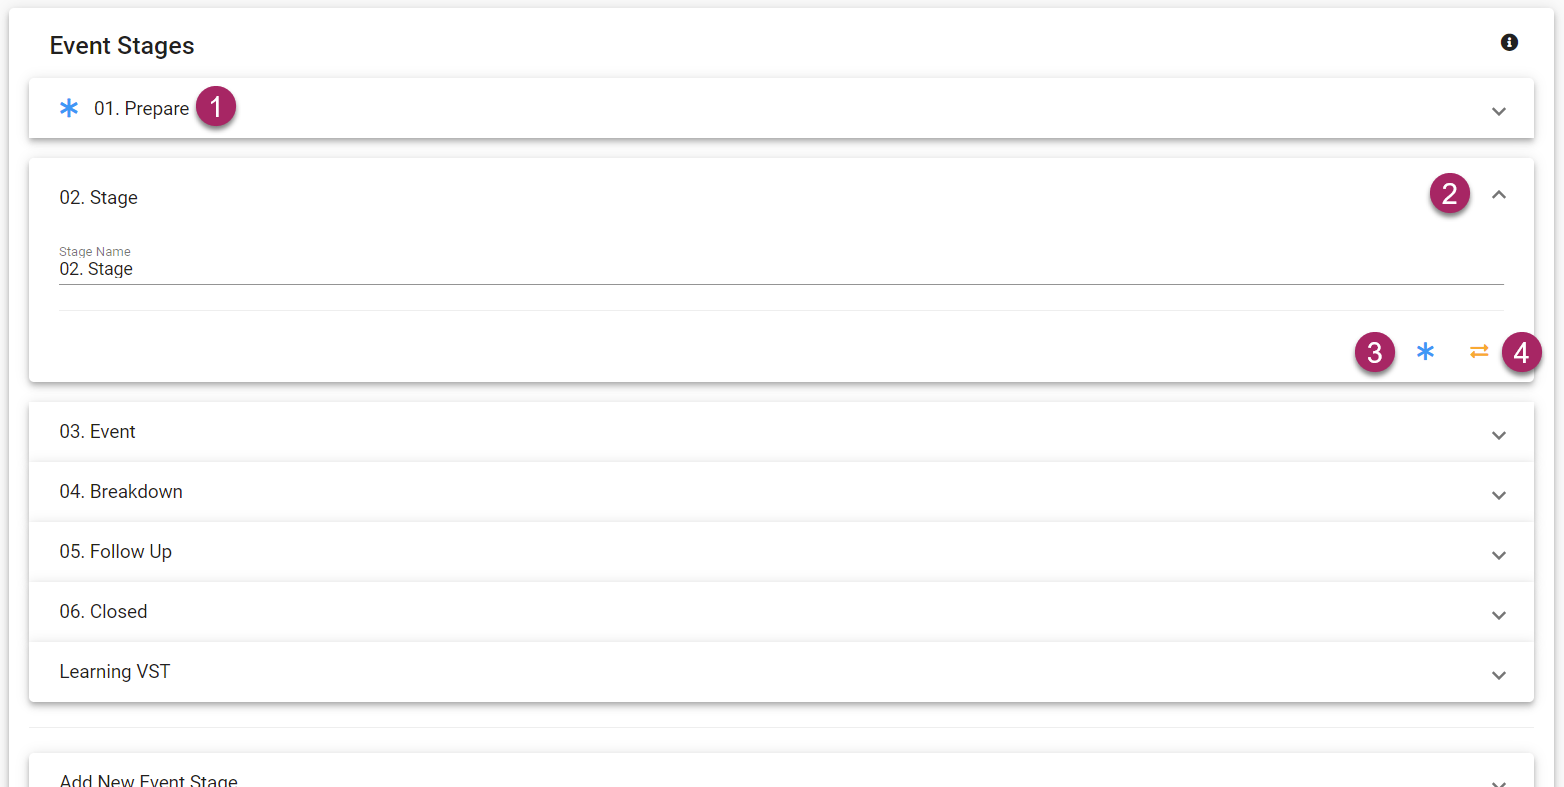
- The current default Event Stage is marked by a blue asterisk next to its name.
- To change the default stage, start by expanding the tab of the Event stage you wish to set as the new default. Expand the tab by clicking the arrow icon on the right side of the desired Event Stage tab.
- Once the tab has been expanded, you can click the blue asterisk at the bottom of the expanded tab. Changes will be saved automatically.
- If you wish to deactivate an Event Stage, click the icon that looks like two arrows facing in opposing directions.