
Admin users can add, edit, and manage victimizations using the victimizations manager in the Admin settings.
Manage Victimizations
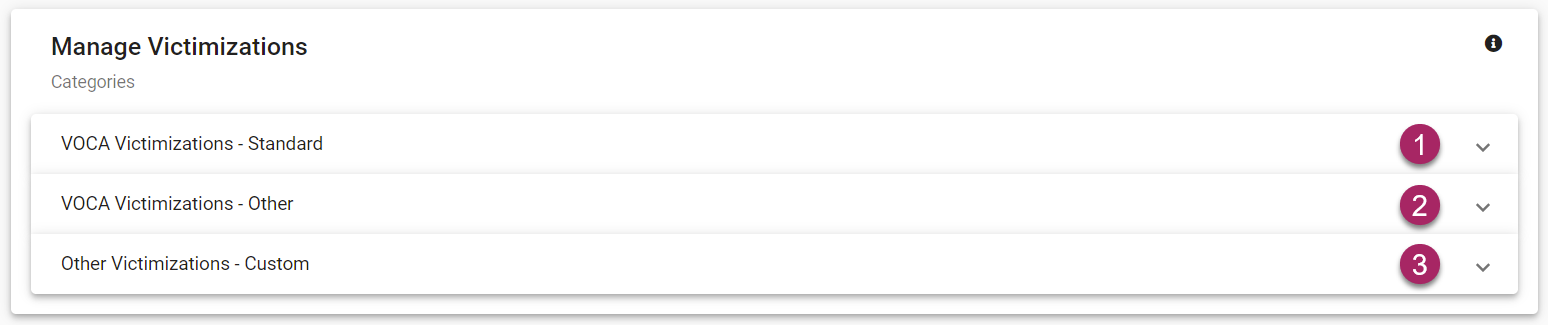
- Manage Victimizations is separated into three main categories. The first two are for VOCA grant reporting. The first category, VOCA Victimizations - Standard, includes default victimizations that are used for reporting for VOCA grants.
- The next category, VOCA Victimizations - Other, allows you to create custom victimizations that may also apply to your VOCA grant but may not already be categorized as a standard victimization.
- The last category, Other Victimizations - Custom, allows you to add any other victimizations that may not be part of your reporting for VOCA.
Each category tab has additional options when expanded which will be detailed below.
VOCA Victimizations - Standard

- Expand the VOCA Victimizations - Standard tab by clicking the arrow icon on the right side of the tab (see above, Manage Victimizations - Step 1).
- Once expanded you will see a list of victimizations.
- Each victimization tab can be expanded to add a detailed description of the victimization. (see below - Edit Victimizations - Standard)
- In each category, you will have the option to add victimizations. Click the row icon to the right of the "Add New Victimization" tab to expand the tab and add a victimization.
- Enter a description of the Victimization in the space provided.
- Once you have entered a description, the "Save New Victimization" button will turn white and you can click it to finalize and save.
Note: Any Victimizations added while in the "VOCA Victimizations - Standard" tab will be added to the "VOCA Victimizations - Other" category.
VOCA Victimizations - Other
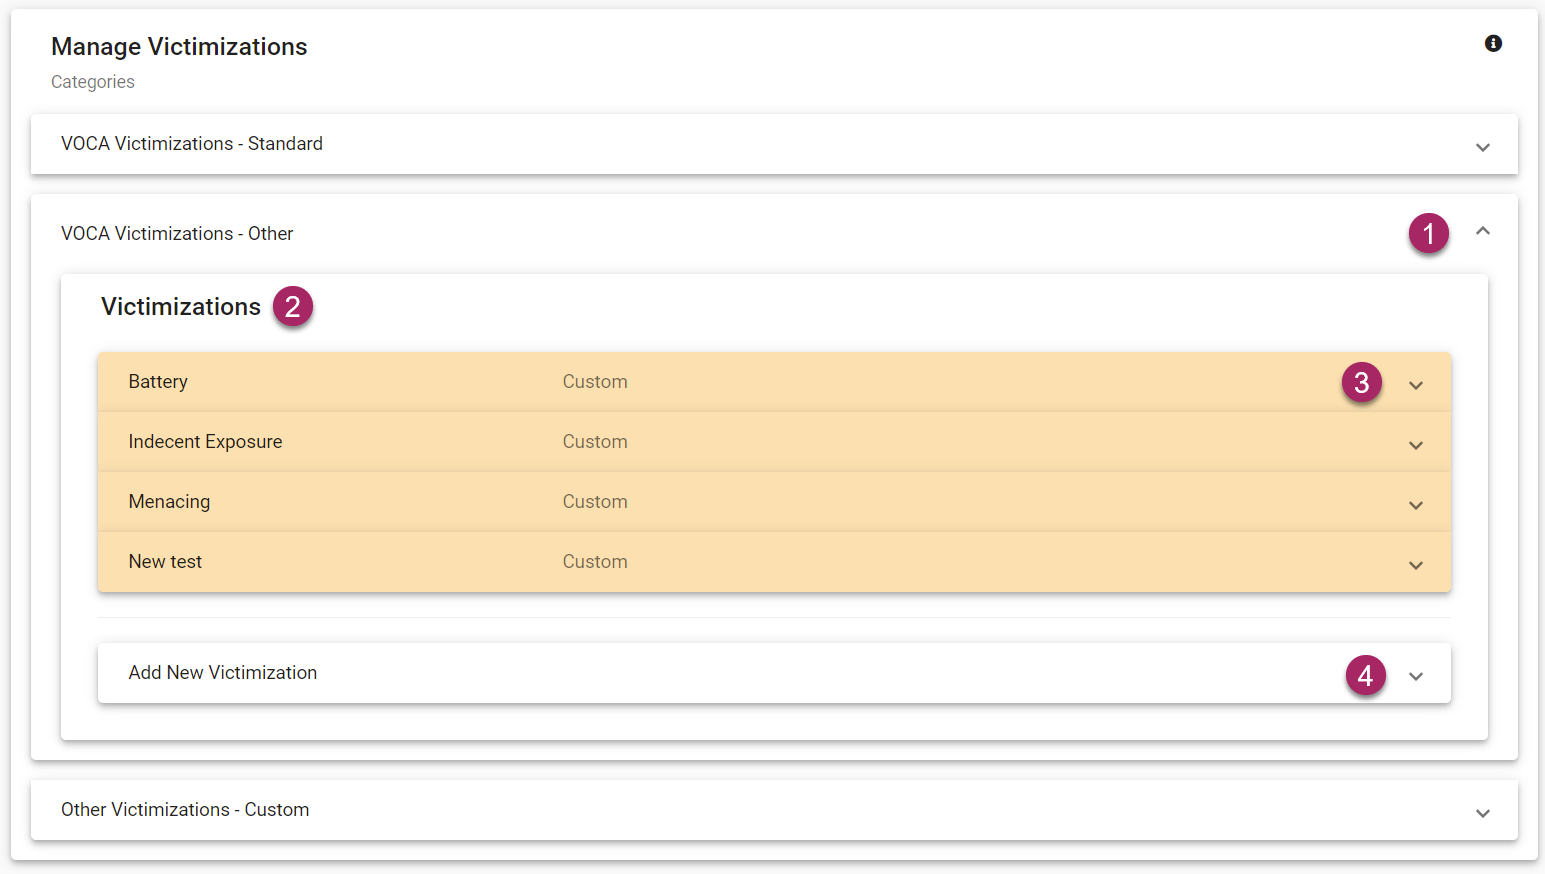
- Expand the VOCA Victimizations - Other tab by clicking the arrow icon on the right side of the tab (see above, Manage Victimizations - Step 1).
- After expanding the tab you will see a list of victimizations. The items in this list are highlighted yellow, indicating they are custom victimizations and can be edited further than standard victimizations.
- Clicking the down arrow on the right side of any victimization tab will expand the tab and allow you to change the category and description of the victimization.
- Add a new victimization by clicking on the arrow icon on the right side of the "Add New Victimization" tab. (For more info see above: VOCA Victimizations - Standard steps 4-6)
Other Victimizations - Custom
Navigation and functions within the Other Victimizations - Custom tab are identical to the steps detailed above for VOCA Victimizations - Other.
Edit VOCA Victimizations - Standard

- Each victimization tab can be expanded by clicking the arrow icon on the right side of the tab.
- Once expanded, you will have the option to edit the description of the victimization. Click the text area below Victimization Description and you can add text.
- The icon of two arrows facing in opposite directions allows you to deactivate the victimization and hide it from users in the software. Conversely, if the victimization has already been deactivated, this button can be used to activate the victimization.
Edit VOCA Victimizations - Other / Other Victimizations - Custom

- Each victimization tab can be expanded by clicking the arrow icon on the right side of the tab.
- Once expanded, you will have the option to change the category of the victimization. To do so, click the down arrow on the right side of the "Change Category" field and a dropdown will appear showing you the available categories. Note: Any added victimizations will categorize as VOCA Victimizations - Other by default.
- Click the text area below Victimization Description and you can add text to the description.
- The icon of two arrows facing in opposite directions allows you to deactivate the victimization and hide it from users in the software. Conversely, if the victimization has already been deactivated, this button can be used to activate the victimization.