How do I add/edit Account Grants?
Account Grants can be added and edited from the "Add/Edit Grants" tab in the admin settings. Add grants for grant reporting.
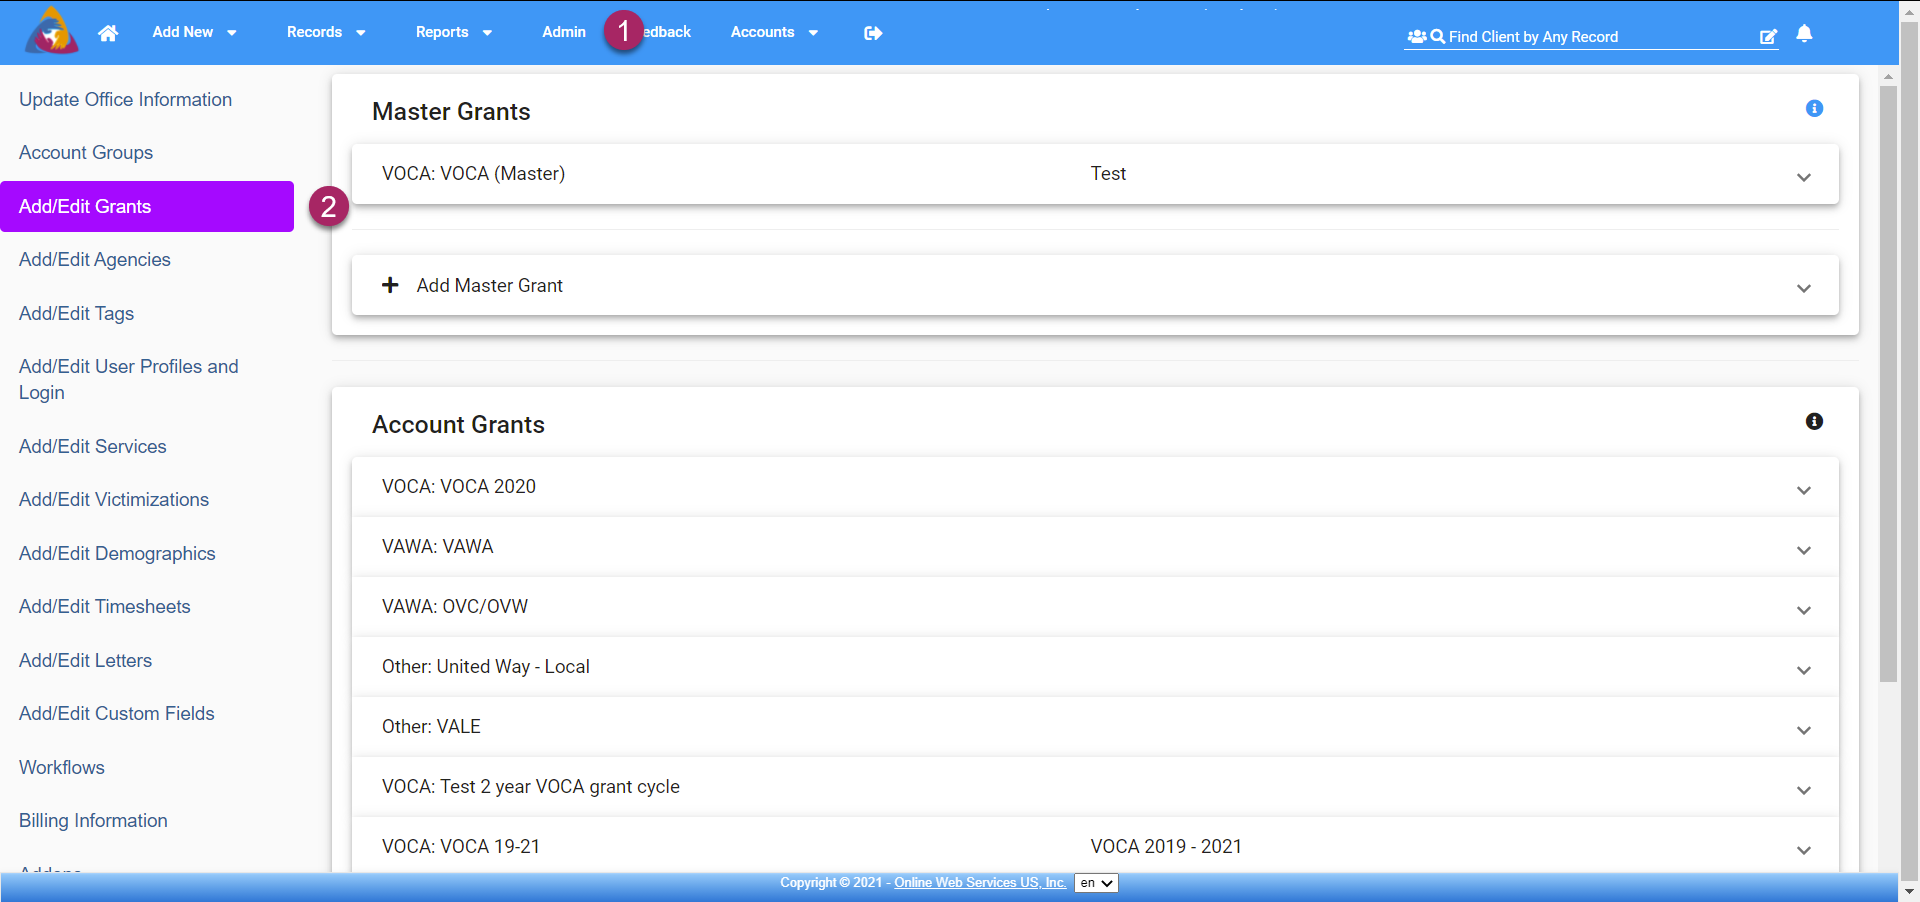
- To access account grants, navigate to the admin settings by clicking "Admin" on the top blue bar.
- Next, click the "Add/Edit Grants" tab and you will find the Account Grants block below the Master Grants block. You will see a list of your existing grants and below that, and Add Account Grant tab.
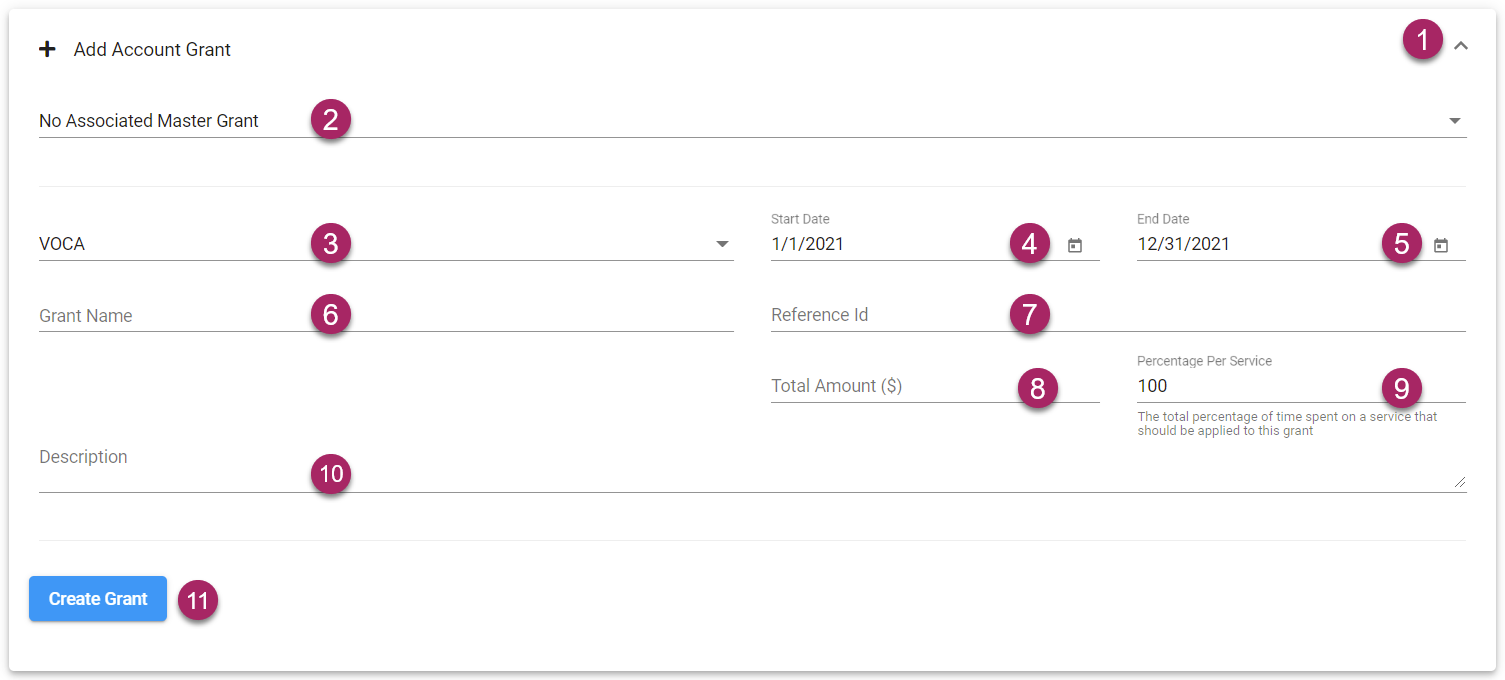
- To add a grant, first expand the Add Account Grant tab by clicking the arrow icon on the right side of its tab.
- If there is a previously created master grant you wish to associate your new account grant with, select it from the dropdown labeled "No Associated Master Grant".
- Next, select the grant type by choosing and option from the dropdown field below "Grant Type".
- Select a start date for your grant's grant cycle by clicking the calendar icon in the field below "Start Date".
- Set your grant's end date in the field below "End Date".
- Click in the field labeled "Grant Name" to add a name for your grant.
- A unique reference id can help identify a grant for adding to cases and clients. Click in the field labeled "reference id" to add an id.
- The total amount of grant funding can be entered in the field labeled "Total Amount ($)".
- Define the percentage of time that should be applied to the grant when offering a service.
- Lastly, the field labeled "Description" can be used to add additional details to your grant.
- To complete and save your new grant, Click the blue "Create Grant" button.
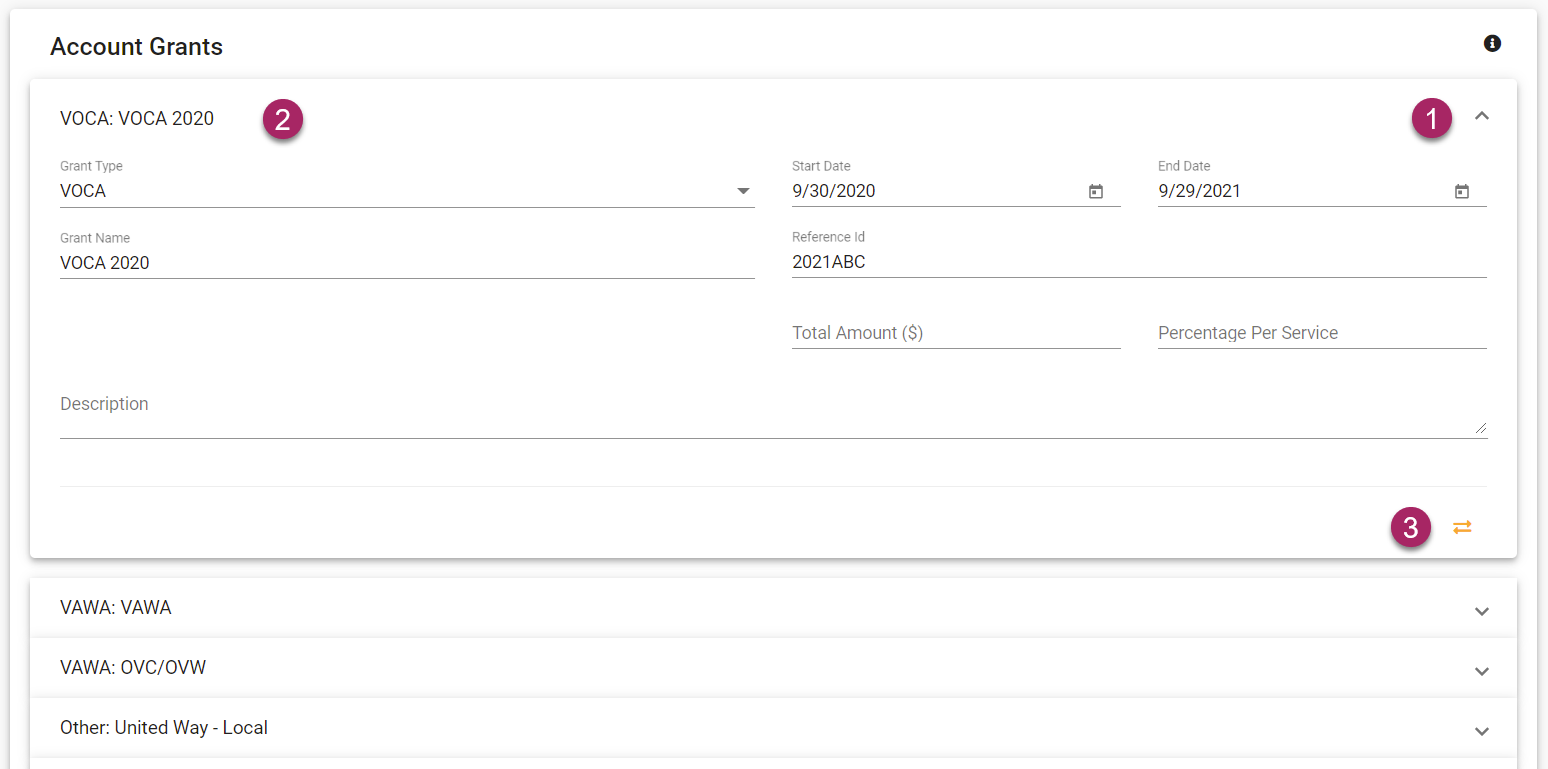
- To edit an existing grant, start by expanding the tab of the grant you wish to edit by clicking the arrow icon on the right side of the tab.
- Once expanded, follow the same process as adding a grant to make edits. Changes will be saved automatically.
- If a grant is no longer needed or current, it can be deactivated by clicking the yellow icon that looks like 2 arrows facing in opposing directions.
