How do I add and edit Timesheets?
Timesheets are separated into two categories: Service and General. Both can be edited on the Add/Edit Timesheets tab in the admin settings.
This section will cover:
Service Timesheets
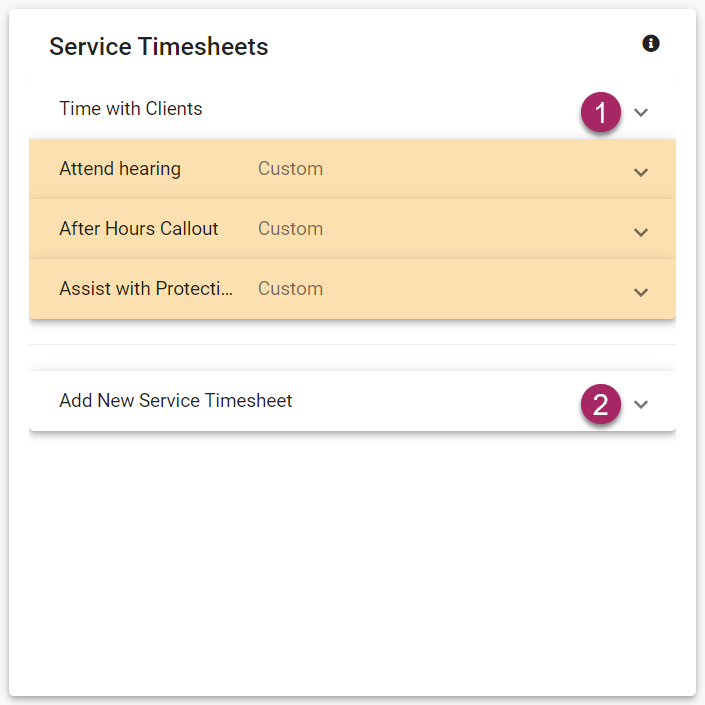
- To edit an existing timesheet, click the arrow icon on the right side of the desired timesheet tab.
- To add a new timesheet, click the arrow icon on the right side of the Add New Service Timesheet tab.
Edit Service Timesheet
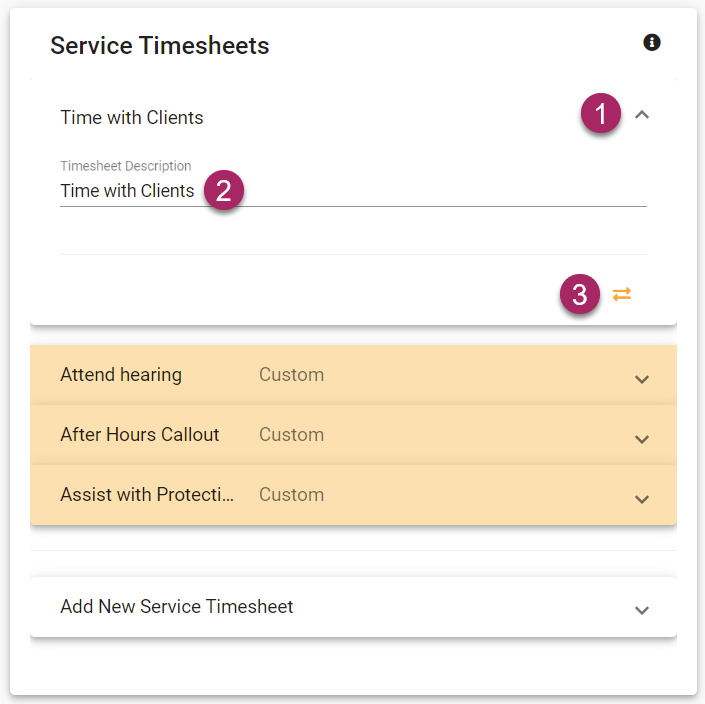
- Once the desired timesheet tab has been expanded you will see the view shown above.
- Click the field below "Timesheet Description" and make changes, or clear the field to change the description.
- If you no longer need a timesheet, you can deactivate it by clicking the icon that looks like two arrows facing in opposing directions.
Add Service Timesheet
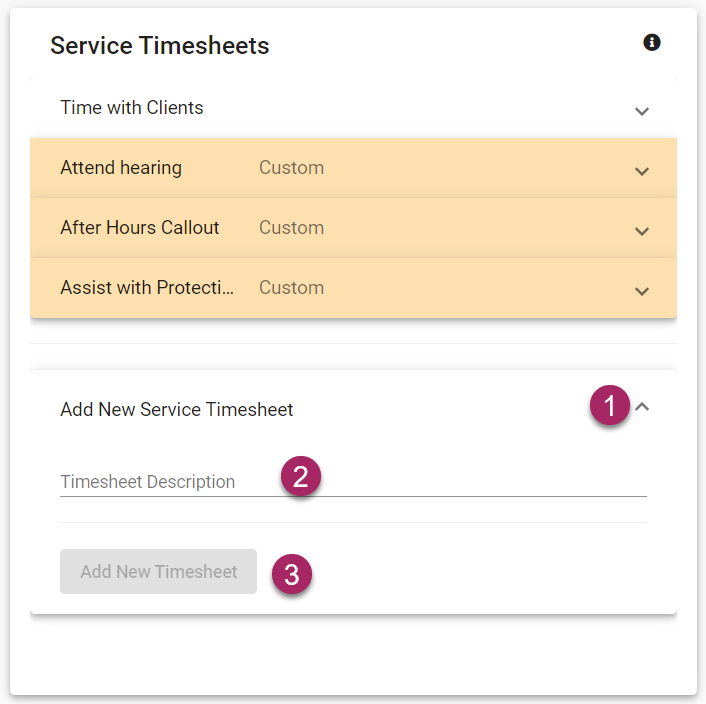
- Once the Add New Service Timesheet tab has been expanded you will see the view shown above.
- Click on the field labeled "Timesheet Description" and enter the description for your new timesheet.
- Once you have entered a description, the "Add New Timesheet" button will turn blue, allowing you to click and save your new timesheet.
Edit General Timesheets
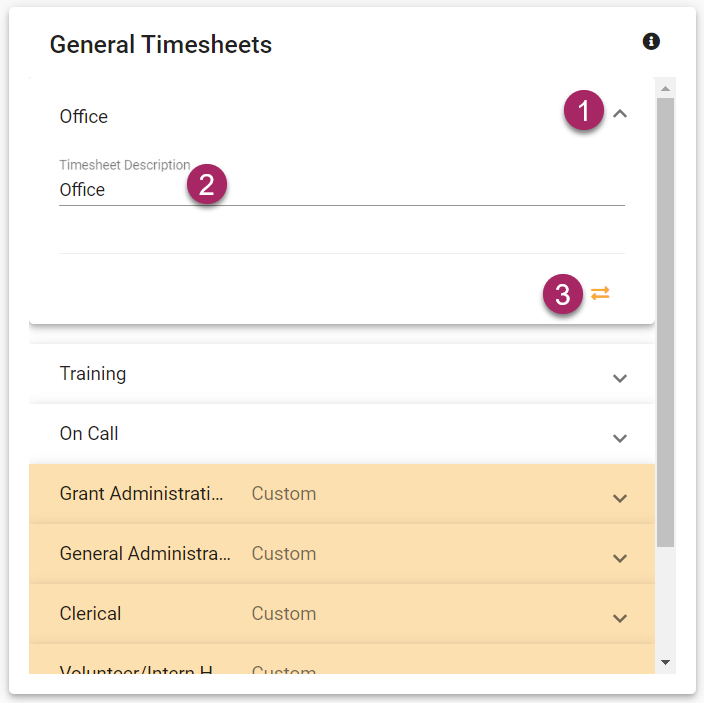
- Once the desired timesheet tab has been expanded you will see the view shown above.
- Click the field below "Timesheet Description" and make changes, or clear the field to change the description.
- If you no longer need a timesheet, you can deactivate it by clicking the icon that looks like two arrows facing in opposing directions.
Add General Timesheet
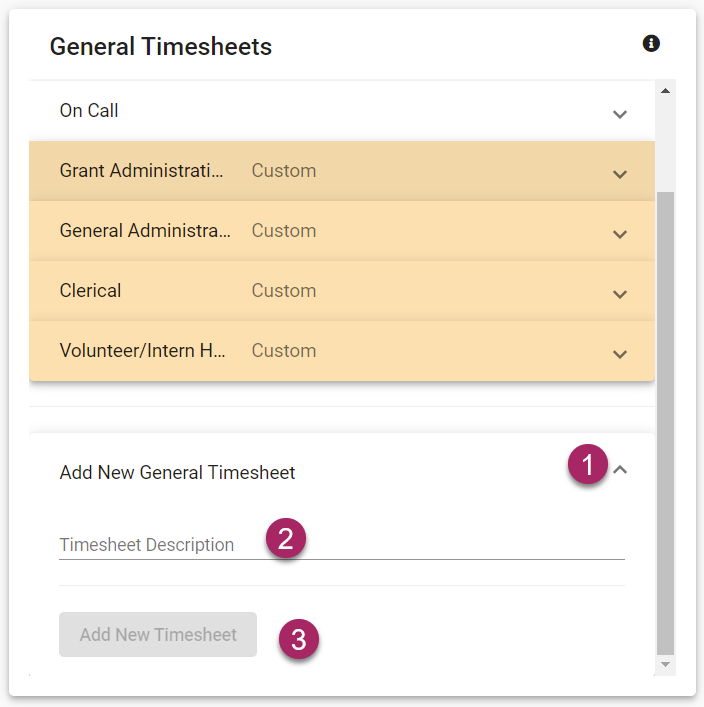
- Once the Add New General Timesheet tab has been expanded you will see the view shown above.
- Click on the field labeled "Timesheet Description" and enter the description for your new timesheet.
- Once you have entered a description, the "Add New Timesheet" button will turn blue, allowing you to click and save your new timesheet.
